How to use OpenAI to write creative email ideas in Airtable
by
Ryan ODonnell
Last updated:
January 26, 2023
Do you have a hard time creating engaging email marketing campaigns? After all, writing creative content can be challenging, especially when you’re working at lightning speed. On the other hand, connecting OpenAi to Airtable is a great growth hack for brainstorming new ideas quickly.
In the ecommerce world, it’s critical to stay one step ahead of your competition — which is where OpenAI and Airtable come in. With this powerful combination, you can craft eye-catching email marketing campaigns that will capture the attention of your current and prospective customers.
Now let’s take a closer look at how to utilize OpenAI for successful email marketing using Airtable.
Note: OpenAI is slowly deprecating aspects of it’s API in favor of ChatGPT. We recommend using ChatGPT step in your workflows instead just to be safe.
Try MESA free for 7-days and enjoy support from automation experts!
Topics:
Watch our walkthrough video
Watch this tutorial on how to connect OpenAI to Airtable for writing email ideas.
Step-by-Step tutorial instructions
Time needed: 10 minutes
To get started, be sure to add MESA to your Shopify store before starting.
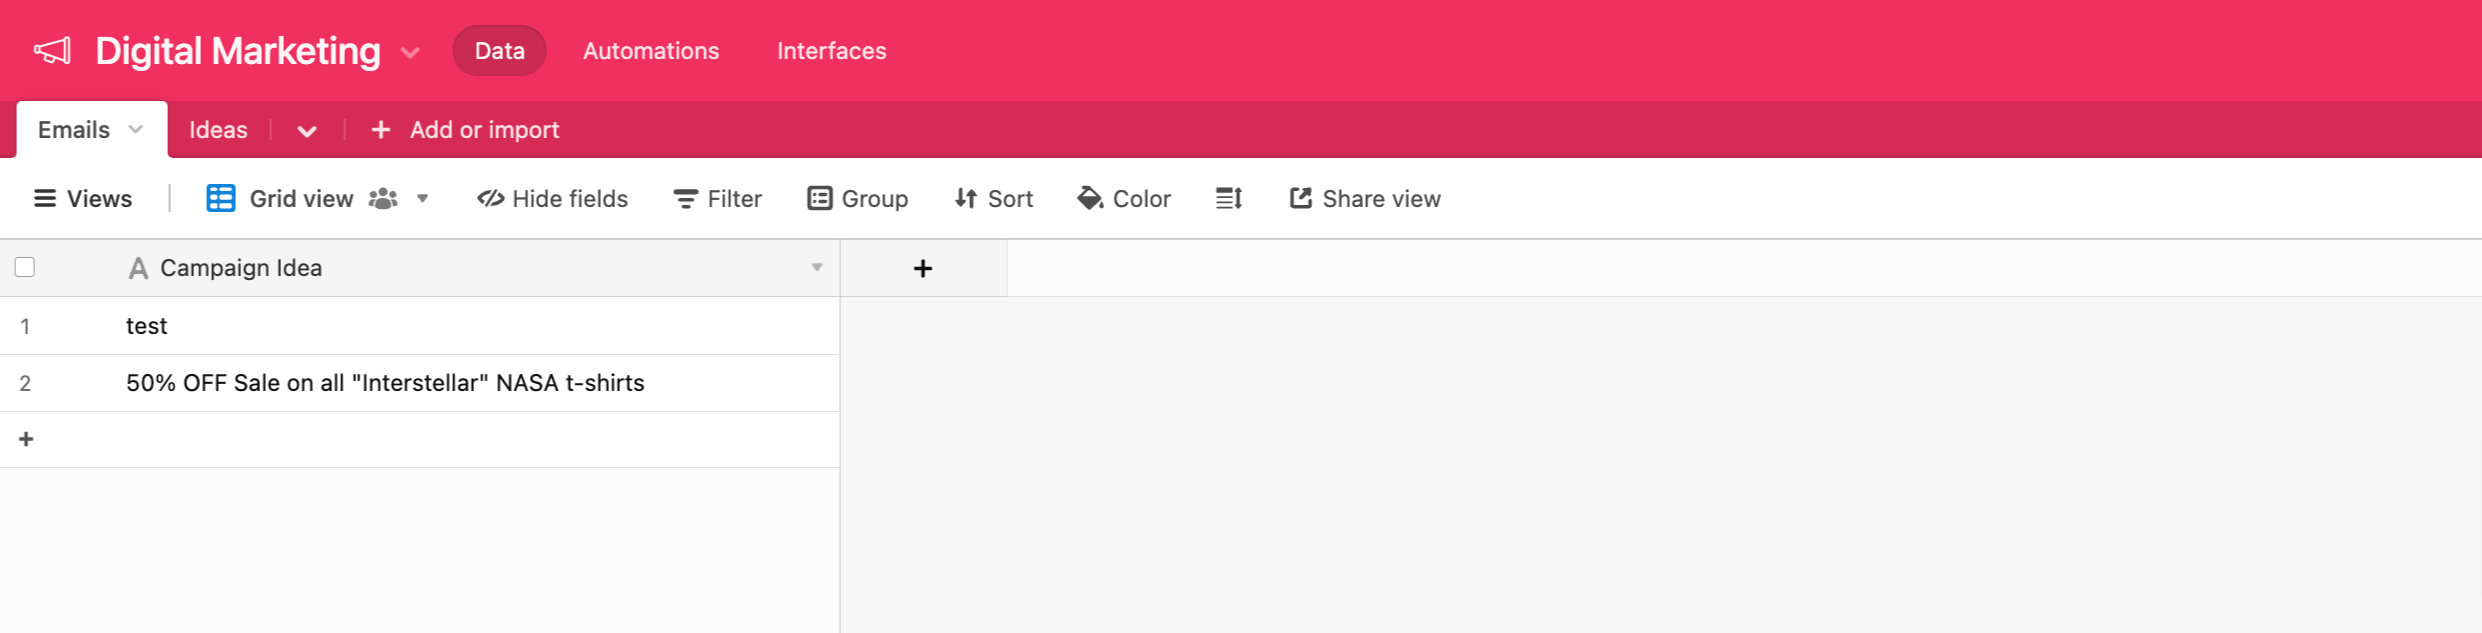
In this example, I have an Airtable base called “Digital Marketing” and within it, are two tables. One for “email campaigns” and the other for “message ideas”.
We’ll use the help of OpenAI to use our campaign names from one table and generate 3 creative email messages in our “ideas” table.
Let’s get started.
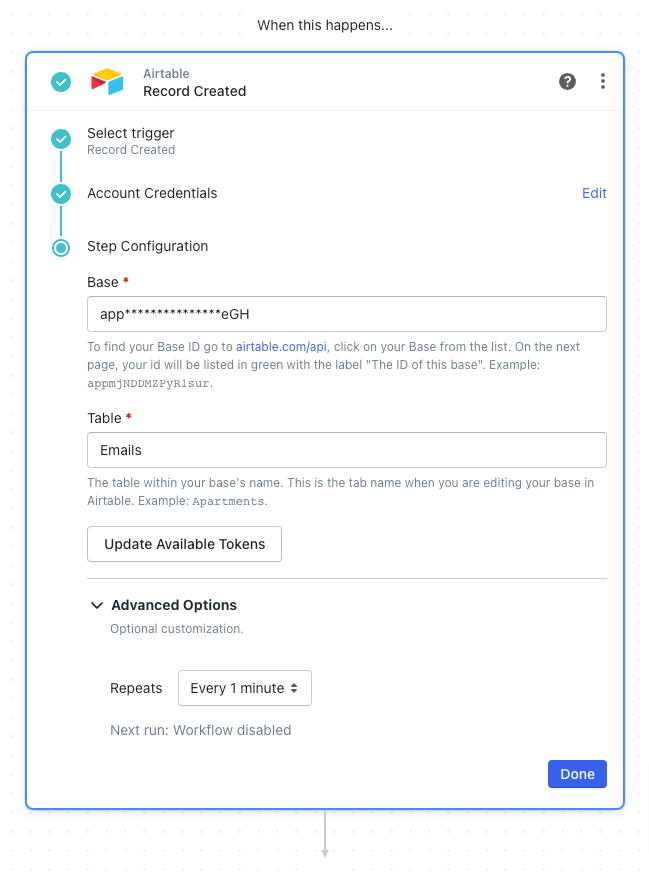
Start a new workflow using the Airtable Record Created action.
First, choose the Airtable app.
Then, search and select the “Record Created” action from the list.
Next, follow the simple instructions to add your Airtable credentials.
Under the Base field, click the Airtable API link. This will take you Airtable’s API reference doc specific to your account.
Click on your Base. Then, copy the ID for that base.
Then, paste this value back in MESA for the Base field.
Enter the name of your table where the campaign name is being entered.
Lastly, change the interval to “Every 1 minute” so we can run this workflow more immediately.
Add the AI step to generate your creative messaging ideas
Now, let’s add the AI step to generate creative ideas.
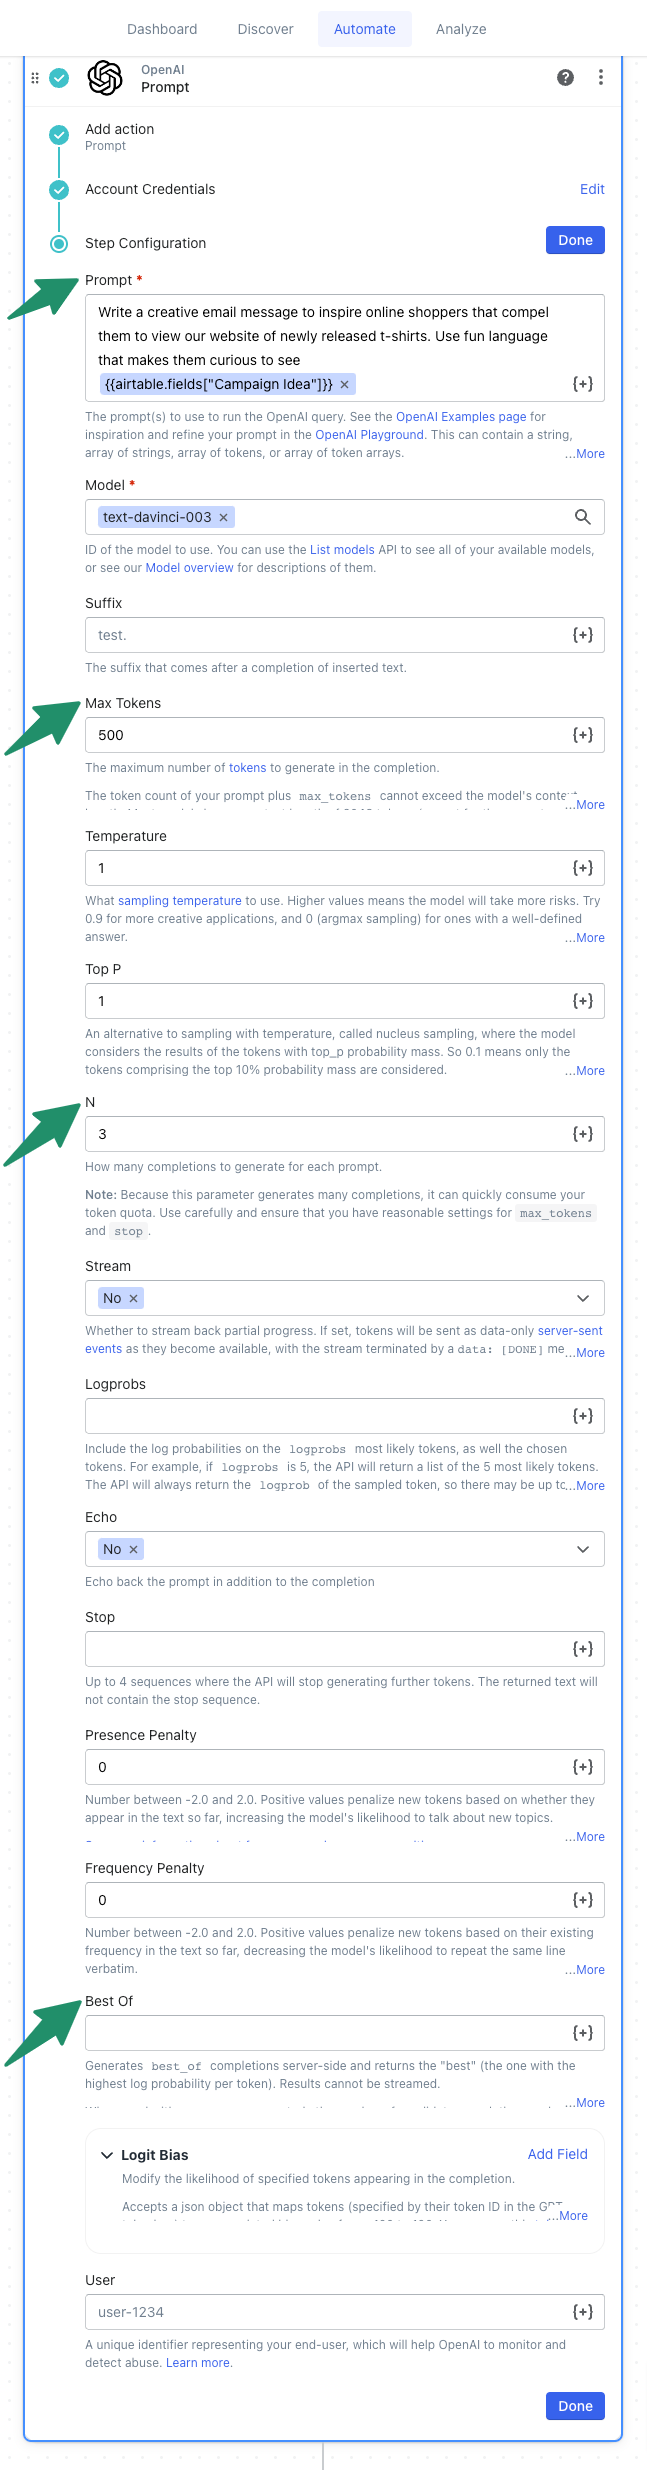
First, choose the OpenAI app.
Then, select the “Prompt” action from the list.
Follow the simple instructions to add your OpenAI credentials.
Now, on the ‘Prompt” field is where we write clear instructions so the AI knows what and how to write the messaging.
Next, open the Variable Selector, and choose the “Campaign Idea” variable to our prompt so the AI knows what we’re referring to.
Then, scroll down to “Max Tokens” and change this value to 500. This is the maximum amount of characters for your message.
Next, scroll down to the “N” field and change this value to 3. Changing this will make the AI deliver 3 unique ideas for our campaign.
Lastly, scroll down to the “Best of” field and remove the default value here. This will make sure the AI gives us 3 unique response as we just defined above.
Add Airtable records for each AI response
Now, let’s add an Airtable record in our other table for each unique response.
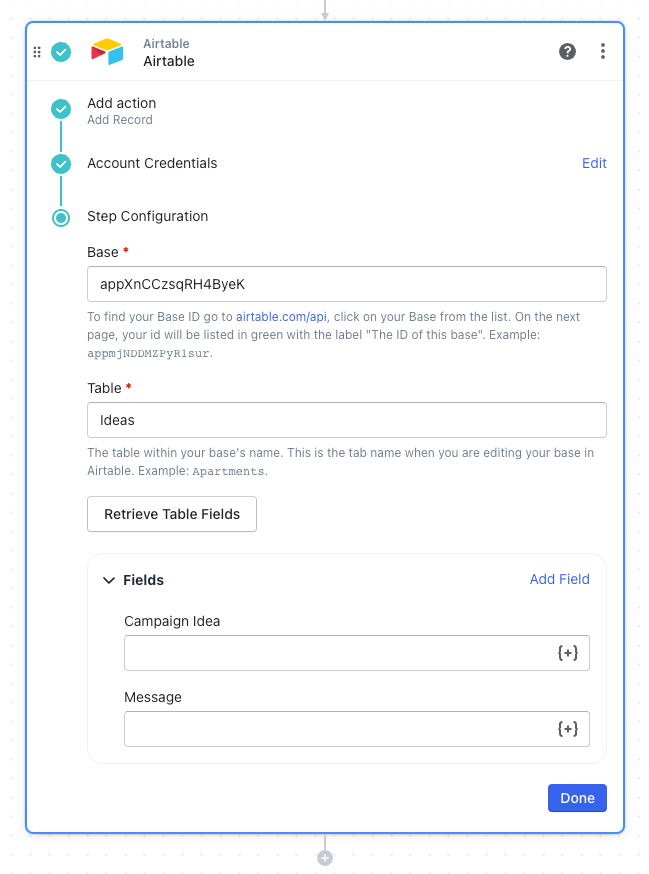
Again, choose the Airtable app.
Then, select the “Add record” action from the list.
We’ll use the same Base ID that we pasted in the first step. But, the table value will be the name of the one you want to store the AI responses.
Then, click the “Retrieve Table Fields” button. This will populate the fields based on that table.
Loop through all AI responses to create Airtable records
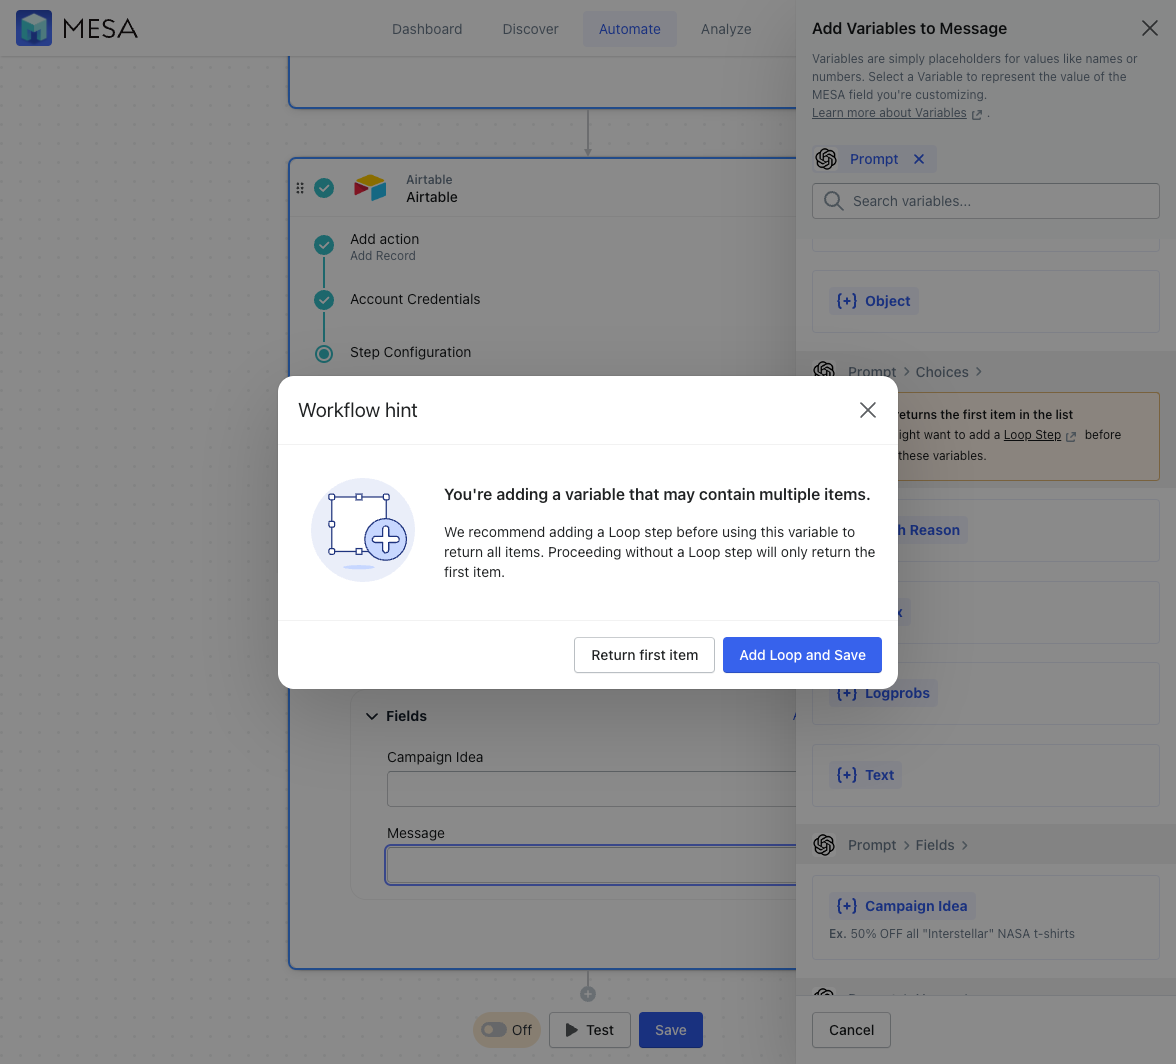
Now, open the Variable Selector and choose from All Variables, Prompt. Then, under Choices, choose the “Text” variable.
Because we want a record for each idea, choose to Add the Loop step.
As a result, this step automatically adds a workflow step to loop through all the responses and then create an Airtable record for each.
Add the Campaign Name value with your new AI ideas
Because of how our Airtable table is set up, let’s add the “Campaign Idea” value from the first step into our other table so we know which idea it’s matched to.
Now, in my Email table, let’s add a unique campaign description.
New records in this Airtable table will trigger our MESA automation
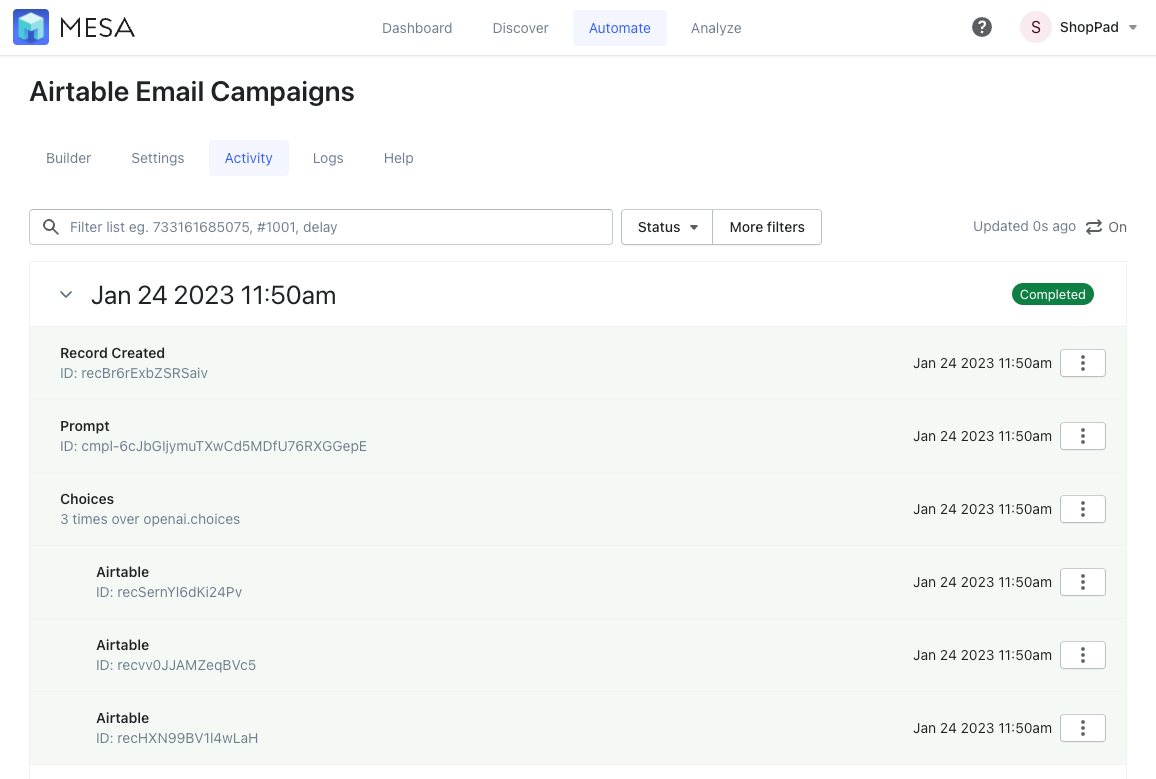
Then, head over to MESA and click the “Activity” tab for this workflow.
Based on the running interval for this workflow, we’ll eventually see this workflow start and can follow along.
When it shows “Completed”, we know it ran successfully.
MESA workflow activity
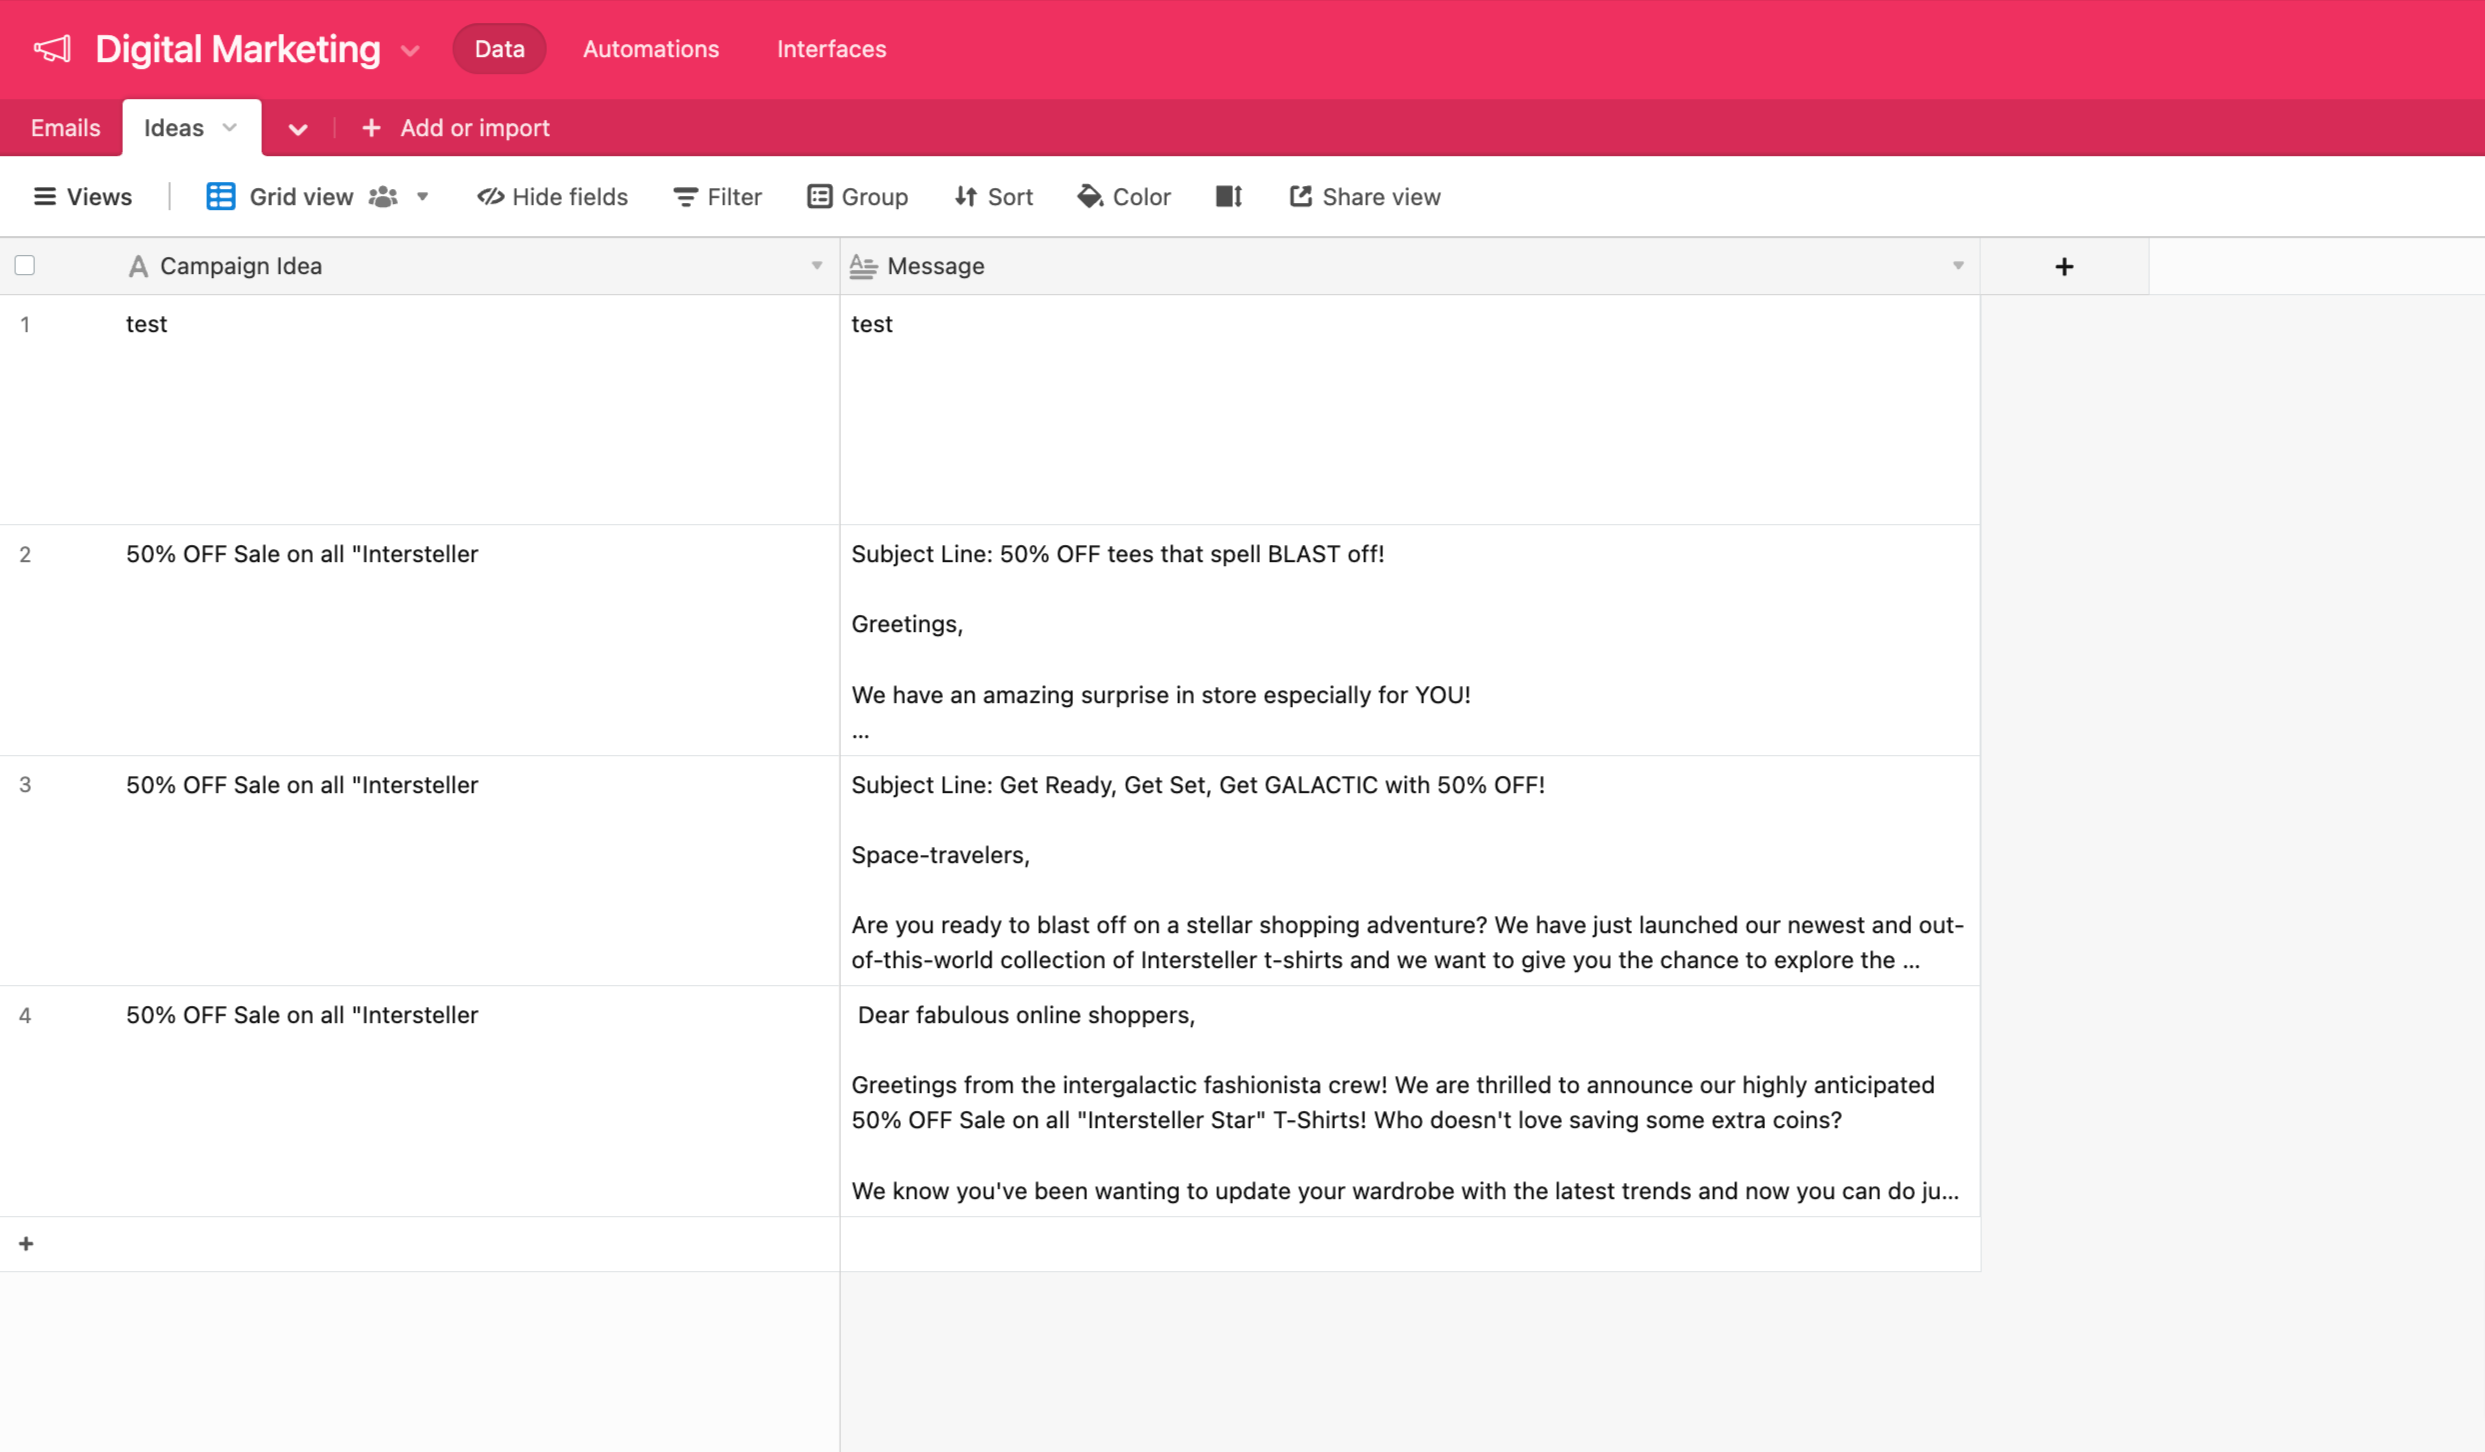
Let’s jump back to Airtable.
Next, click on our other table and there are the three new creative message ideas!
After the MESA automation runs, the email ideas from OpenAI are added to the Airtable table.
Pretty cool, right?
Extend this workflow to your favorite email management app
Do you have OpenAI prompts dialed in and crafting perfect campaign messages every time? If so, kick this workflow up a notch by connecting your favorite email management system!
Even if you wanted to send your message directly, you can with Email by MESA.
Generating and sending more clever email campaigns has never been easier.
Tips & Tricks for helping AI write creatively
Provide a clear and specific prompt: Give the model a clear and specific topic or question to write about in the email. This will help it generate more focused and relevant content.
Use a diverse set of input examples: Provide a variety of examples of the type of email you want the model to generate. This will help it learn to generate more diverse and creative content.
Encourage the model to take risks: Encourage the model to take risks and generate unconventional ideas. This can be done by setting the temperature parameter higher when generating text.
Use customer personas: Create customer personas and provide examples of emails that would be relevant for that persona. This will help the model generate emails that are personalized and more likely to be read.
Use A/B testing: Use A/B testing to compare the performance of different subject lines and messages generated by the AI. This will help you find the most effective subject lines and messages, which you can then use to optimize your email marketing strategy.
Brainstorm Faster
In conclusion, AI-driven messaging from OpenAI offers a unique way to inspire creativity and bring diverse ideas and concepts to business owners. By utilizing OpenAI for your creative messaging, you can rest assured that it will be interesting and innovative and boost efficiency by reducing the time spent on brainstorming.
MESA provides easy access to the power of AI-generated content with its easy integration of OpenAI with your Shopify stores. So if you are looking for a way to help keep your customer’s attention with new and exciting content, adding MESA is the smartest choice.
After all, they say “The future is AI”, so why not use it?
What you should do now
Whenever you’re ready…here are 4 ways MESA can help you get more done:
Sign up for MESA. The best way to get started is sign up for MESA today. Every plan includes the first 7-days free so you can be assured your workflow is running properly.
Browse pre-made templates. Our customizable workflow templates are a great way to get started more quickly.
Talk to our automation experts. If you need help personalizing any workflow template, guidance how to make any automation or, simply want us to make your workflow, we can help.
If you know another merchant who’d enjoy reading this page, share it with them via LinkedIn, YouTube, Twitter, or Facebook.