How to automatically add Shopify tags to products and more
It’s easy to mix up or miss important store information when you’re spending hours organizing data without product tags. As a result, what follows is an increase in time requirement. You need to spend hours, if not days, to get your store data sorted manually.
If you feel your day-to-day operations are too much to manage, it’s time to look into the automation of manual tasks. Shopify tags help you do just that— from organizing your customers, inventory, and orders to transfers and shipment, handling data becomes a lot less cumbersome.
With organized data available to filter in just one click, you can customize shopping experiences for different groups of customers. Additionally, you’ll be able to stay on top of your shipment and inventory, leading to a boost in sales and customer loyalty.
But is that enough?
If you want to scale this process and want auto-tagging to happen in the background so you focus on your strategic goals, Shopify alone doesn’t cut it.
The addition of MESA’s automated workflows provides you with pre-built templates and limitless customization to take your auto-tagging game to the next level.
Are you ready to save time and bring a personalized shopping experience to your customers? Get MESA for free and manage your store better by auto-tagging your data.
Topics:
What are Shopify tags?
Shopify tags are labels that you can add to virtually any data you have on your store. For example product info, customer info, order details, or blog posts.
Adding tags to a logical group or collection of data helps you in your organization, marketing, shipping and fulfillment, and customer experience efforts. To clarify, Shopify allows you to tag six different types of data items:
1. Product: Product information like name, price, color, and features.
2. Transfer: Information related to incoming inventory in your system.
3. Customer: Customer information like email, location, subscriptions, and total spending.
4. Blog post: Posts on your website
5. Order: Order details like order value, shipping region, expected delivery date, and delivery status.
6. Draft order: Orders that aren’t confirmed yet.
However, if you’re a Shopify Plus user, you can add unlimited tags to your products. Otherwise, you’re limited to 250 tags for each of your products, customers, orders, and more.
When to use Shopify tags?
Shopify tags are helpful when you need to organize your store data to make sense of it. By organizing your products, orders, and customers logically, you have a clearer picture of your website operations.
For instance, if each of your orders is tagged with information like its shipping destination, delivery time, and associated warehouse location, you can avoid unnecessary delays, cancelations, returns, and other errors.
As your operations and logistics team has a near-instant and consistently accurate view of every order’s essential attributes, fulfillment becomes more efficient, and errors are significantly reduced.
Similarly, if you tag your products with keywords that you know your customers are searching for, you’re guaranteed to improve their search experience and, by extension, your SEO.
You can drastically improve your marketing communication and customer loyalty by tagging your customers with specific tags to segment them into functional categories.
Additionally, tags improve your internal operational efficiency.
Your store can instantly improve its turnaround time and overall customer satisfaction by communicating the exact status of in-transit orders to your team or alerting them when a customer leaves a negative review or requests a return.
Lastly, by grouping particular products or customers, you can perform useful actions on them as a unit, thus scaling your efforts exponentially. For example, you can create Collections by auto-tagging your products.
The Limitations of Tags
While Shopify lets you tag almost every aspect of your operations, from inventory to shipment, it still lacks a crucial element of tagging.
To clarify, you can only add or remove tags manually via your Shopify admin panel.
If you want to bulk edit your tags and automate the responses, there’s no native way in Shopify to do that. But apps like MESA help you do that.
Benefits of auto-tagging
Before you start tagging every entity on your site, you should understand how it benefits your store’s efficiency and your fulfillment and marketing performance. Otherwise, your tagging strategy will be haphazard and not yield the best returns.
1. Keep Your Data Organized
When running a Shopify store or any online store, you’ll inevitably start generating a large amount of data. Your store likely generates more data than you can manually manage, from your inventory list, product descriptions, and product images to orders, customer information, and shipping details.
This is where auto-tagging can help you put a method to the madness by helping you avoid unnecessary grunt work and keeping things error-free.
MESA Template ID
tag-a-customer-when-they-purchase-a-specific-product
2. Stay on Top of Orders and Fulfillment
Your orders are your lifeblood and what keeps your store in business.
Add a tag for the zip code or the fulfillment zone to an order that’s confirmed. Then you can quickly view orders with the same delivery location by searching for the respective tag.
Manually adding tags to orders, products, or customers doesn’t sound productive. We have a solution for that, which we’ll discuss in the following sections.
3. Improve Product Search and SEO with Tags
Customers like a simple and enriching shopping experience online. They don’t want to take pains to find what they’re looking for. Improve their store experience by using product tags.
For example, using keywords around price like ‘under $100’ or around product color like ‘black’ as tags will bring more customers to relevant product pages.
Or, you can tag new products with a ‘New’ tag, your best-selling products with a ‘bestselller’ tag, and your discounted products with an ‘On Sale’ tag. Note: Make sure your Shopify theme doesn’t make those tags visible on product pages that you don’t want seen.
MESA Template ID
tag-an-order-when-a-specific-discount-code-is-applied
Have a tagging strategy before getting started
Before you dive headfirst into the world of Shopify tags, take a step back and review the scenarios where you’ll need them. By assessing all potential use cases, you’ll create better tags that won’t require editing in the future.
For example, you might run the same promotion over and over during a year to boost sales and move inventory. If you create a common tag for a particular promotion, you can reuse it every time.
Thinking about your tags with a broad scope in mind can help you save a lot of rework and simplify adding Shopify order, product, and customer tags.
Shopify Order Tags
Order tags can group orders with similar expected delivery dates, delivery status, fulfillment regions, and more. This can help your shipping and logistics team stay up-to-date with all fulfillment requirements.
MESA Template ID
copy-product-tags-to-shopify-order
Shopify Product Tags
Use product tags for product features, color, season, price range, and anything else your customers use as search terms. Including these tags organically on the product details pages will boost your SEO and help your customers have a much more rewarding experience. Customers can also use your tags to shortlist products when using the filter menu on your store.
Shopify Customer Tags
WIth Shopify customer tags, you can tag your customers to create segments for running marketing campaigns or creating personalized communication. Schedule emails and SMS to be sent to customers tagged with a specific action.
How to auto-tag Shopify orders using MESA
Time needed: 10 minutes
Follow these step-by-step instructions to auto-tag Shopify orders in this example workflow. Be sure to install MESA on your Shopify store before proceeding.
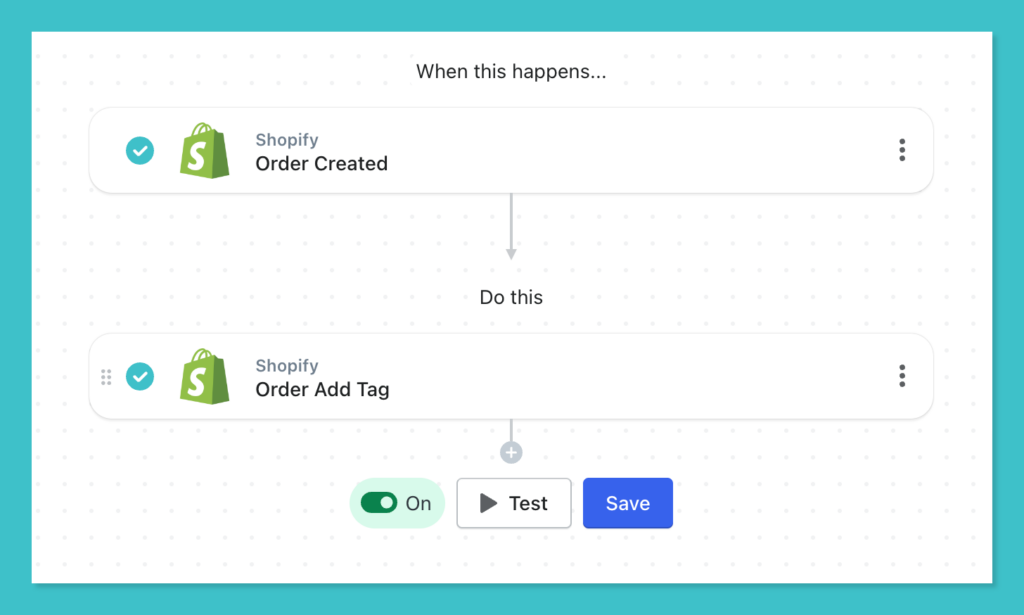
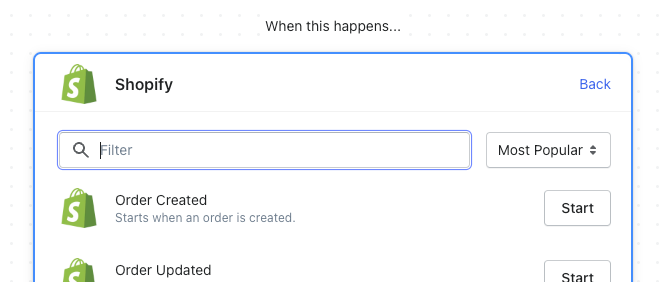
- First, select the Shopify Order Created trigger event.
Create your workflow by selecting the Shopify app. Then, choose the Order Created trigger by clicking the “Start” button.
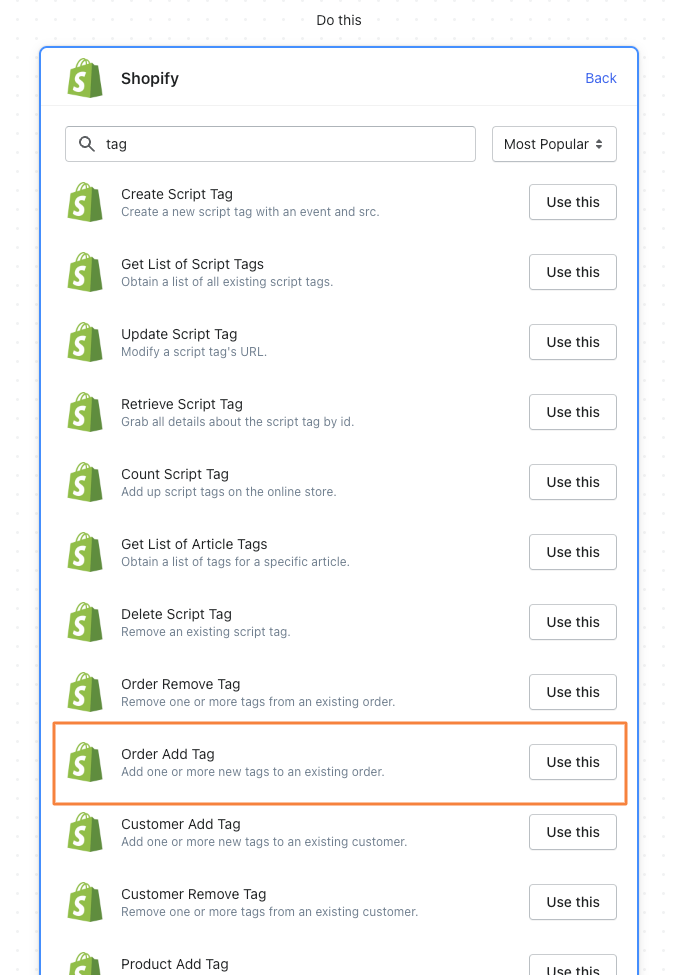
- Next, choose the Order Add Tag action
The Shopify app connector contains many actions. Use the search box to narrow down the list by searching for “tag”. Below are all actions for adding, updating, and removing tags. The action you’re looking for is “Order Add Tag”.
- Configure the tag being automatically added
In the Order Add Tag step, map the Order ID with the token variable from the prior step. Click the { + } icon for that field. Then, assign the Order Created ID variable to this field.
Next, in the Tag field, enter the tag you’d like to have automatically added every time an order is created.
In this example, we’re using “MESA” as the tag to be added.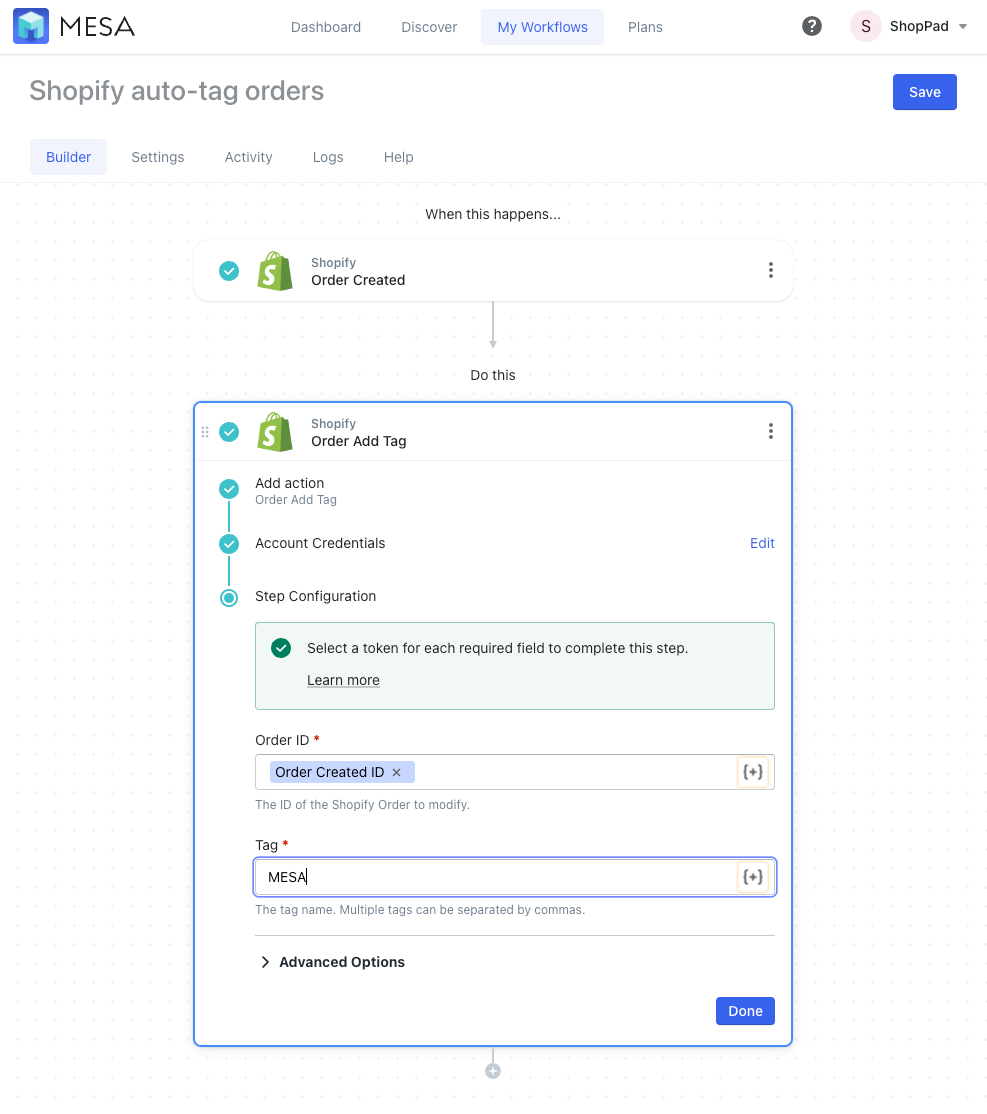
- Save and Enable the automation
Click the “Save” button to keep the existing or any optional configuration changes to this workflow.
Lastly, be sure to enable this automation by turning it “On” so this automation runs every time a new order is created. MESA will proudly celebrate your achievement by popping confetti in your honor. Congratulations!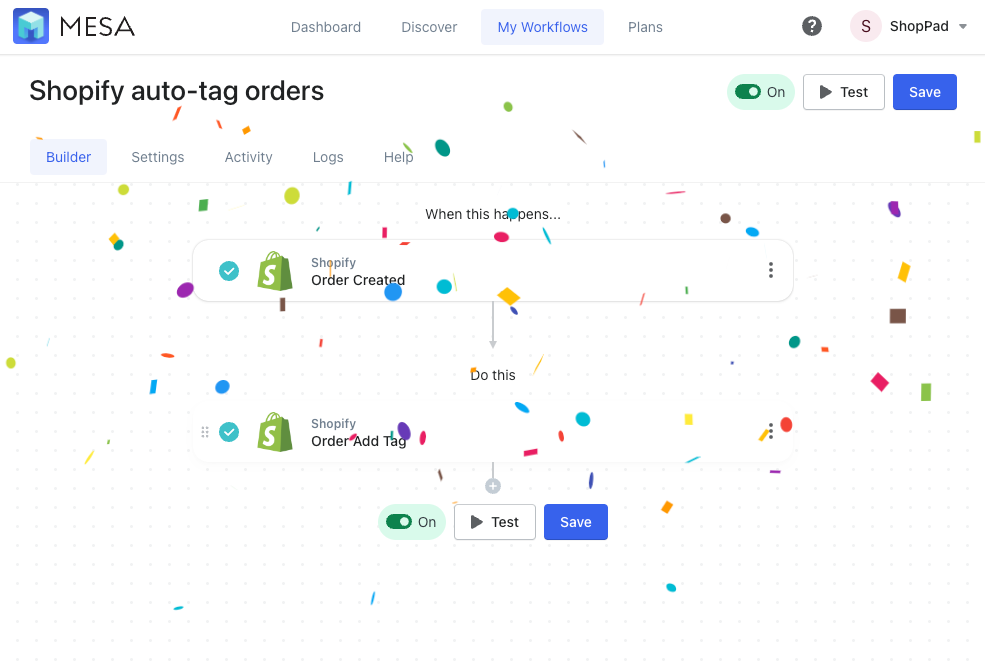
In summary, merchants have a lot of reasons to auto-tag orders, products, customers, and more. You can easily make this workflow more sophisticated by using our built-in apps.
How to auto-tag Shopify customers
Managing customer tags can do done very similarly to the Product Tag tutorial above. Within any workflow, use the action step Customer Add Tag or Customer Remove tag to manage your data. When auto tagging customers using workflows, you can pass data variables from previous steps or apps to be used as tags too.
For customer updated workflows, it’s common to add or remove tags so your customer data is always accurate. Currently, only MESA supports this trigger event so, be sure to give it a try if you’re after simpler automations.
How to auto-tag Shopify products
Managing products tags is easy using the Product Add Tag and Product Remove tag action steps in any workflow. Product tags are a popular way to organize collections and filter options. So, be sure you fully understand how your Shopify theme works before adding or removing product tags automatically.
Shopify auto tag templates
Shopify tags are useful in many ways, as we saw. But does Shopify allow you to scale them once your store starts growing? Not really. That’s where MESA’s pre-made workflow templates come in.
With MESA, you can one-click your way to adding auto-tagging workflows to get more accomplished.
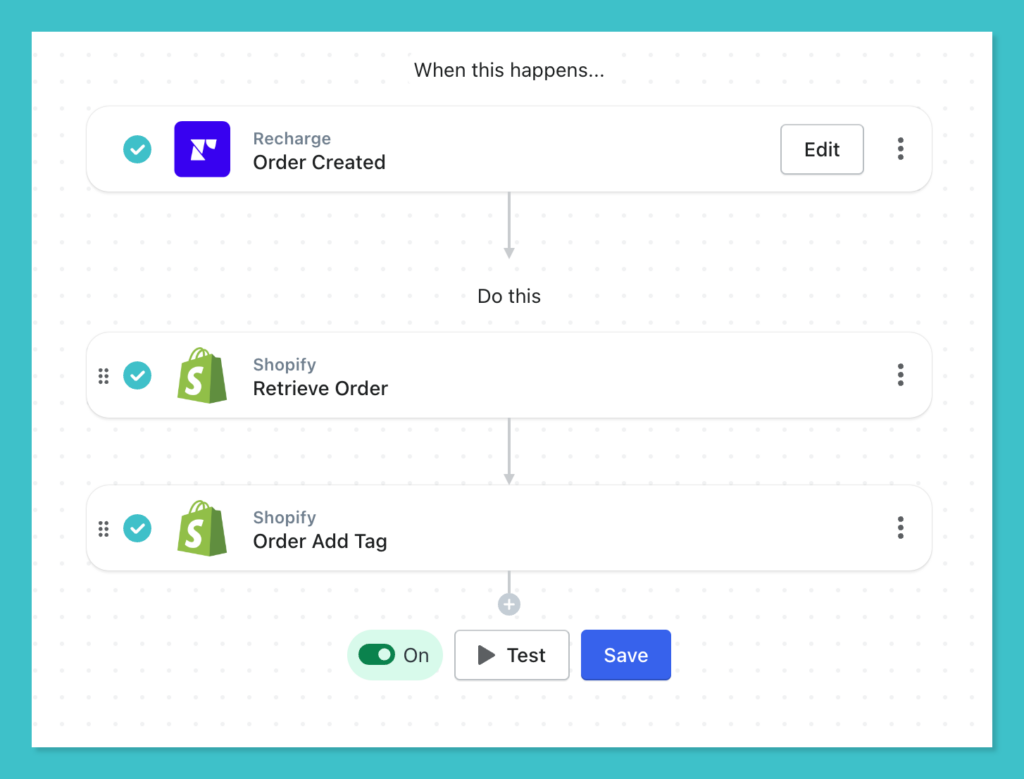
Tag an order when processed with Recharge
Uncover the hidden rhythm of subscription order processing and lighten your load with the ingenious aid of tags. Let this remarkable template take the lead, gracefully labeling orders as ‘subscription’ with a mere touch of Recharge. Prepare to be informed, as up-to-date information effortlessly finds its way to your fingertips.
MESA Template ID
tag-an-order-when-processed-with-recharge
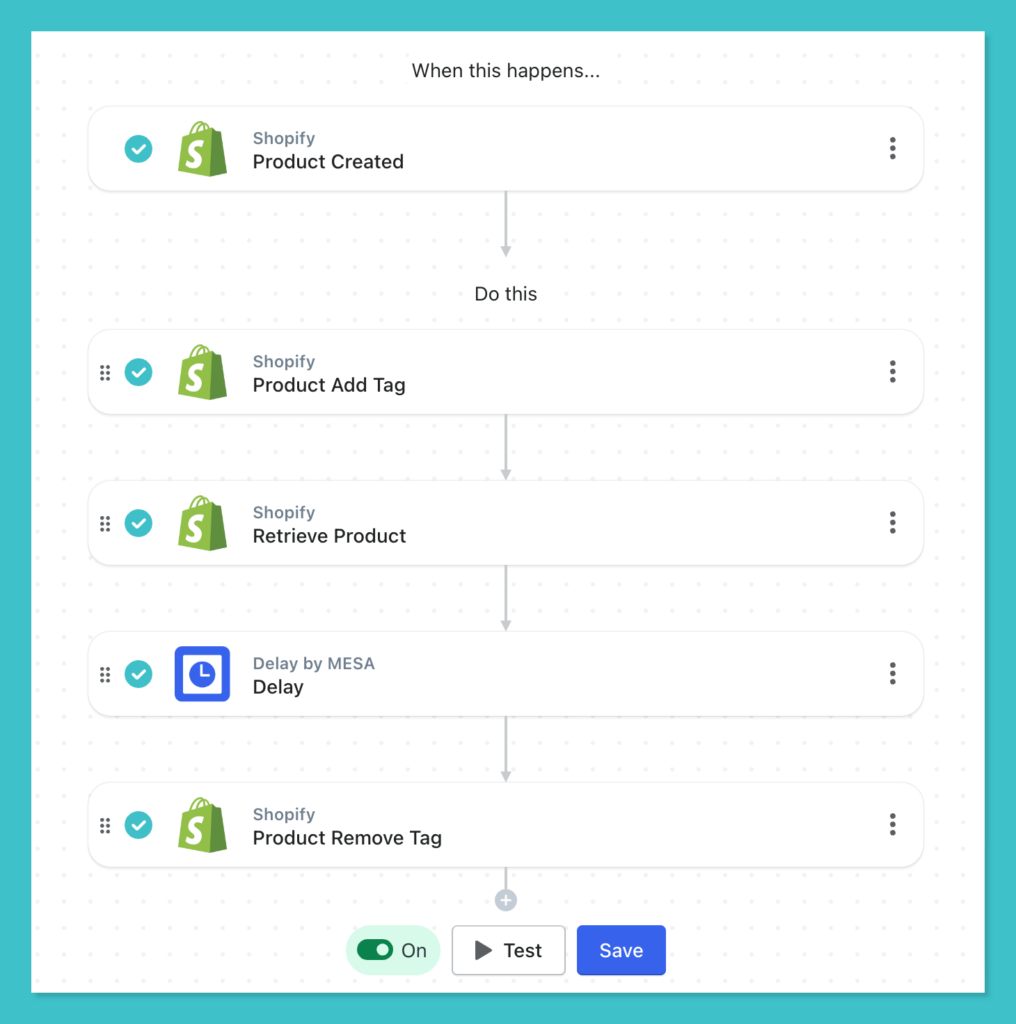
Tag a new product and then remove the tag after 30 days
Stay effortlessly organized and manage your freshest product lineup with the magic of tags. Our handy template lends a helping hand by automatically adding the coveted label “New Arrival” to your latest creations, and like a gentle breeze, removes it after a 30-day period.
Need a different tag or want to tweak the timeline? No worries! You’re in control. Easily customize your tags and timeframes to fit your unique preferences. Streamline your product management and enjoy a stress-free approach to keeping your catalog up-to-date.
MESA Template ID
add-a-tag-to-a-new-product-and-then-remove-the-tag-after-30-days
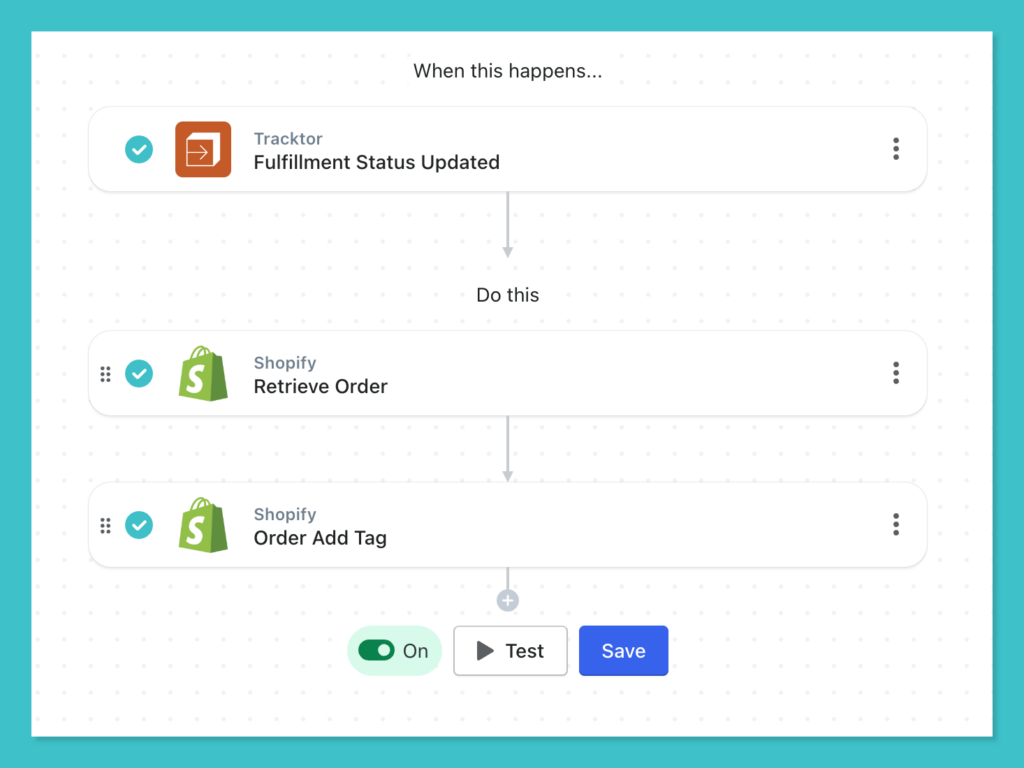
Tag Shopify orders with the fulfillment status
Stay in the know with a real-time glimpse into your fulfillment activity, courtesy of automatic tags. Our exceptional template works its magic by seamlessly tagging your Shopify orders with the latest fulfillment status whenever a change occurs. Armed with these insightful tags, you’ll effortlessly streamline your order processing and gain the upper hand in inventory management.
MESA Template ID
tag-orders-with-the-delivery-status-when-fulfillment-status-changes
Auto-tag Shipping Province to a Shopify Order
Remember the example of adding a delivery location tag to your orders? What if you could automate it? MESA has a pre-built template for doing just that:
MESA Template ID
add-shipping-province-tag-to-order
Auto-tag Shopify VIP customers after spending $500 or more
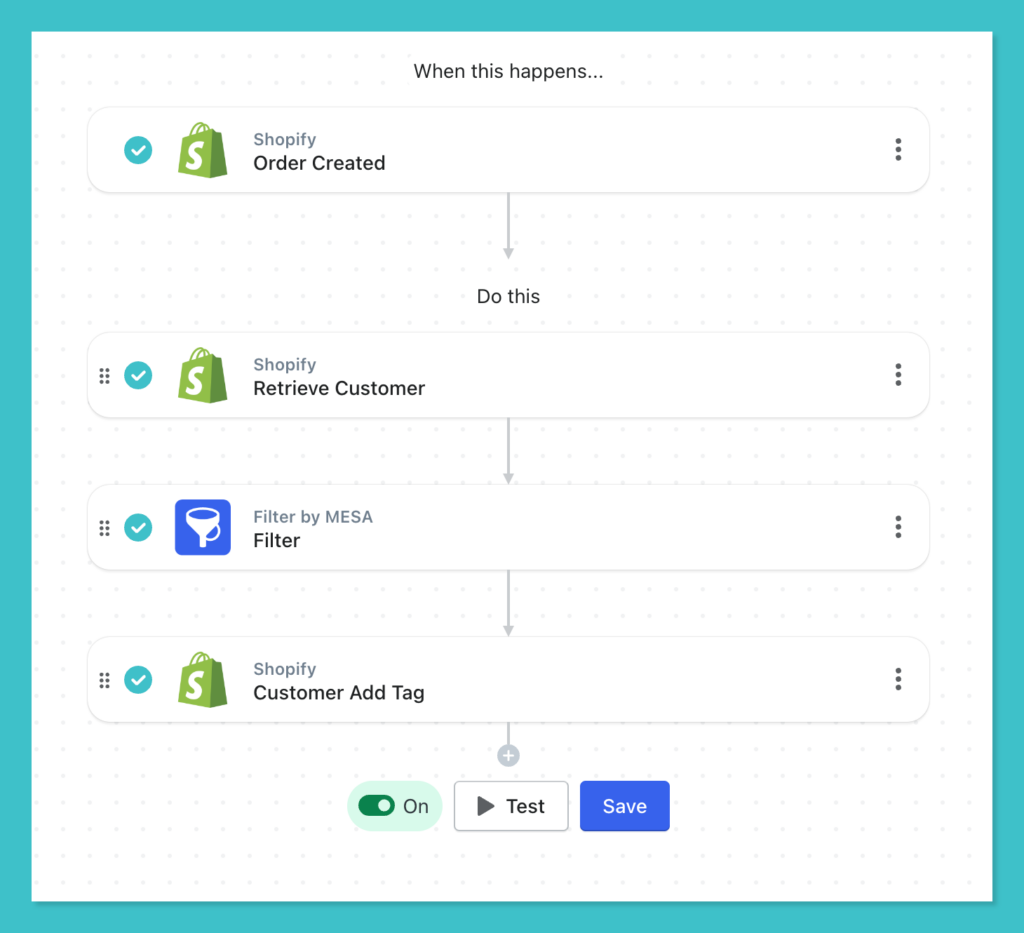
Suppose you want to know who your biggest spending customers are. You can decide on a dollar number and then create Shopify customer tags based on that. For example, customers spending more than $500 can be tagged as VIPs. You can then send targeted discount coupons and incentives.
And, to auto-tag your best customers as VIPs, there’s a template for that too. You simply need to input the dollar number that you find fit, and the workflow tag every time a Shopify customer fulfills the condition.
MESA Template ID
tag-customers-with-vip-after-they-spend-500-or-more
Auto-tag Recharge Subscription Orders
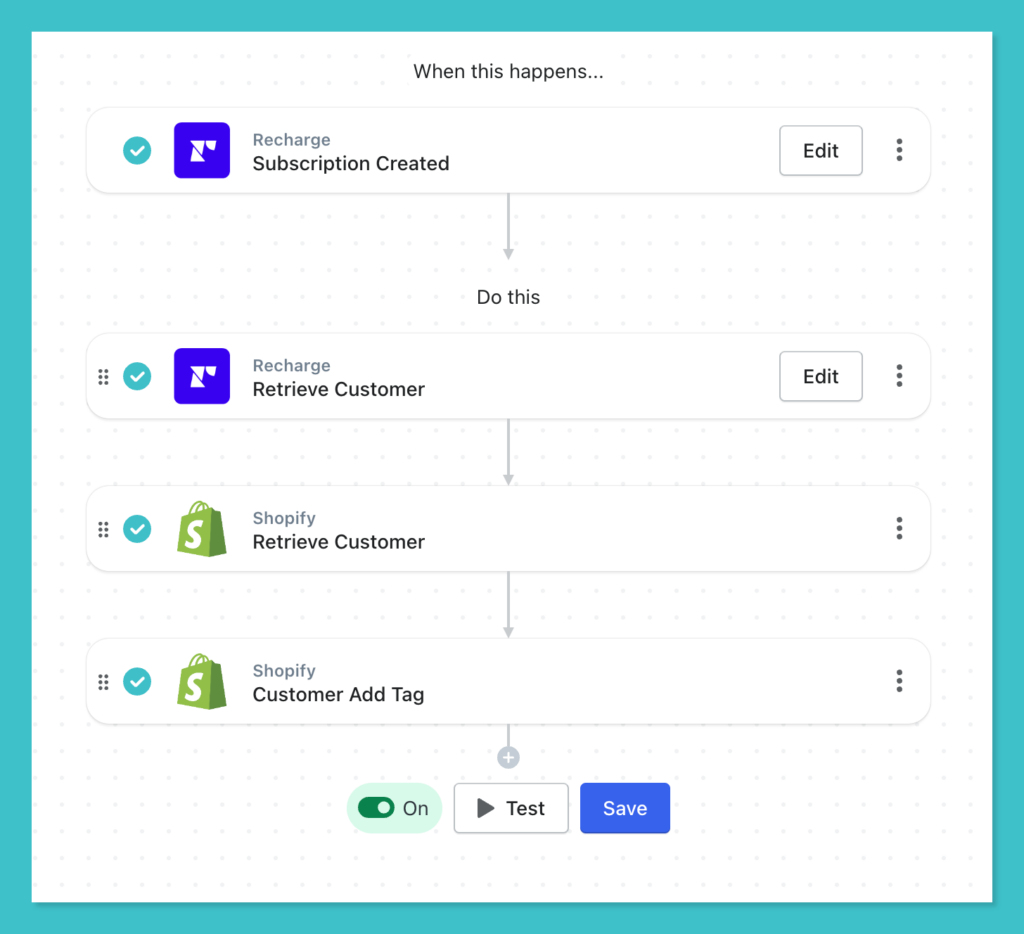
Do you have a subscription model and want to add Shopify customer tags for subscribers? You can integrate subscription apps like Recharge with MESA, and this pre-built template does the rest for you:
MESA Template ID
add-a-tag-to-a-shopify-customer-when-they-purchase-a-subscription-product-through-recharge
Unlock scalable tagging with MESA
To summarize, tags can prove incredibly useful for you as a Shopify merchant. And with auto-tagging made possible with MESA, the possibilities become truly endless.
Whether you’re simply in need of data organization or want to boost your productivity, our Customer Success Team can help you make the switch to MESA a breeze. Get inspired by other solutions our merchants are using. There’s no limit to what your creativity can achieve.


