How to Send a Shopify Customer to a Hubspot Contact
by
Ash Maynor
Last updated:
June 14, 2022
Every Shopify store owner hopes to experience business growth as they begin to increase sales volume.
But all successful Shopify store owners know that with this growth comes the obstacles of maintaining customer loyalty and retention.
In this post, we’ll show you how to improve customer relationships, increase sales and boost productivity using one of the most popular CRMs, HubSpot.
Try MESA free for 7-days and enjoy support from automation experts!
Topics:
Use a CRM like HubSpot with Shopify
CRM stands for Customer Relationship Management, which primarily means software to improve business-customer relationships. Think of a CRM as a way to manage all your contacts and gather essential customer information. For example, insights such as demographics, purchases, and previous interactions can be accessed by anyone on your team.
An effective CRM’s primary goal is to help you work more efficiently through integrations. Additionally, if you’d like to read more about CRMs, reference our previous post on the Best CRMs for Shopify Stores.
One popular CRM among store owners is Hubspot. It’s easy to use and offers a range of tools to grow your Shopify store, from marketing solutions to customer service software.
Through HubSpot, you’ll be able to launch strategies around content and organic search to build a brand that customers keep coming back to. With a long list of 1,000+ integrations, it is no wonder why Hubspot remains a staple CRM in Shopify’s marketplace.
How to connect a Shopify Customer to Hubspot Contact
Let’s get started; the best way to connect Shopify to HubSpot is by using MESA. MESA also comes with pre-built integration with HubSpot, making it even easier to create workflow automation between HubSpot and Shopify.
Before you get going, it’s good to know the basics of MESA and how to create a workflow from scratch. Next, we’ll show you how to do just that for one of the most common use cases.
These step-by-step instructions will connect Shopify customers to Hubspot contacts. Be sure to install MESA on your Shopify store before proceeding.
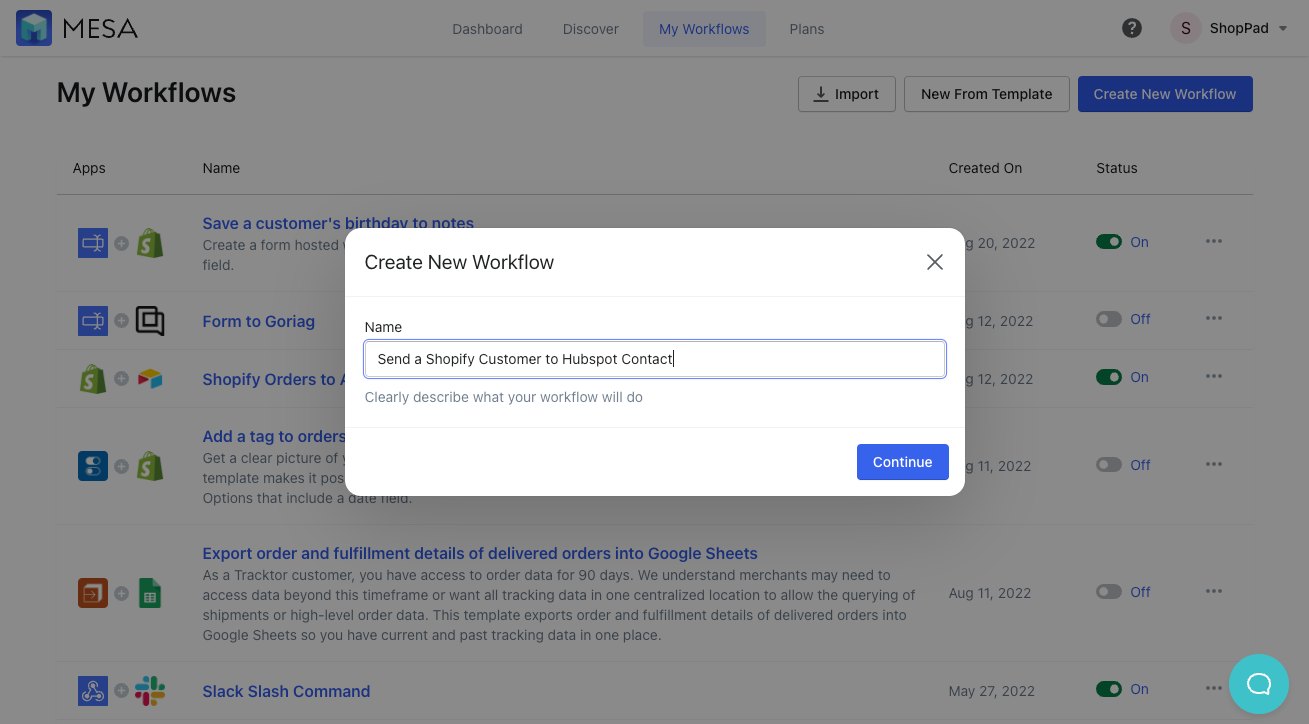
Create New Workflow
Click your MESA Discover tab, and select the pink Create your own workflow button in the right-hand corner. You’ll need to name your workflow; we’ll call this one “Send a Shopify customer to a HubSpot contact.” Click the pink Continue button when finished.
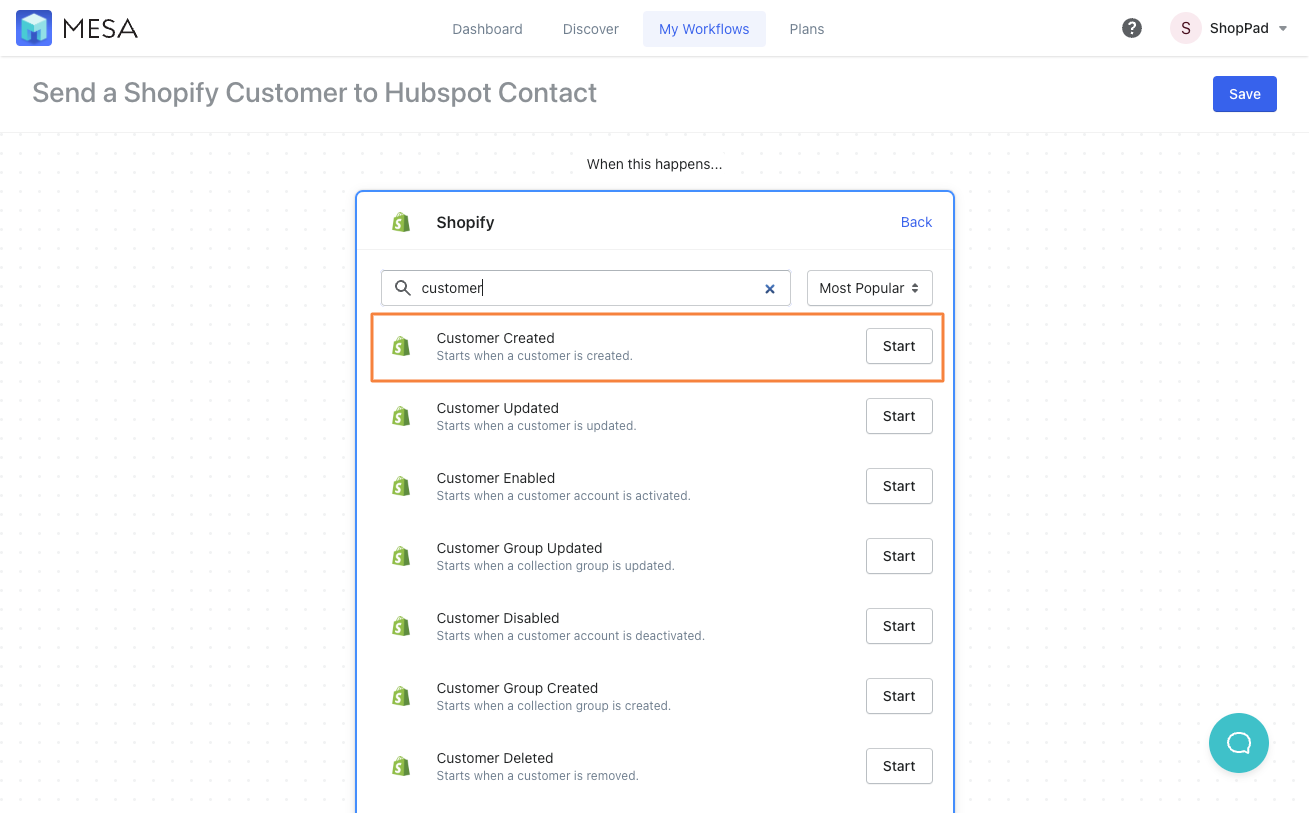
Next, start your workflow with the Customer Create trigger event
Now, you’ll want to pick the Trigger step, which is the first step in a workflow that causes automation to begin. In this case, you’ll want to start with Shopify and select Customer Created.
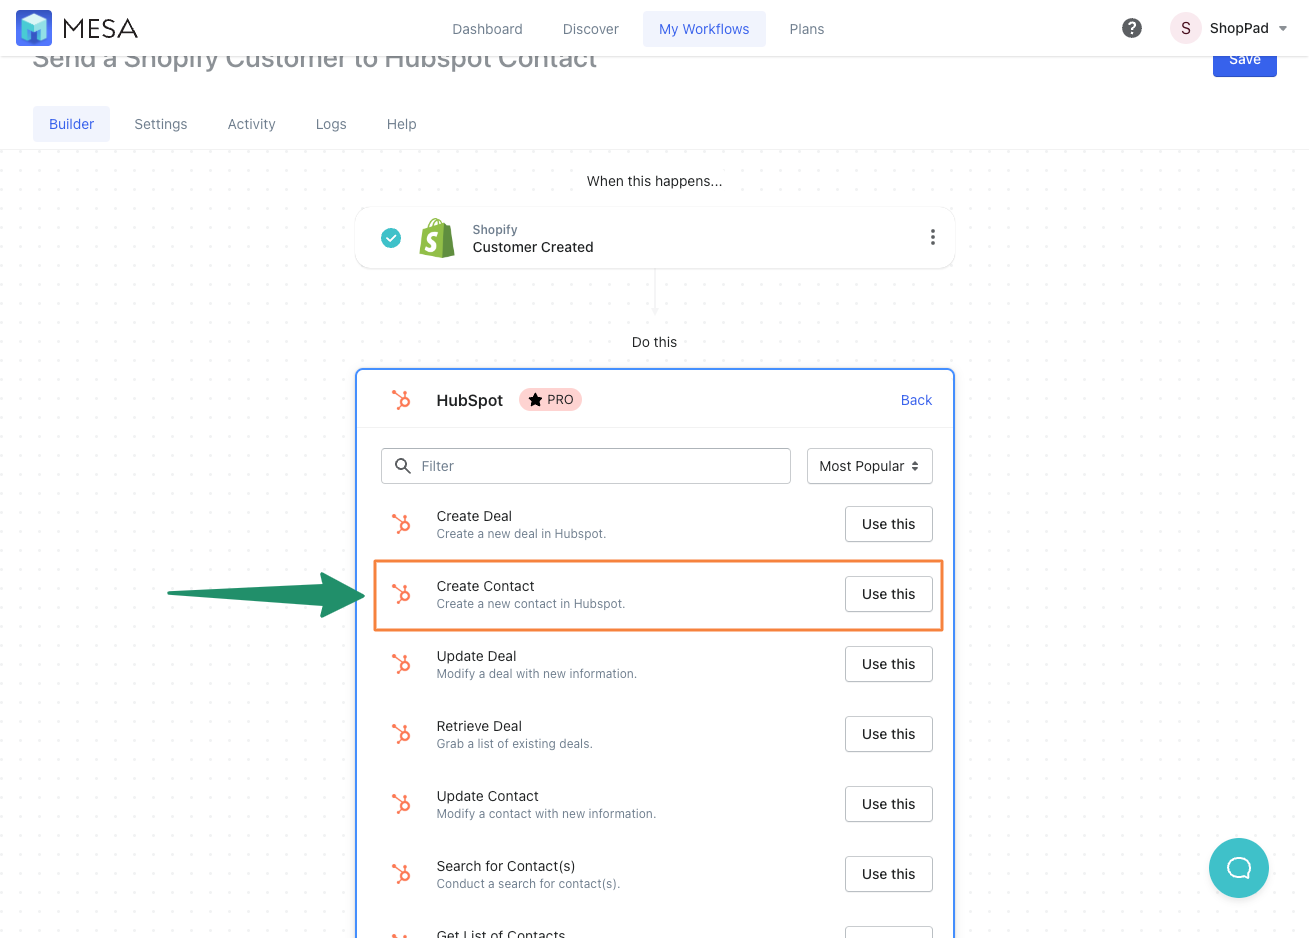
Next, add the Hubspot Create Contact workflow action
Now, set up your Action Step. This is any additional step beyond the Trigger step. In the search field of the Action Step, search for “HubSpot,” then choose the HubSpot Create Contact option.
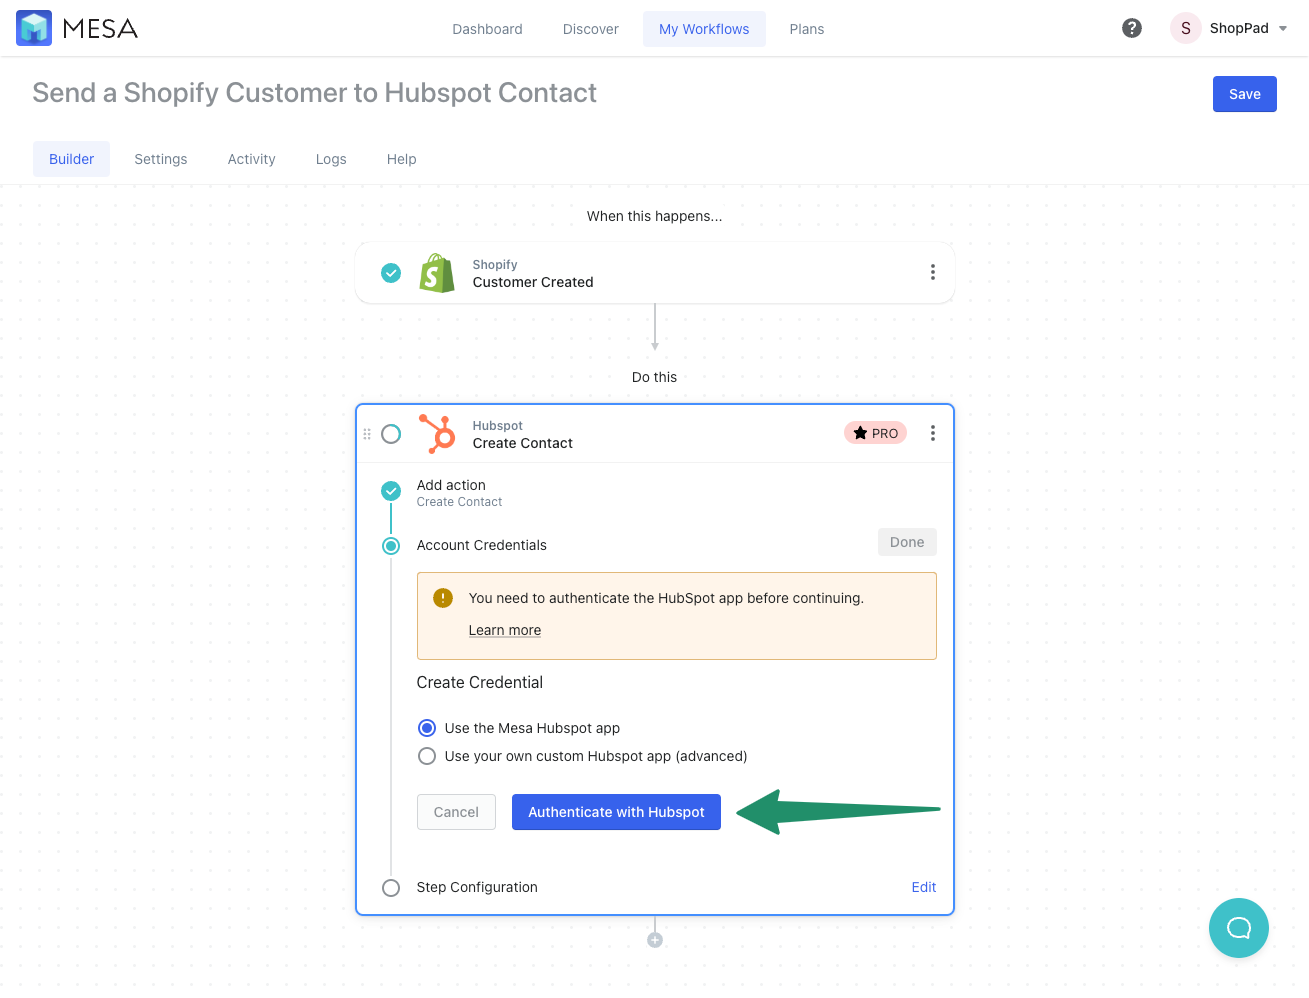
Next, authenticate your Hubspot app
4. Here you’ll either add an existing credential from the drop-down menu or create a credential through MESA’s HubSpot App (recommended) or your own custom HubSpot App. Once selected, click the Add New Credential button to start the process.
When adding a new credential, you’ll be prompted to login into HubSpot if you’re not already logged in. Once you’re in, select the HubSpot account that you want to connect.
**You must have Super User permissions on your HubSpot account to connect MESA with HubSpot.**
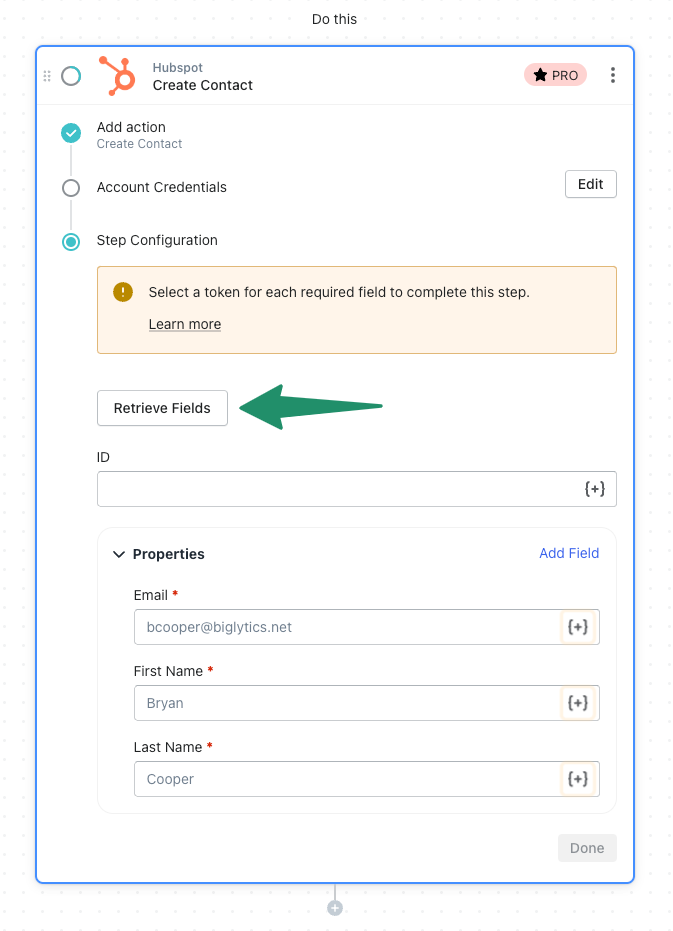
Retrieve Hubspot Contact Fields
Under Step Configuration, you’ll want to click the Retrieve Fields button to pull in fields from your HubSpot account.
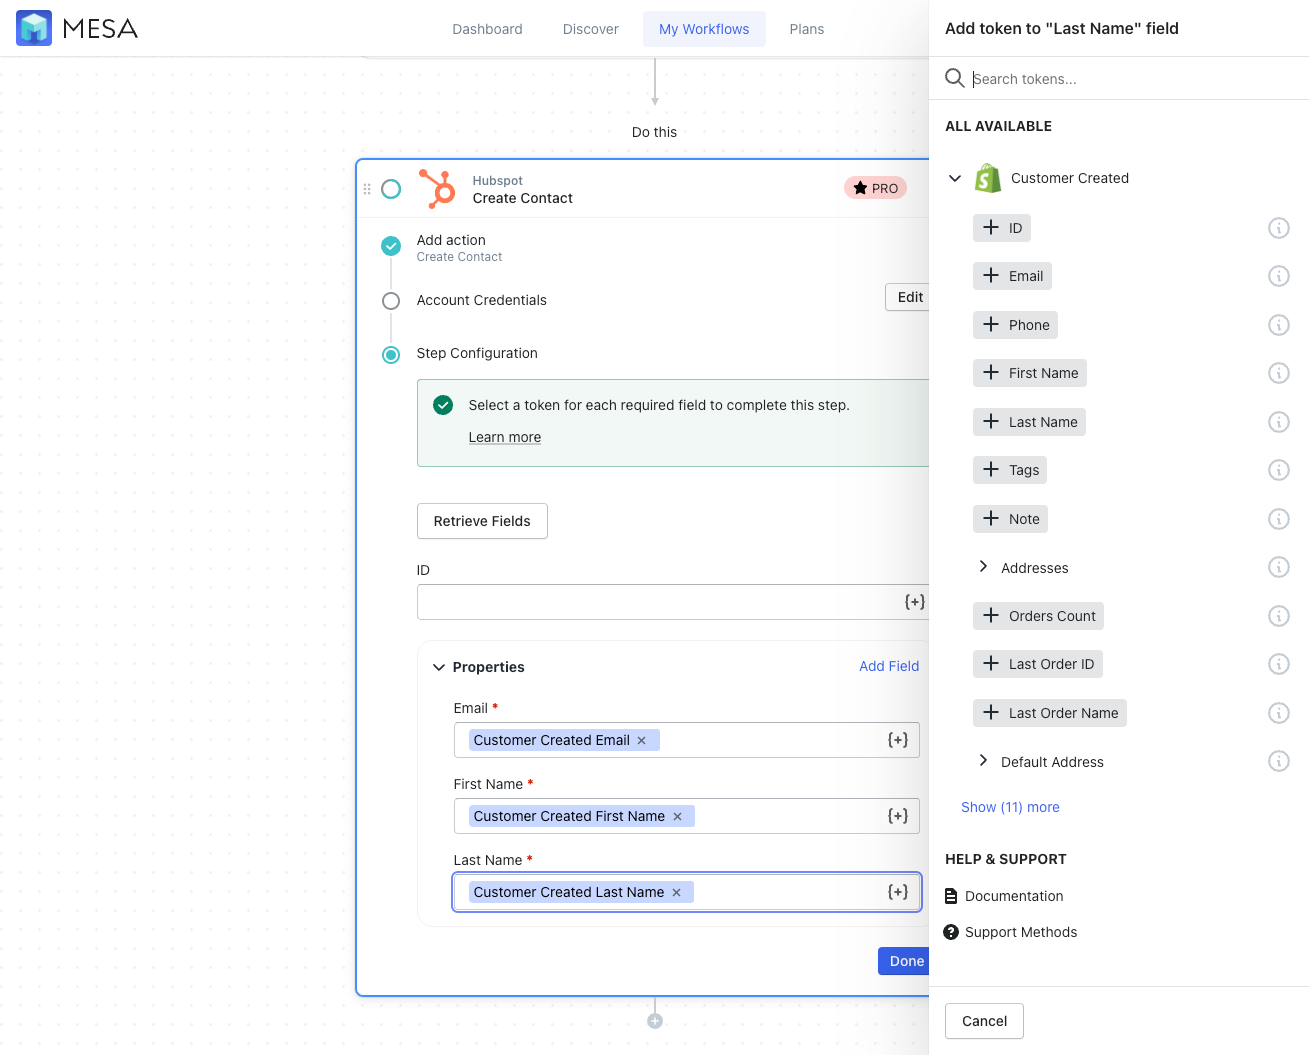
Map your Shopify data to Hubspot
Below the button, you will need to assign Tokens in the HubSpot fields pulling in. Tokens are snippets of data you’re sending from one app to another, in this case, Shopify to HubSpot. You can utilize MESA Tokens by clicking the {+} icon to find the right Token value for any field in the step.
Furthermore, in this Step Configuration portion, you’re ensuring you send the correct Shopify customer data to HubSpot. Once finished, it will look something like this:
Lastly, Save and Enable your automation.
Click the “Save” button to keep the existing or any optional configuration changes to this workflow.
Finally, be sure to enable this automation by turning it “On” so this automation runs every time a new Shopify customer is created. MESA will proudly celebrate your achievement by popping confetti in your honor. Congratulations!
Workflow Wrap Up
Now you can make a Hubspot Shopify integration of your own. Or, try one of our pre-made workflow templates. Contact us if your integration requires more sophistication or just want our experts to build everything for you.
What you should do now
Whenever you’re ready…here are 4 ways MESA can help you get more done:
Sign up for MESA. The best way to get started is sign up for MESA today. Every plan includes the first 7-days free so you can be assured your workflow is running properly.
Browse pre-made templates. Our customizable workflow templates are a great way to get started more quickly.
Talk to our automation experts. If you need help personalizing any workflow template, guidance how to make any automation or, simply want us to make your workflow, we can help.
If you know another merchant who’d enjoy reading this page, share it with them via LinkedIn, YouTube, Twitter, or Facebook.