Ever wonder how to keep up with countless product descriptions from multiple third-party suppliers? Don't worry, we got you. Introducing ChatGPT: the automated conversation AI that can quickly update those sad supplier product descriptions into pure gold. Get ready to say goodbye to manual rewriting tasks. And, wave hello to efficient, effortless ChatGPT product descriptions.
And by turning to automation, you can rid yourself of that pain-staking task once and for all.
In this blog post, we'll show how to use ChatGPT to take product details from 3rd-party suppliers and turn them into creative and engaging product descriptions your shoppers will love.
TL;DR: Skip the step-by-step tutorial. Use this template to use AI to help write your product descriptions with just a few clicks.
Step-by-step tutorial video
How to use ChatGPT to write product descriptions
Time needed: 7 minutes.
To get started, be sure to get MESA and connect it to your Shopify store. Then, follow these simple, step-by-step instructions.
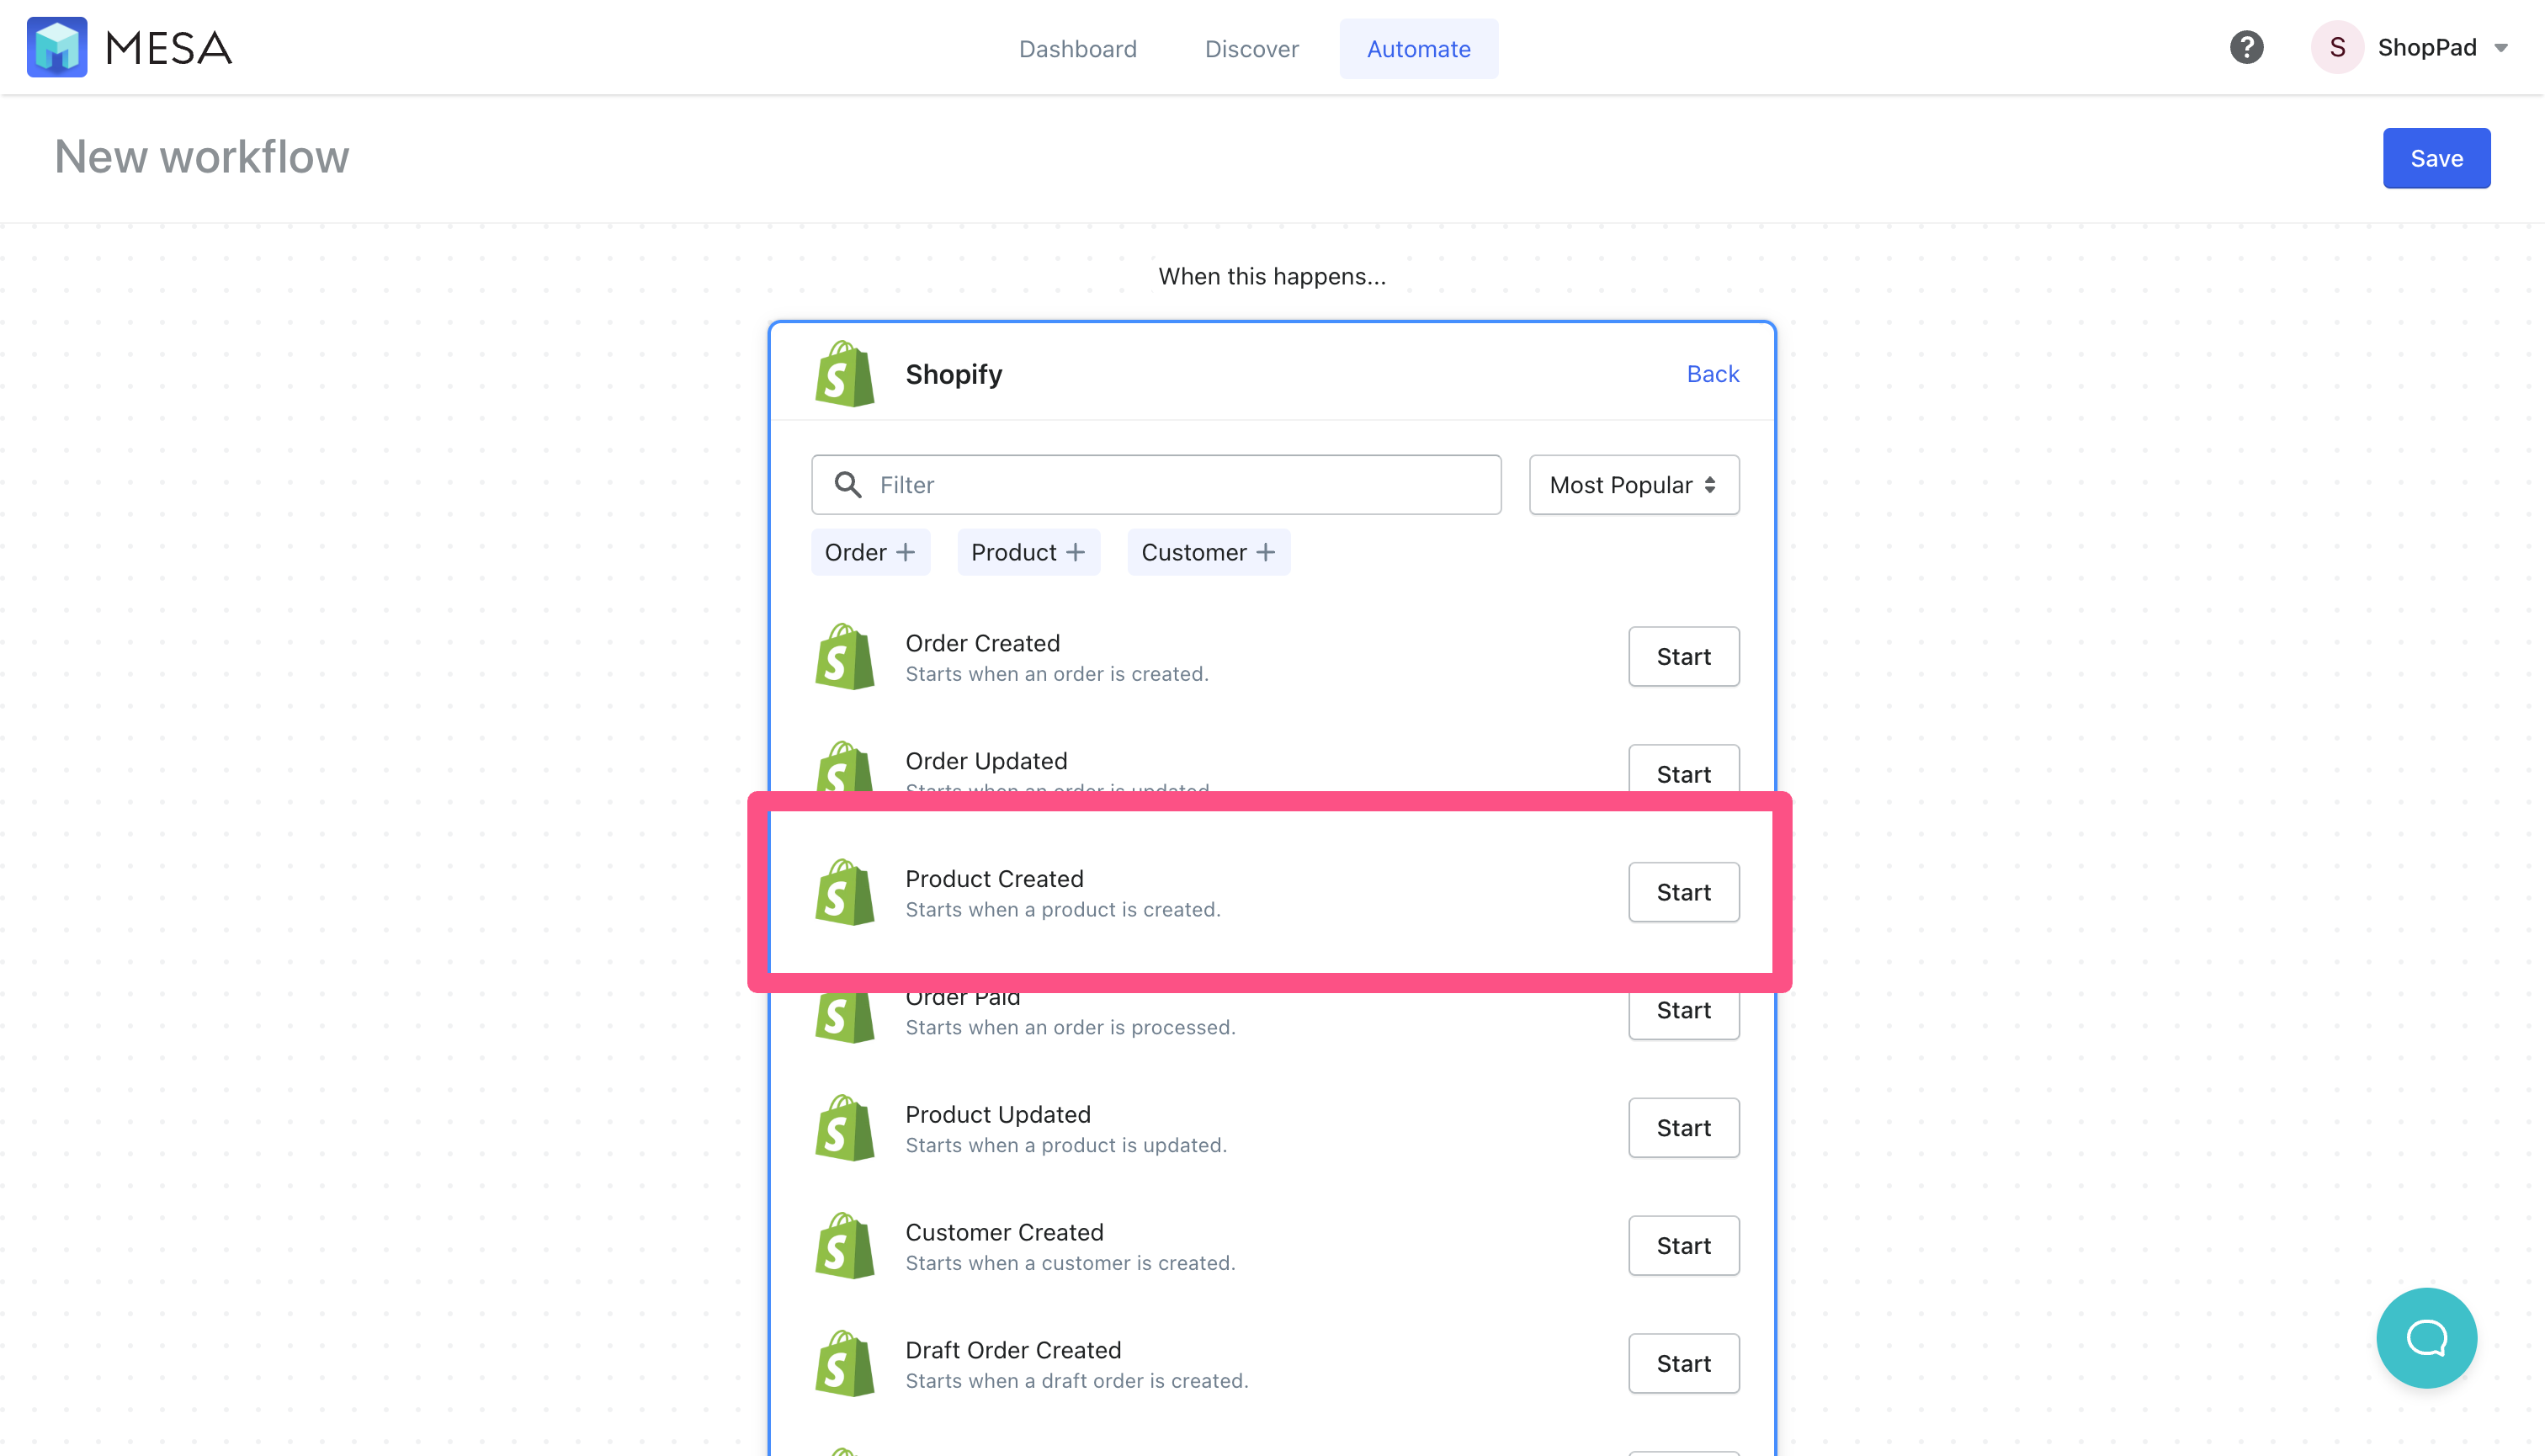
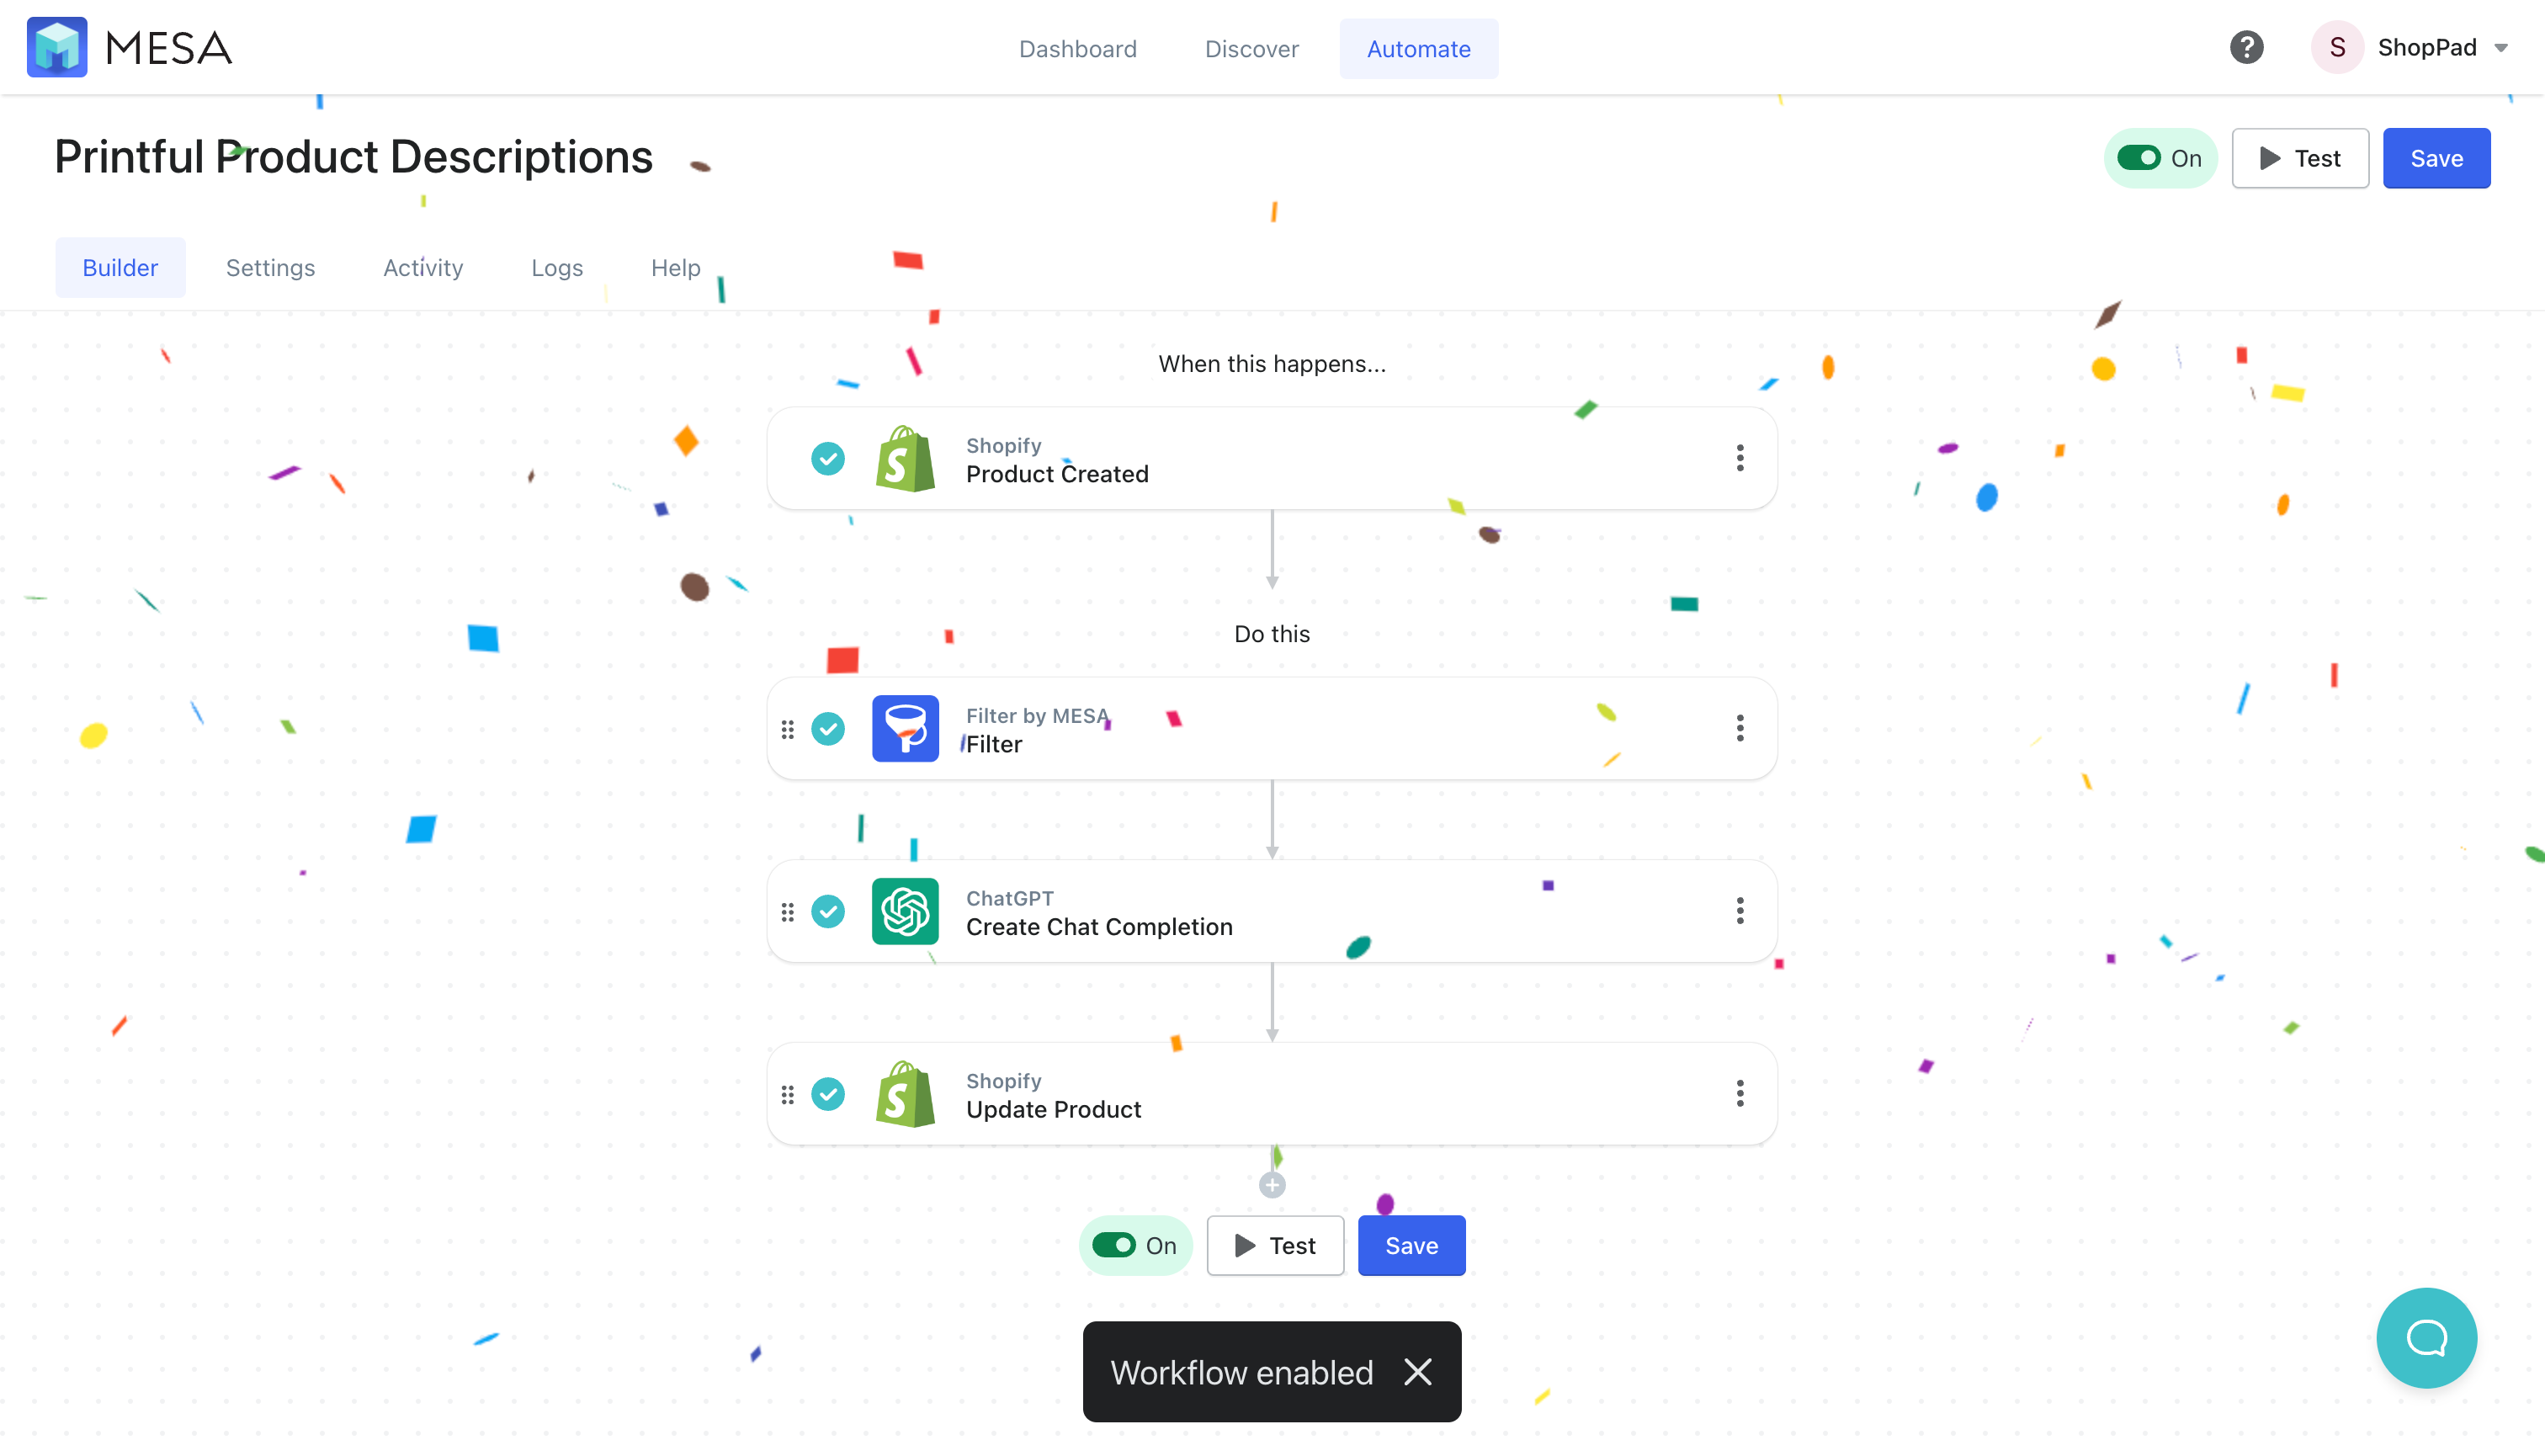
- Start a workflow with Shopify Product Created step
First, start a new workflow using Product Created trigger step from the Shopify app.
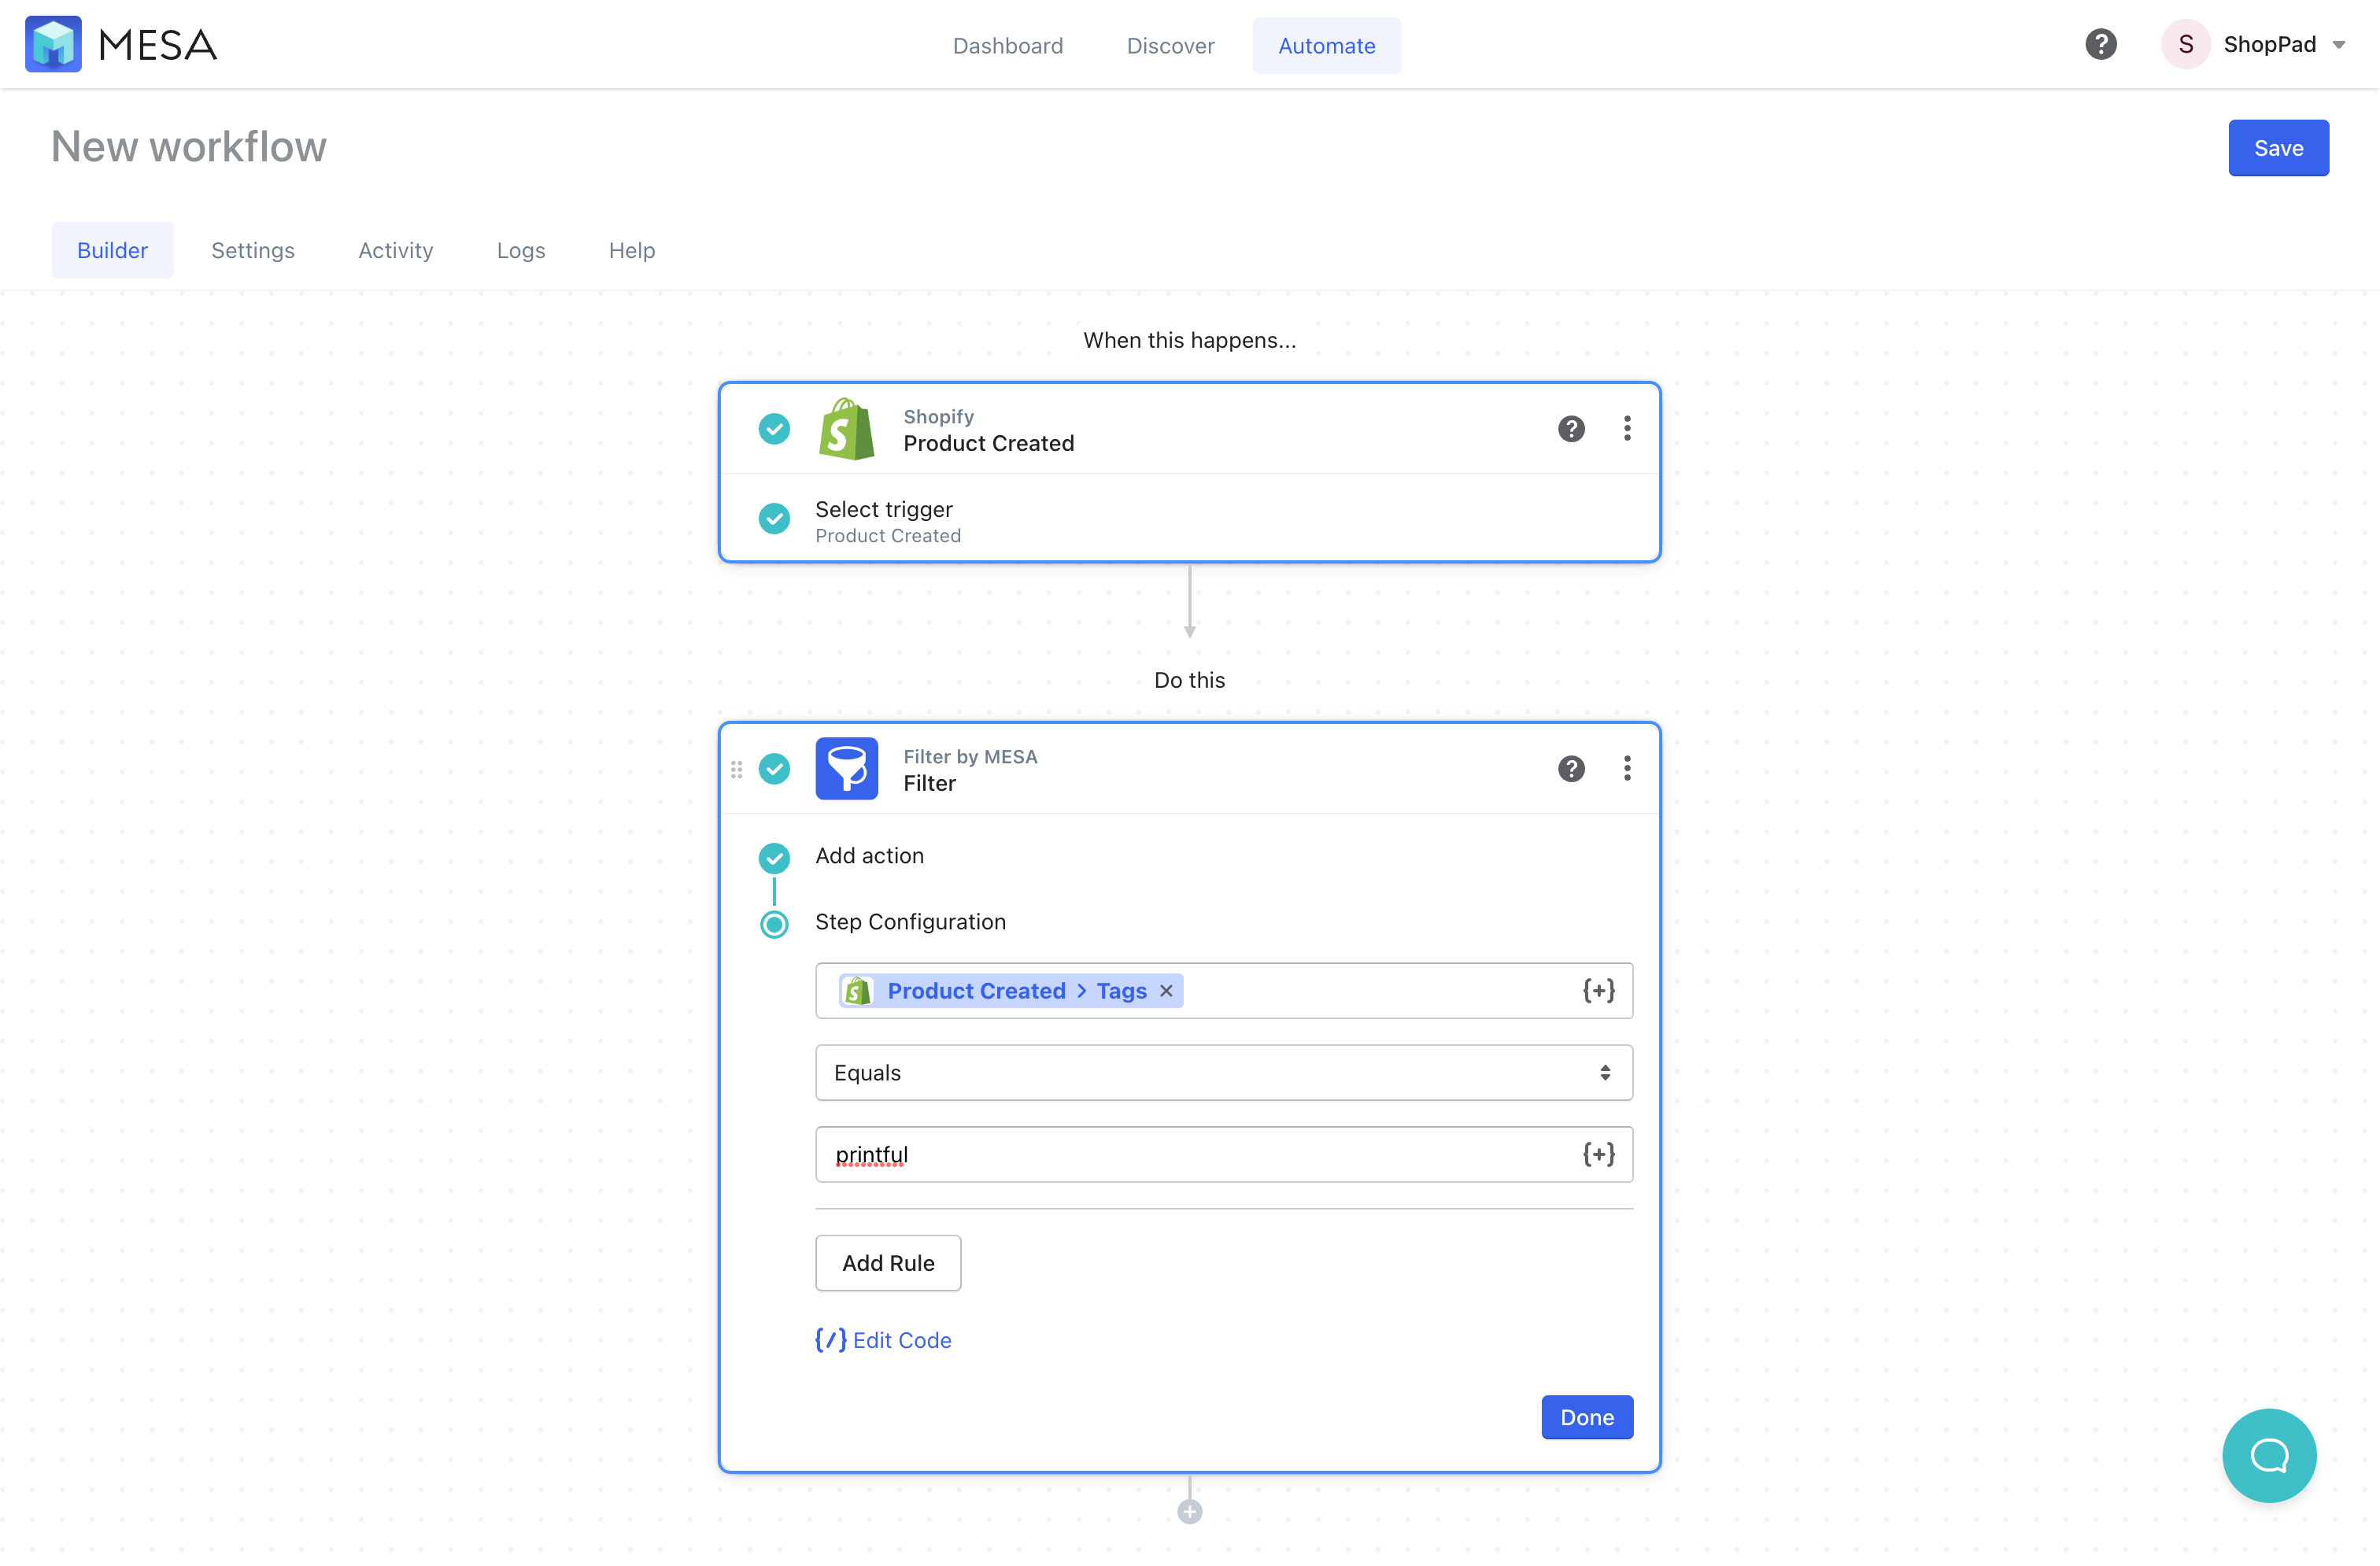
- Filter products for 3rd-party tags
For this example, we'll use the Filter by MESA app to look through the newly created product's tags and see if any contain the term "printful". In the Printful app, when creating products to be imported, there is an option to add tags. By adding a "printful" tag, we'll know the source when viewing them in Shopify.
- Add the ChatGPT app
Next, click the plus icon under the workflow steps then, search for ChatGPT to add this to your workflow.

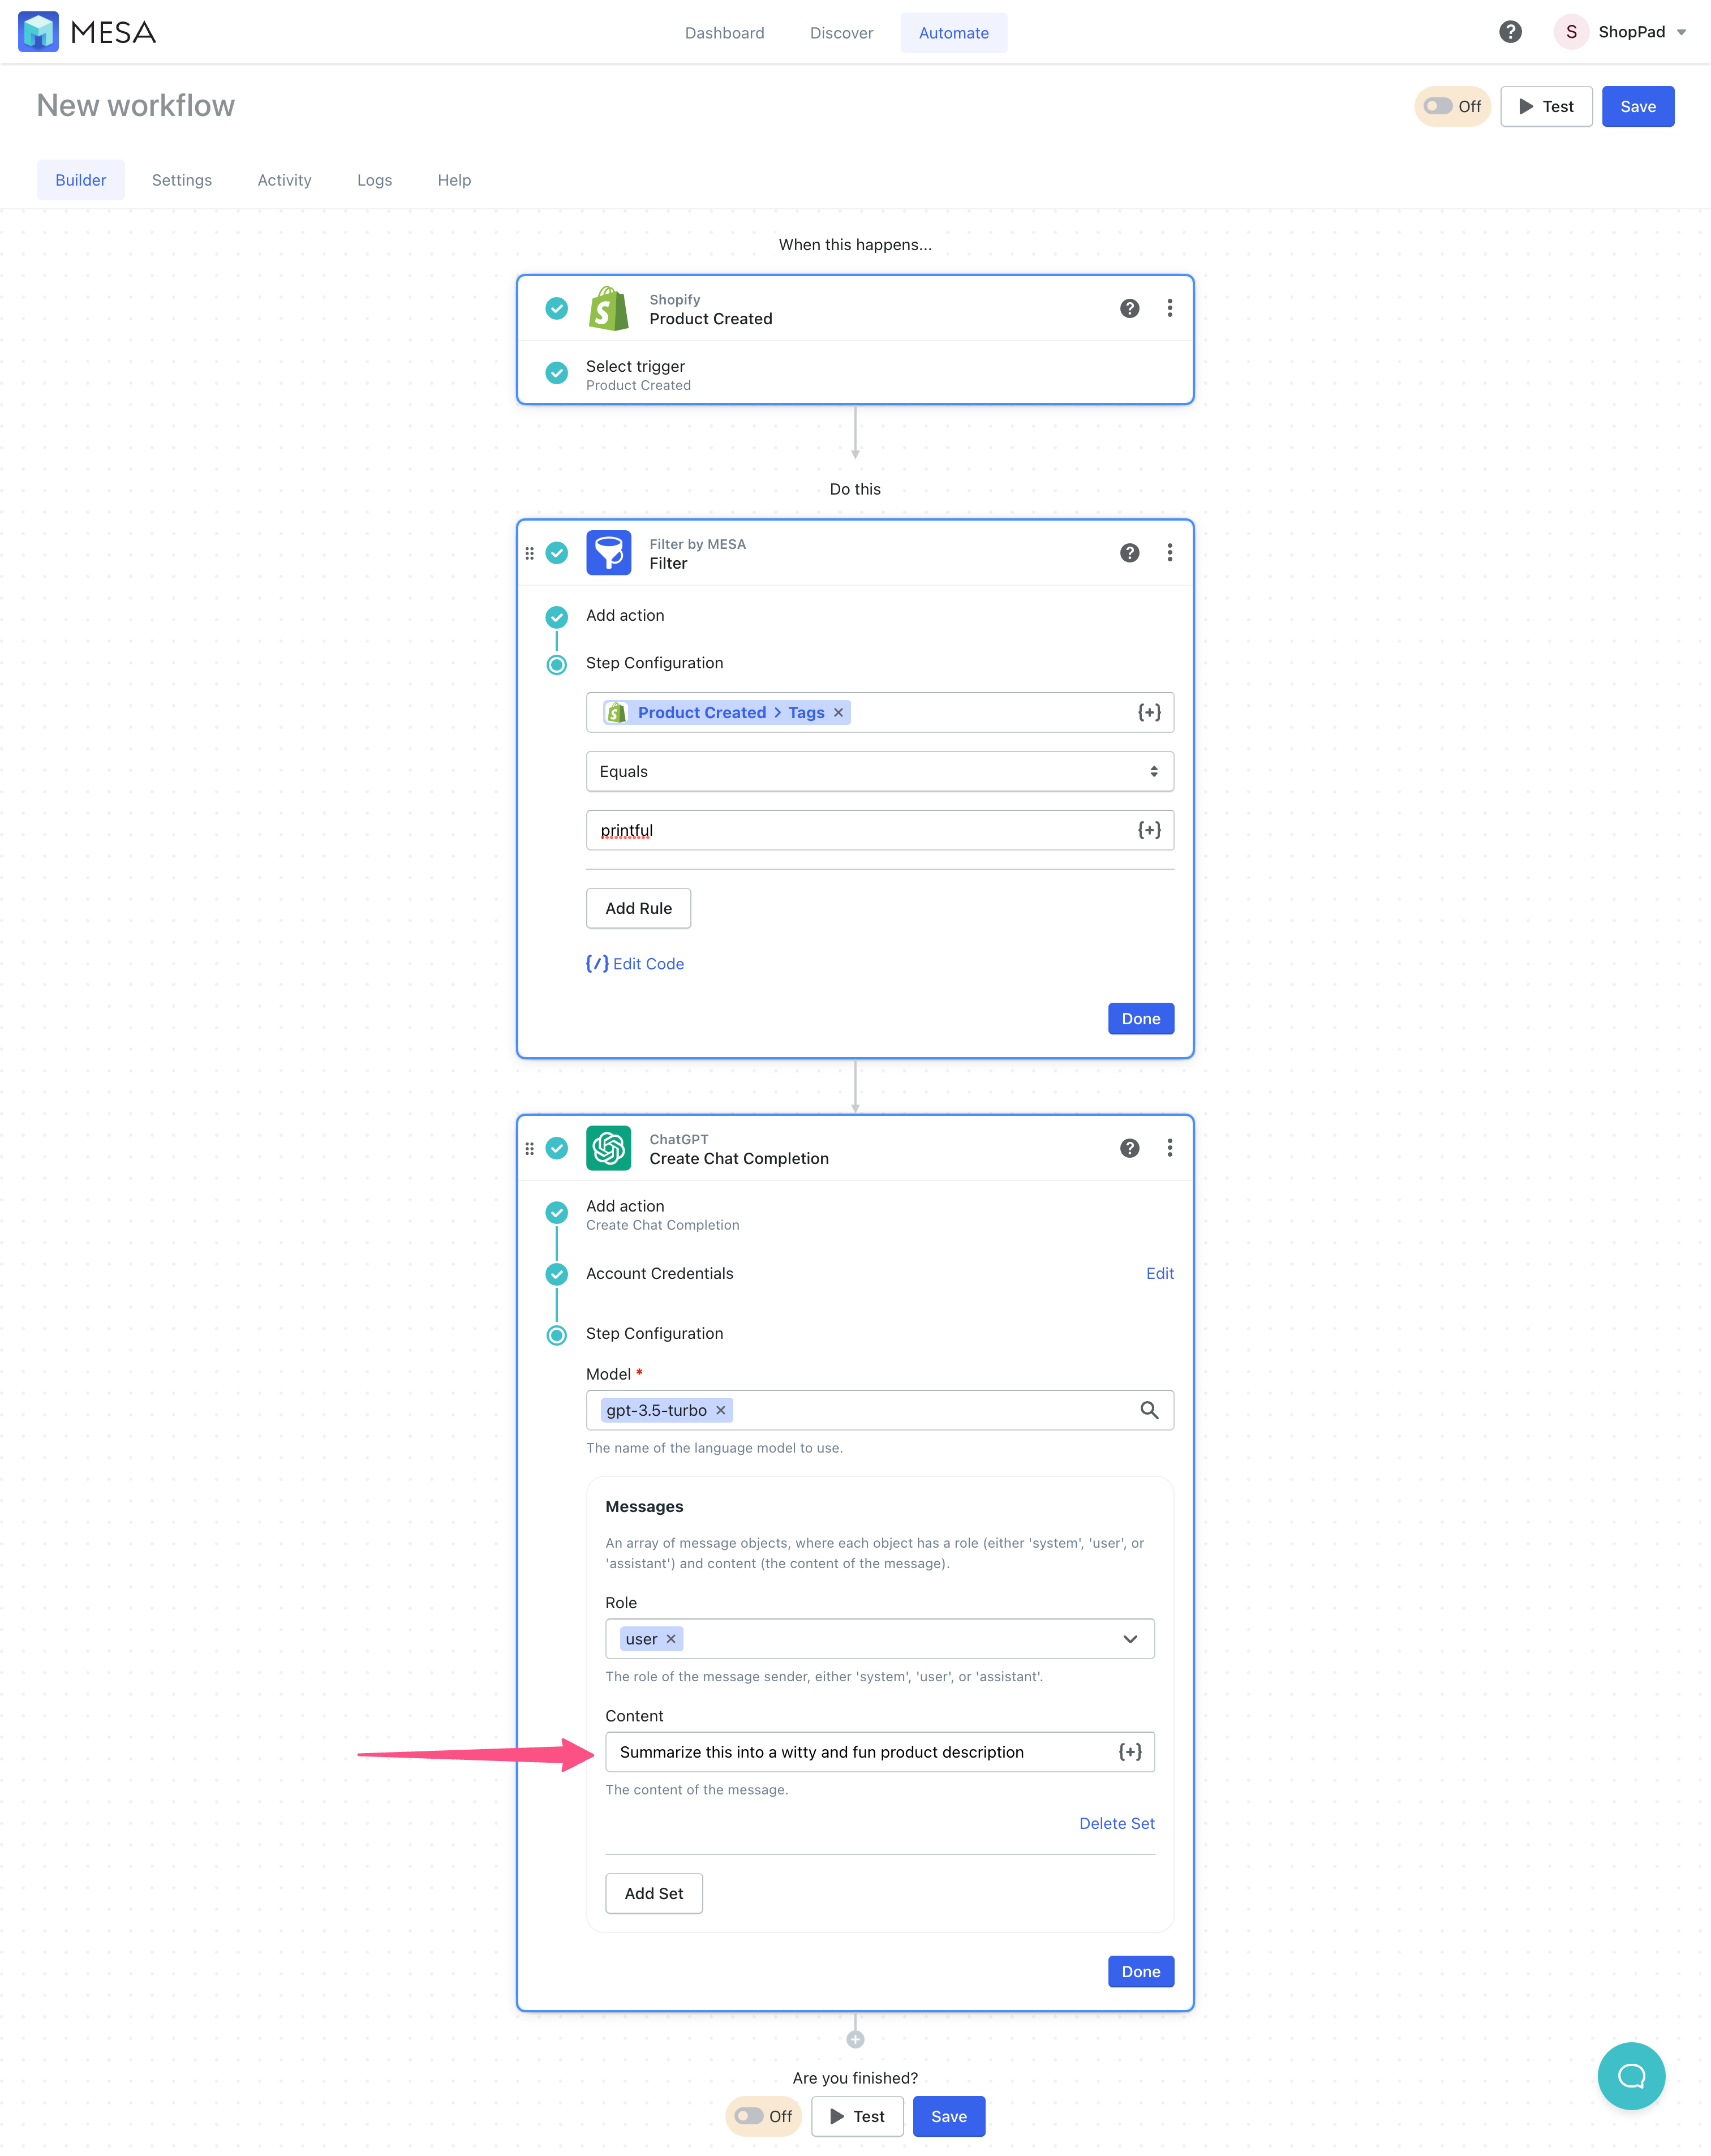
- Ask ChatGPT to re-write the supplier's description
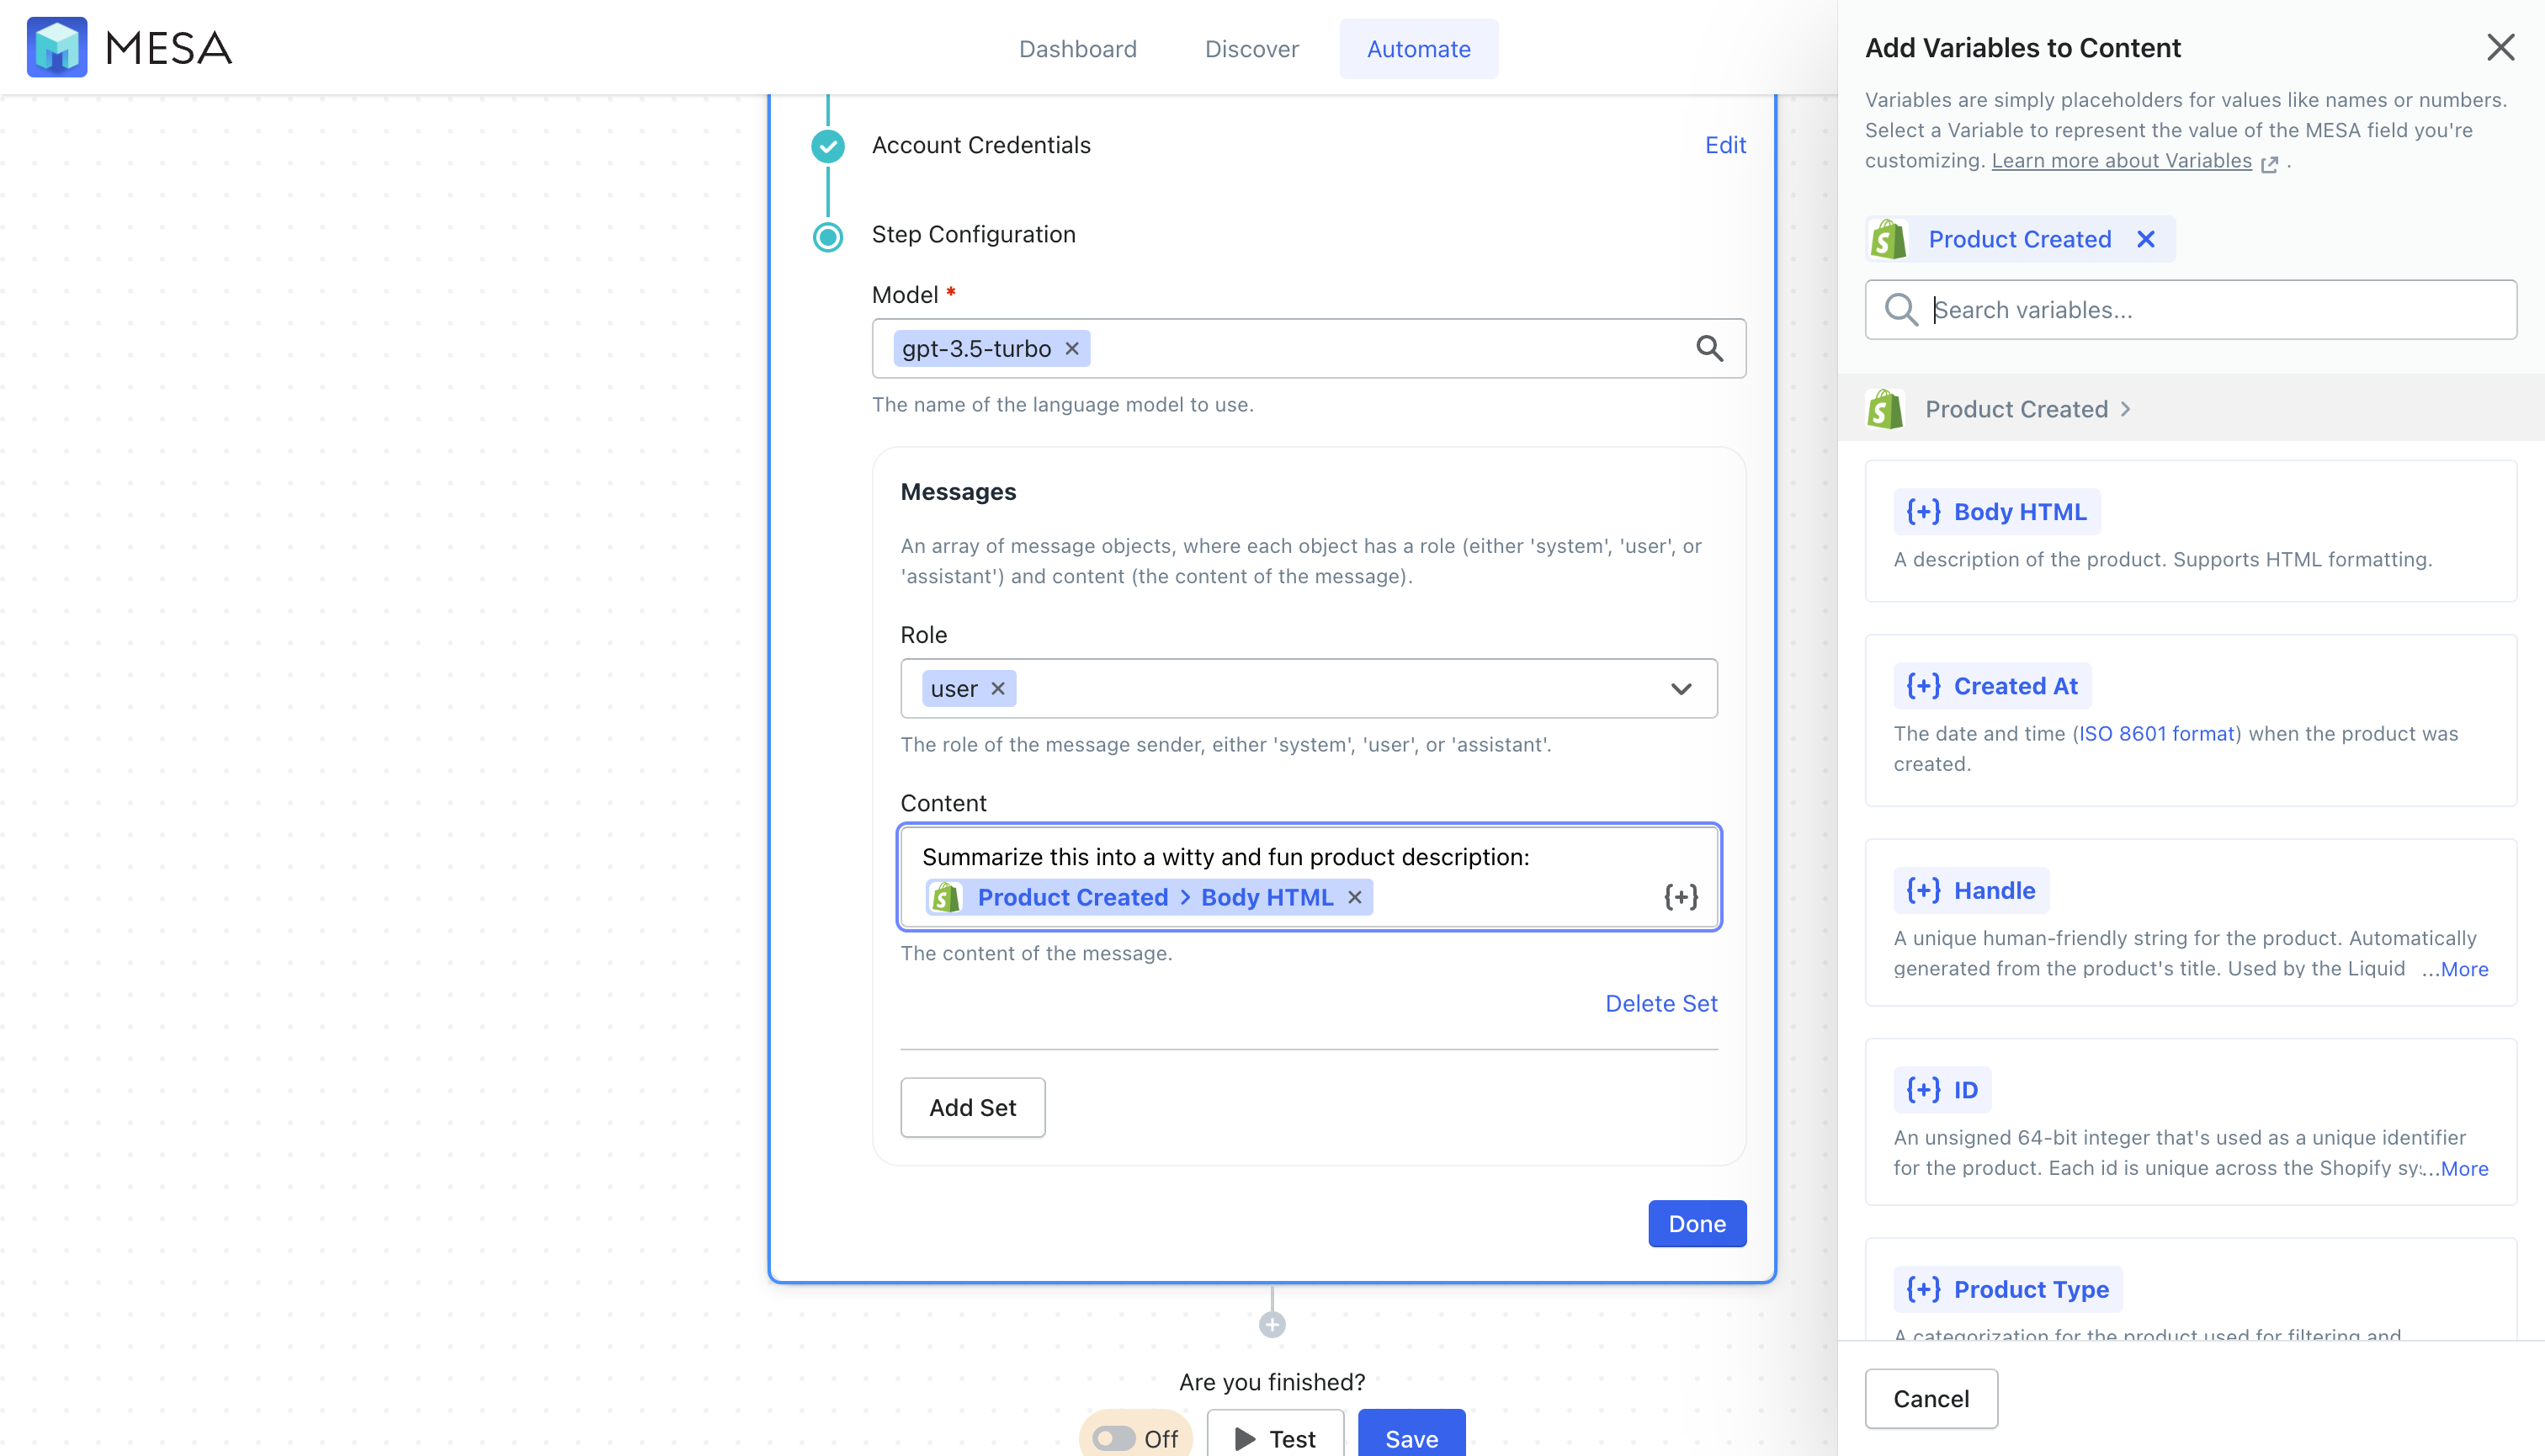
Follow the simple instructions to add your OpenAI API key. Then, click Add Message to start a new message in ChatGPT. Finally, in the Content field, ask "Summarize this into a witty and fun product description"
- Add the original product description as a variable to the ChatGPT message
Click the variable selector icon then, choose the Product Create Body HTML variable. This way, you include the original description from Printful so the AI knows what to rewrite.
- Add the Shopify Product Updated step
Finally, add the Shopify Update Product step. Now we'll use the new workflow variables to update the product that was created.
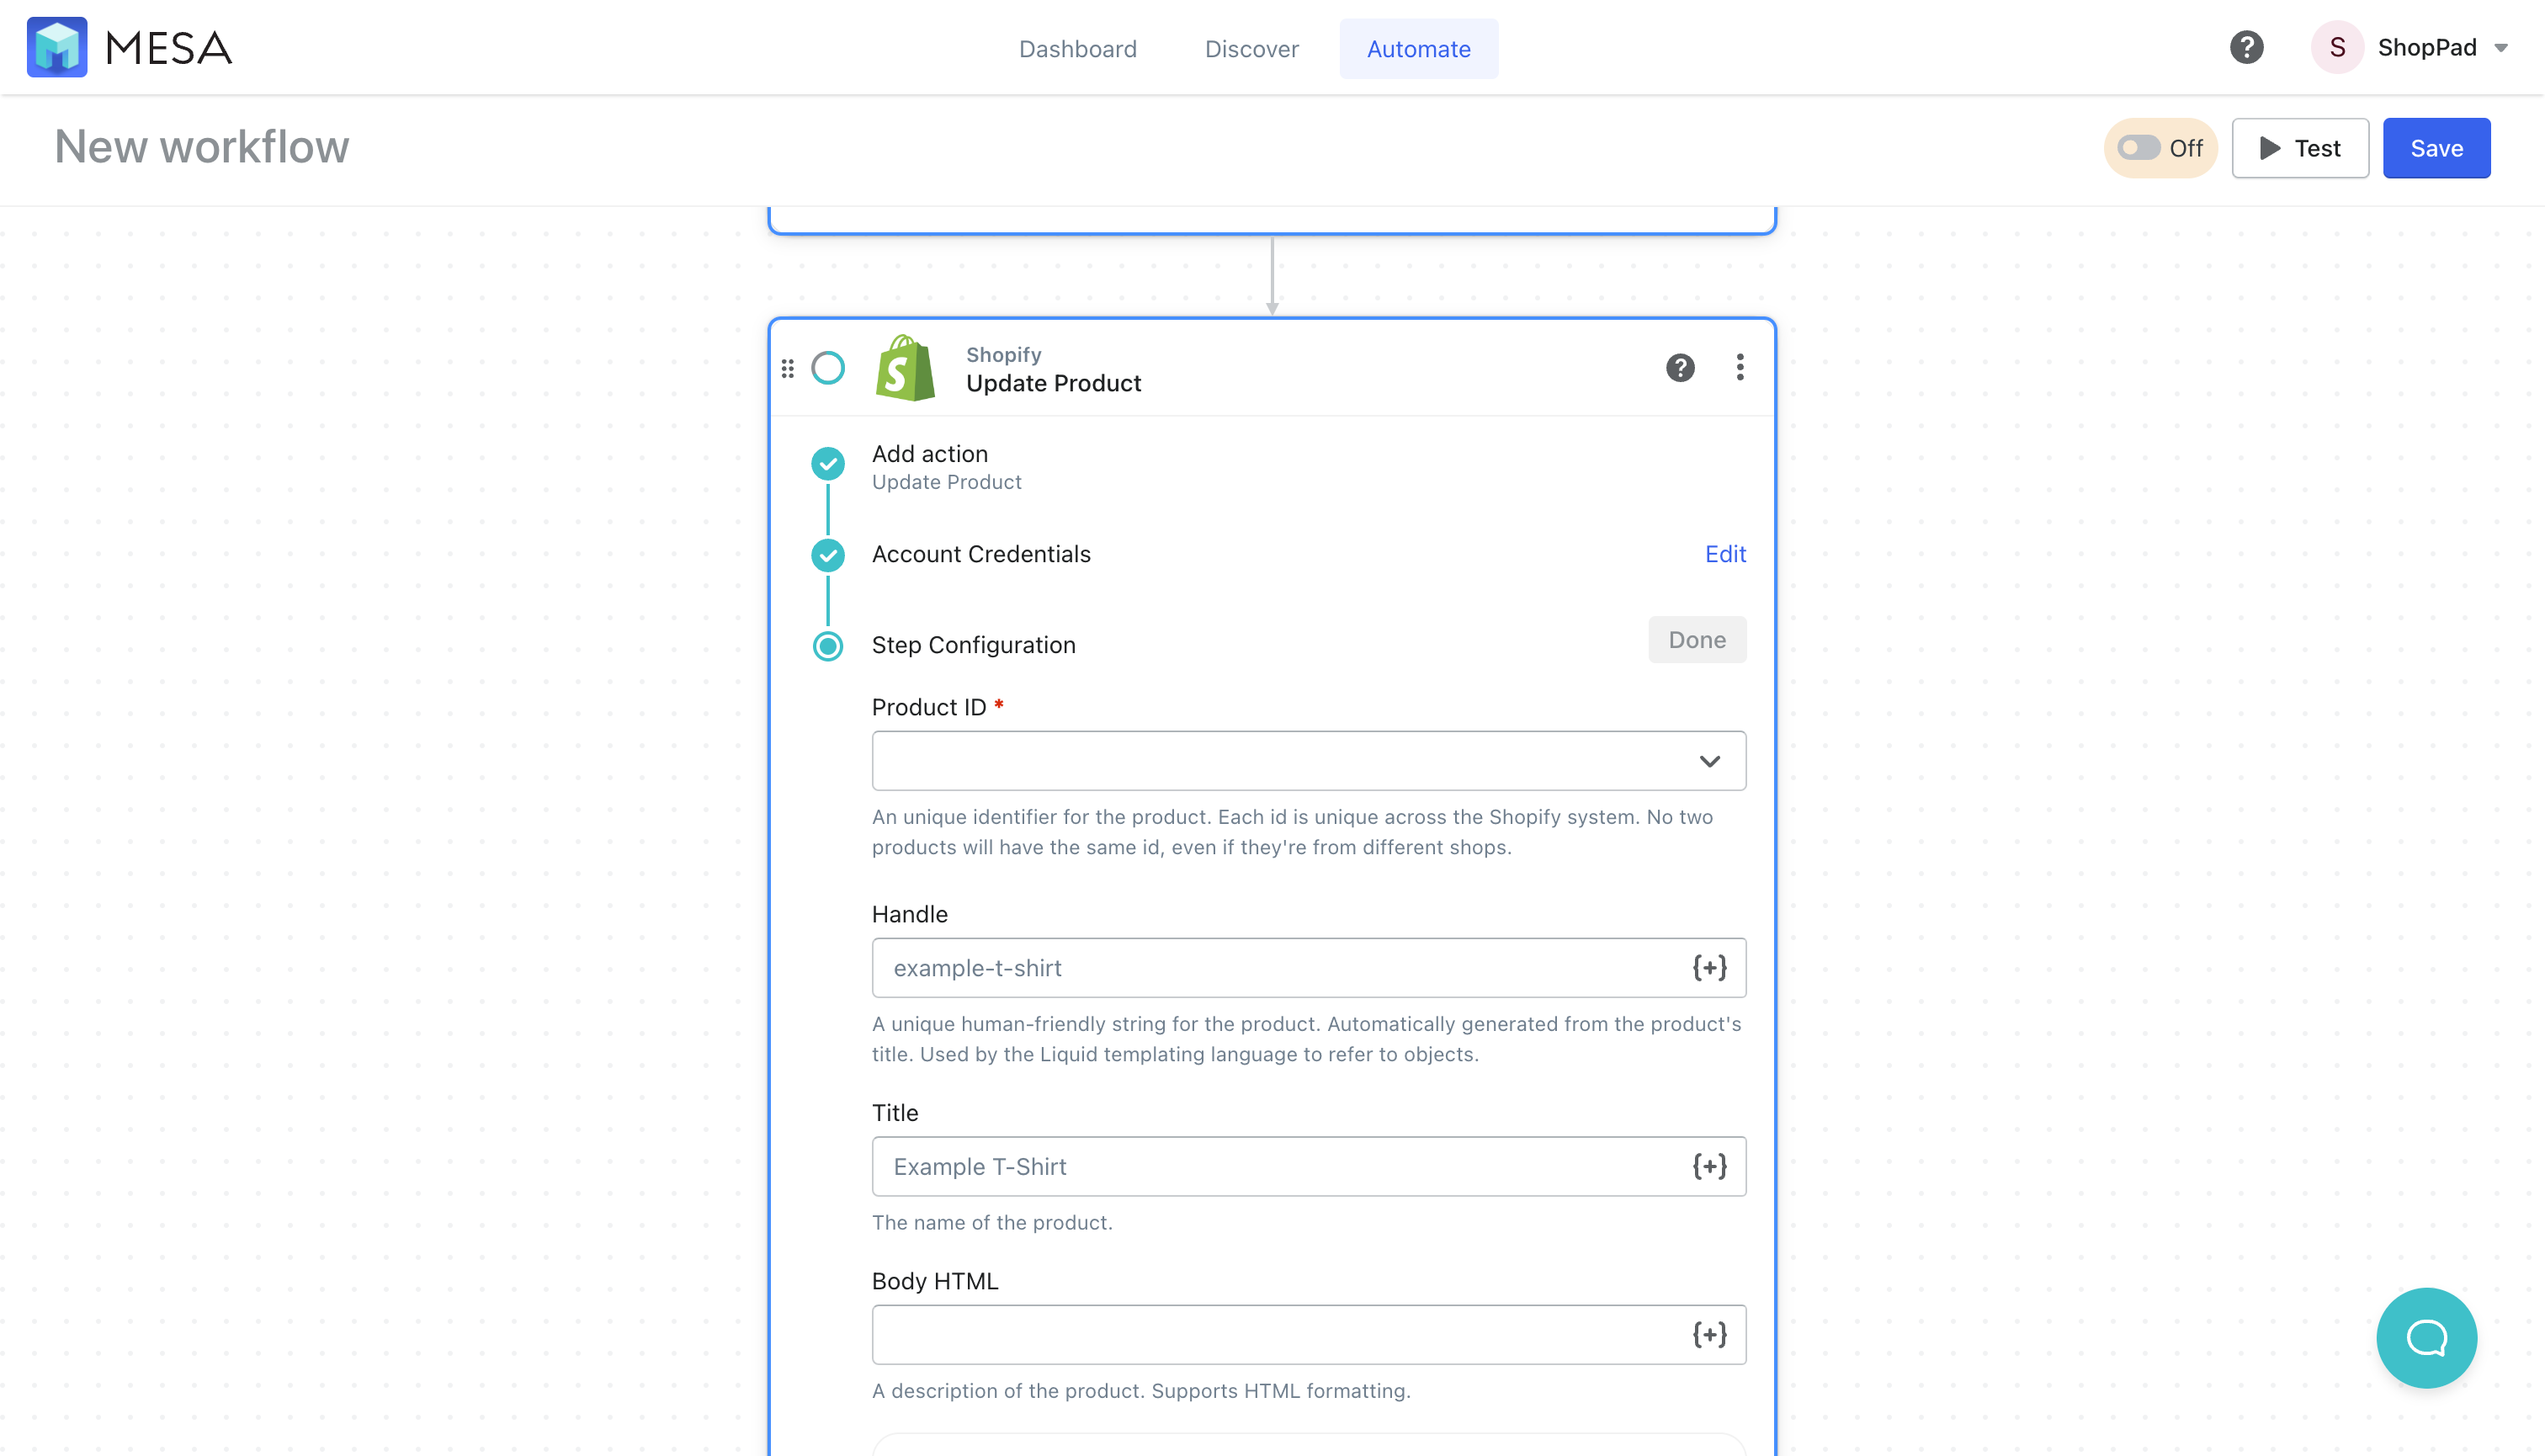
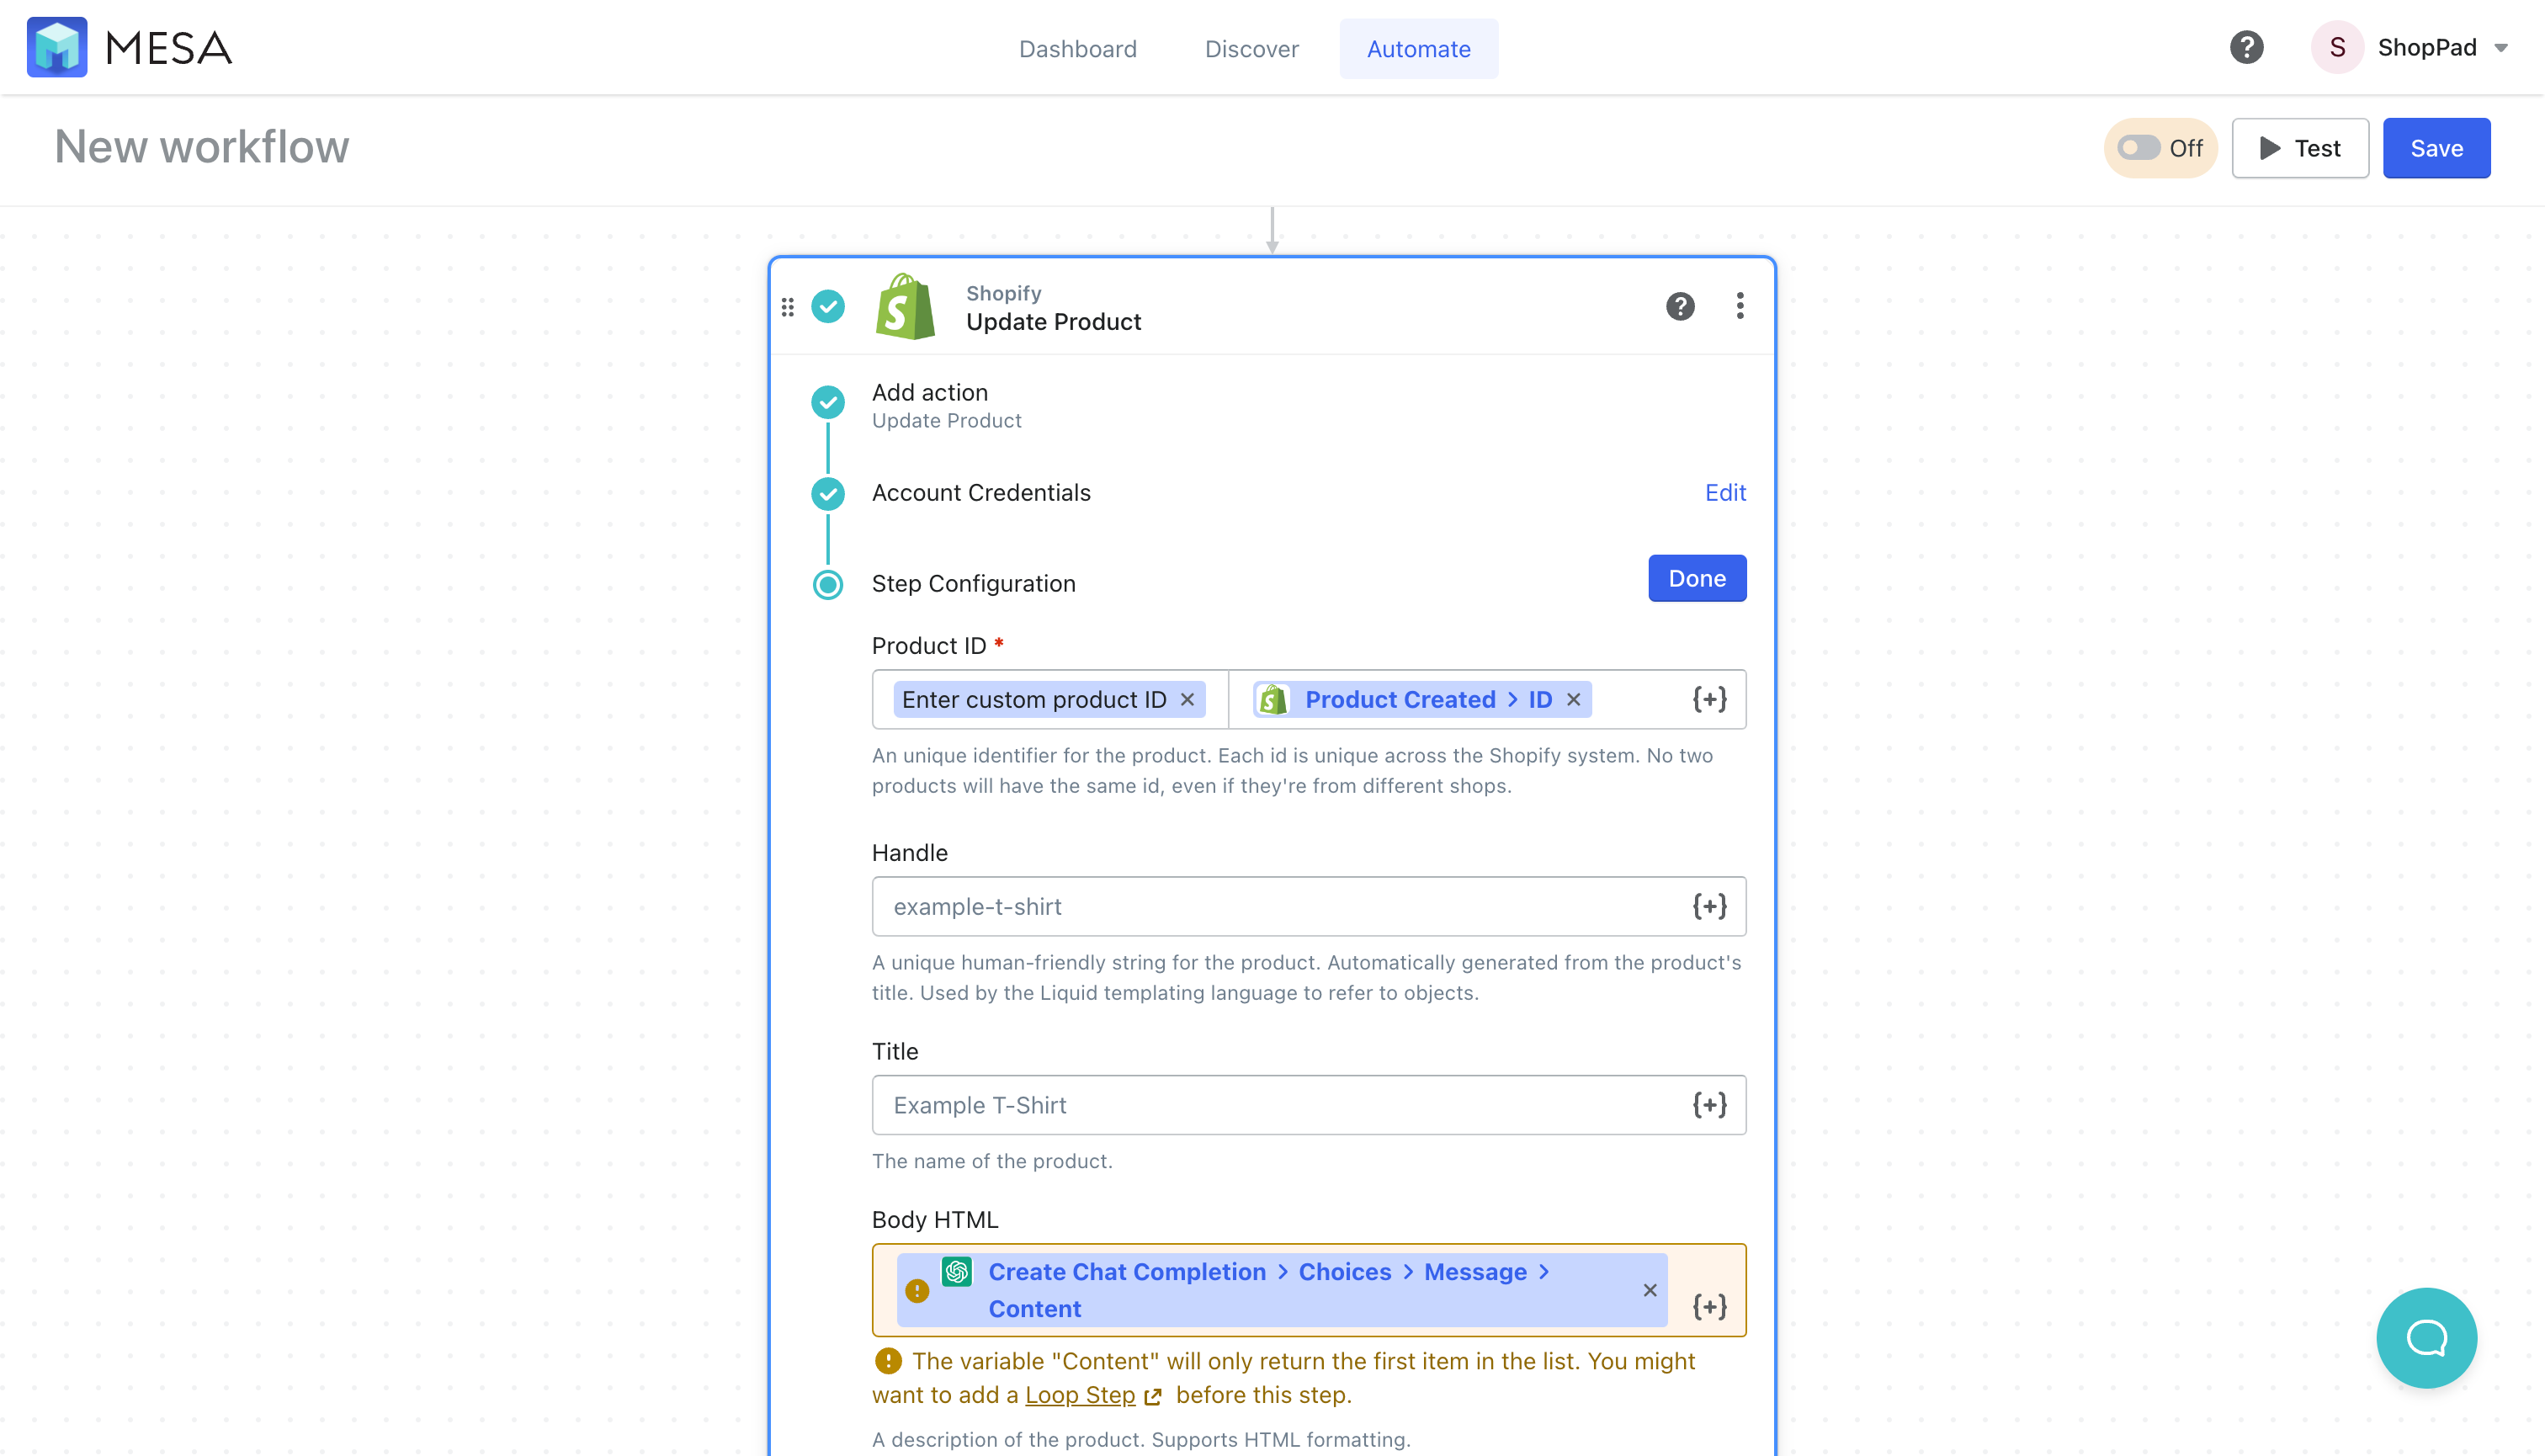
- Update the product with the new description
Under the Product ID field, choose Enter Custom Product ID from the dropdown. Then, open the variable selector and add the Product Created ID variable to the field. Lastly, for the Body HTML field, add the Content variable found under Create Chat Completion > Choice > Message. Use the search field to locate this variable faster. Click the Return First Item button when prompt to send the first reply from the AI.
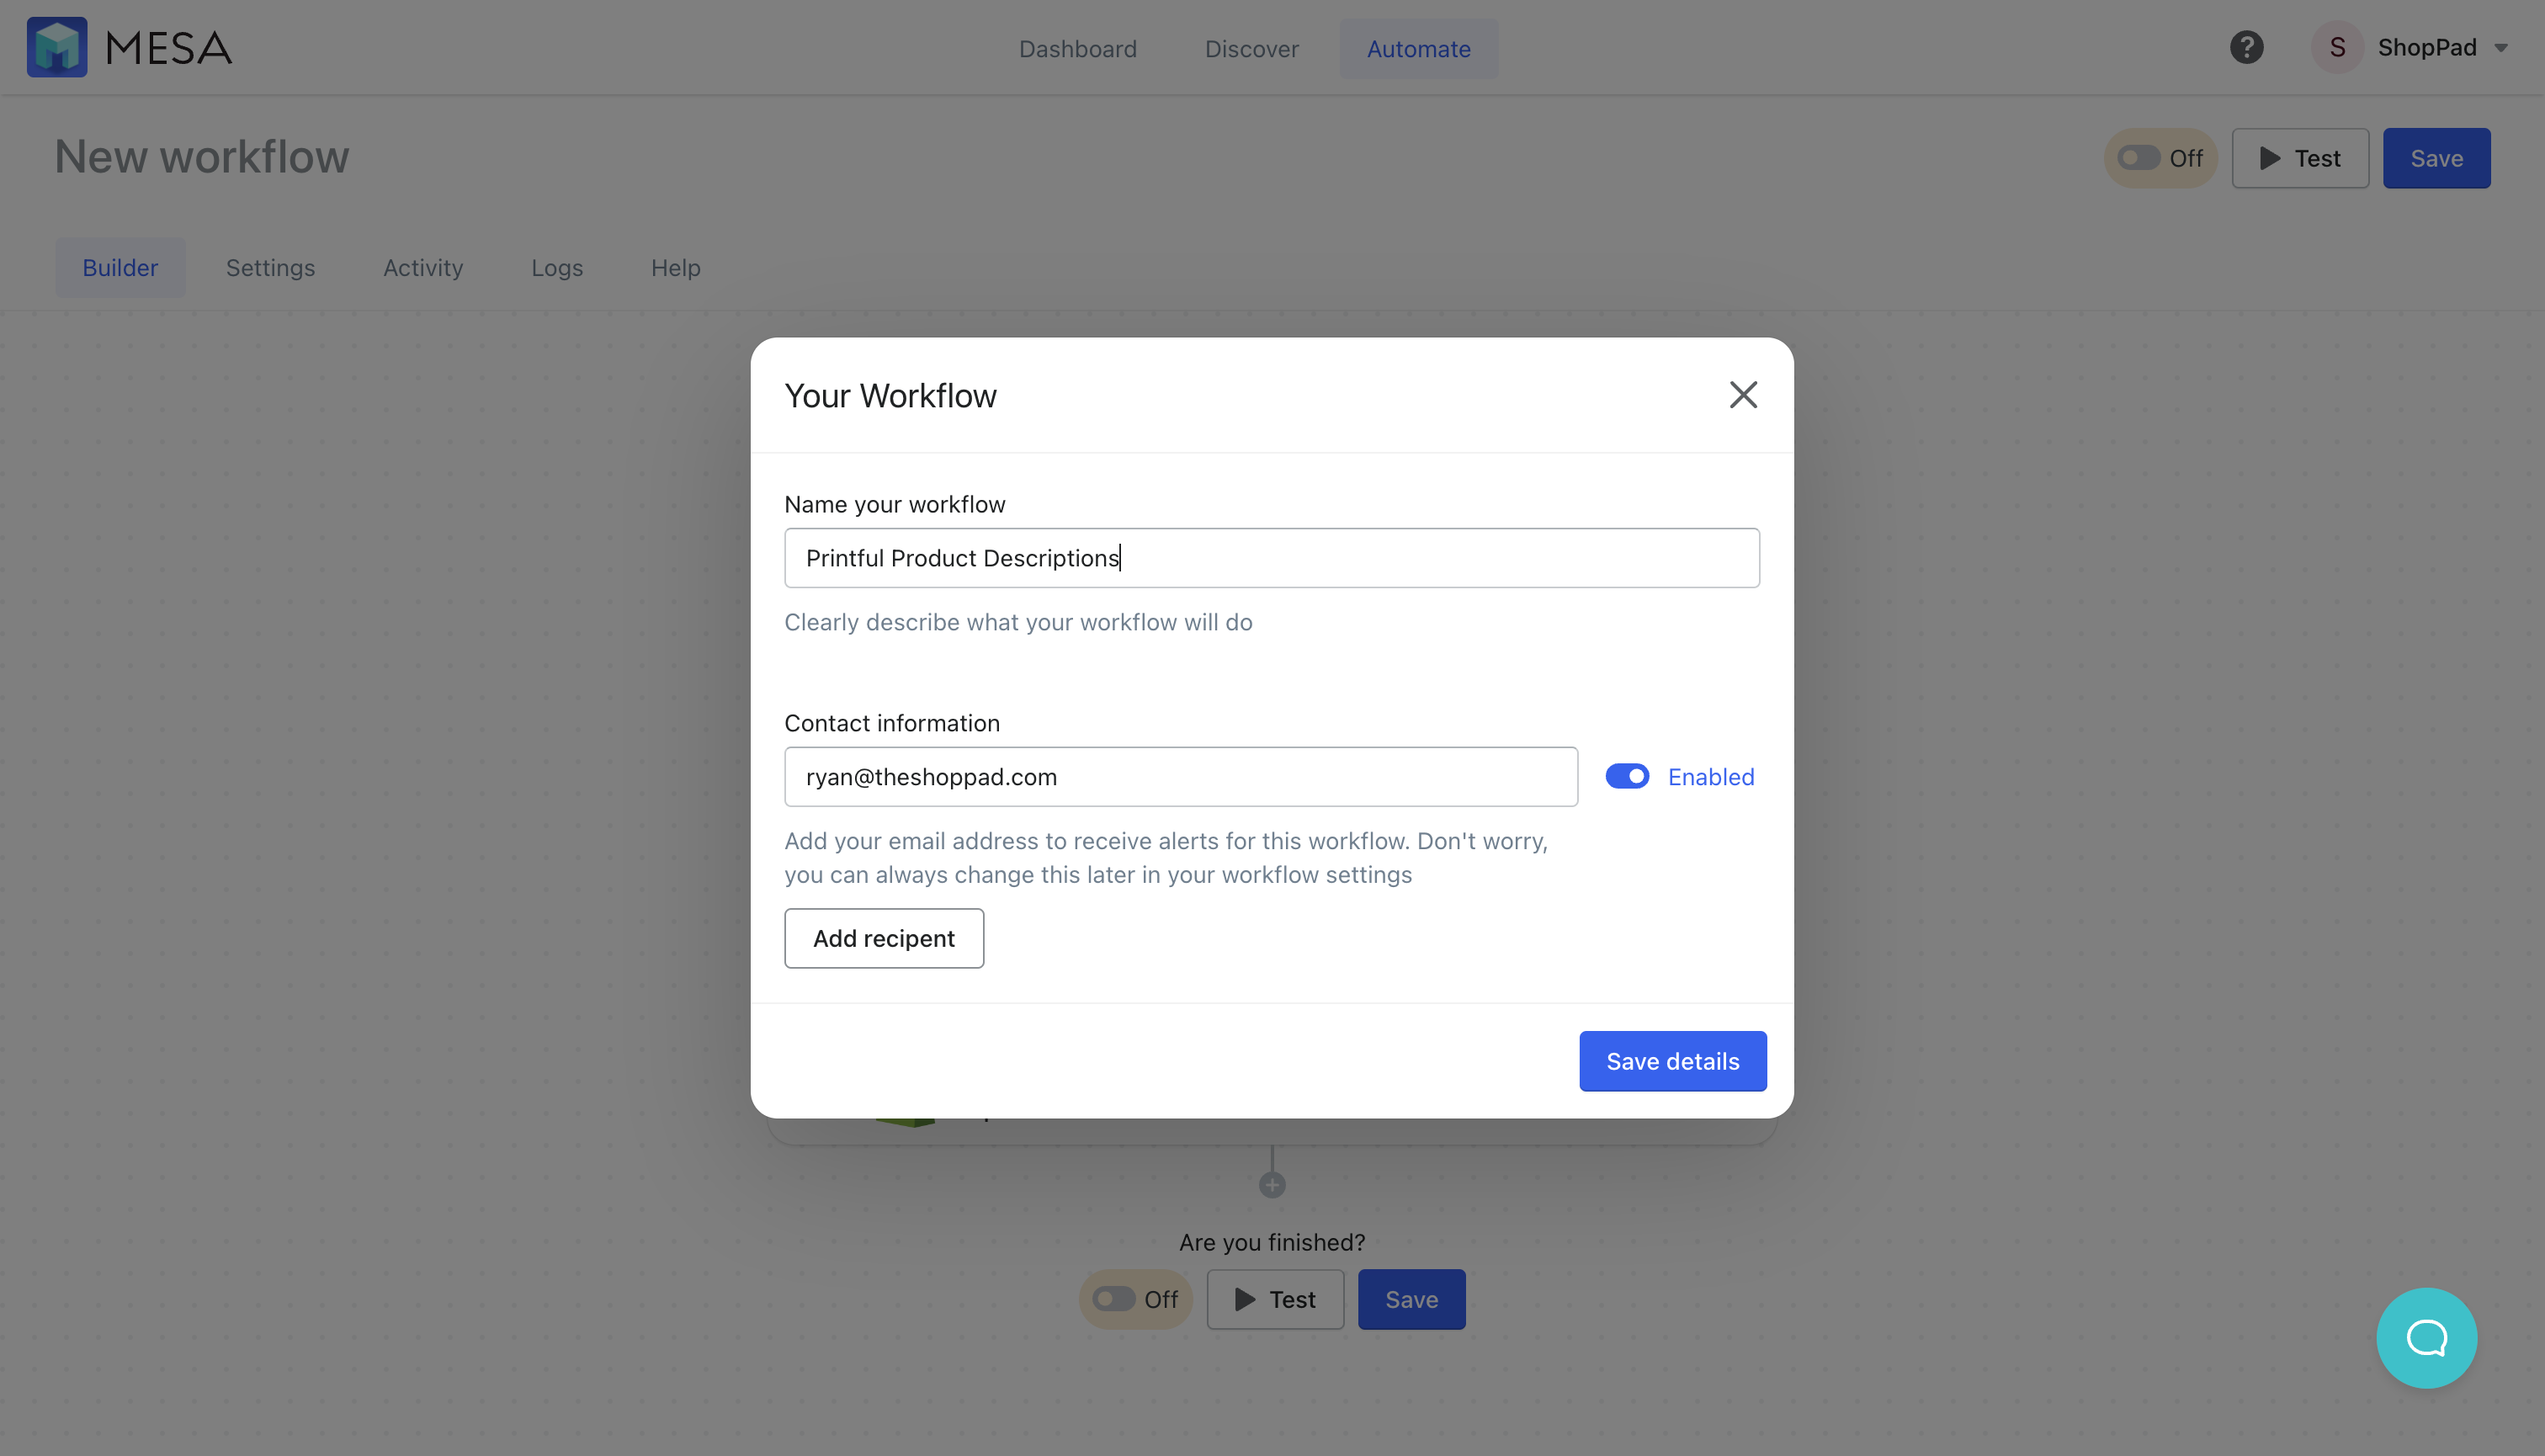
- Save then, name your workflow
When prompted, be sure to give it a unique name and update your email address to receive workflow notifications.
- Turn your workflow "On"
Be sure to turn your workflow on. Congrats! You're done.
Save yourself the setup. Use this template instead:
See this workflow in action:
Workflow wrap-up
In summary, you can make product descriptions that are captivating and concise in as little as a couple of clicks. Imagine producing creative and accurate descriptions quickly and efficiently like a machine, but with a tone of writing that resembles your own hand.
ChatGPT is an invaluable resource for businesses looking to craft short yet descriptive product descriptions, backed by the power of artificial intelligence.
So let's raise a glass (or several) and give thanks to the technology that helps us level up our product catalogs without too much fuss: from AI-generated content, all the way 'till checkout.