How to add a Shopify post purchase survey on your Order status page
by
Jen Sparks
Last updated:
October 01, 2021
One of the most effective ways to understand your customers is by asking the right questions at the right time. This is where post-purchase surveys come into play, providing a wealth of valuable data that can help you elevate your business to new heights.
Whether you’re a Shopify novice or a seasoned pro, this tutorial will offer insights that can help you make data-driven decisions, optimize your offerings, and ultimately, increase your customer satisfaction and loyalty. So, if you’re ready to harness the power of customer feedback to boost your eCommerce business, read on!
Try MESA free for 7-days and enjoy support from automation experts!
Topics:
Understanding post-purchase surveys
A post-purchase survey is a powerful tool used by businesses to gather critical feedback from customers after they’ve made a purchase. This feedback often covers aspects such as product satisfaction, customer service, shipping experience, and the purchasing process as a whole.
A post-purchase survey, as the name suggests, is conducted after a customer completes a purchase. Its primary goal is to gather information about the customer’s buying experience. The insights derived from these surveys offer a plethora of benefits. They can help you identify what you’re doing right and where there’s room for improvement. These surveys also provide an opportunity to uncover trends, improve customer retention, and even drive positive word-of-mouth referrals.
Key components of an effective post-purchase survey
While the questions in your survey will depend on your specific goals, there are some common elements that make up an effective post-purchase survey:
Relevant and Specific Questions: The questions should be relevant to the purchasing and product usage experience. For instance, asking about the ease of the checkout process, product satisfaction, or delivery experience.
Different Types of Questions: A good mix of open-ended and closed-ended questions can provide both qualitative and quantitative feedback. While closed-ended questions can help identify patterns and quantify customer satisfaction, open-ended questions can provide rich insights and uncover issues you may not have been aware of.
Rating Scale Questions: Questions based on a rating scale (like the Net Promoter Score question, “On a scale of 0-10, how likely are you to recommend our product/service to a friend?”) can help you measure and track customer satisfaction over time.
Easy and Quick to Complete: The survey should be straightforward and quick to complete, ideally taking no more than a few minutes.
Anonymity: Providing an option to answer anonymously can help you gather honest feedback, as customers may feel more comfortable sharing their real thoughts.
By understanding the purpose of post-purchase surveys and the elements that make them effective, you can start to create a survey that delivers valuable, actionable feedback for your Shopify store.
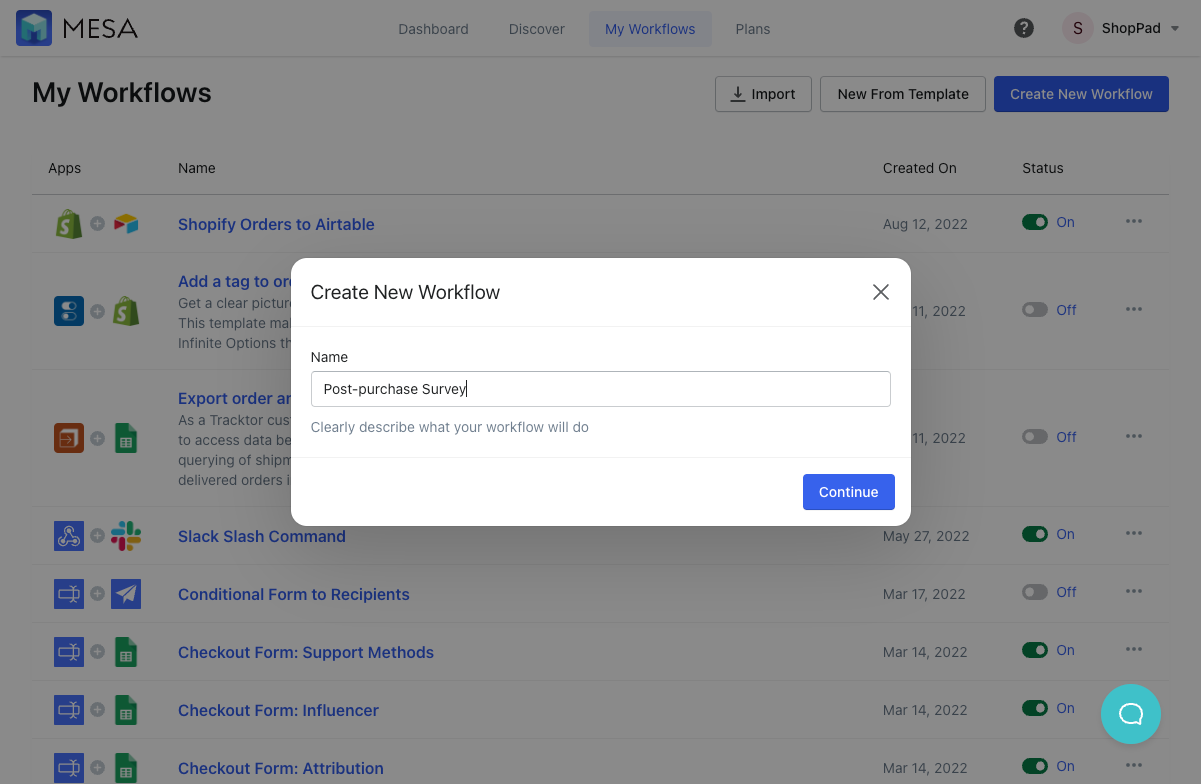
On your MESA dashboard, click the Create New Workflow button.
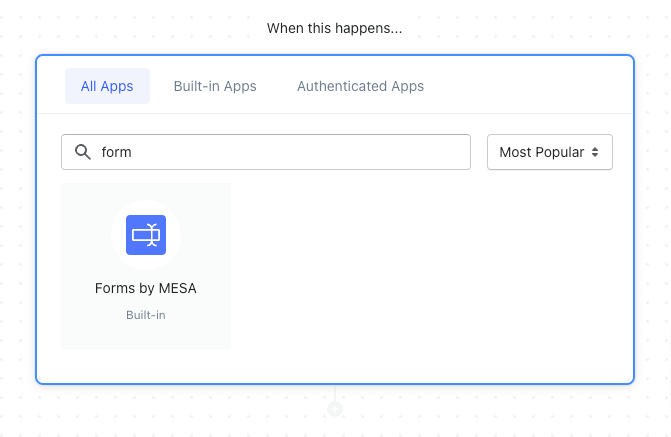
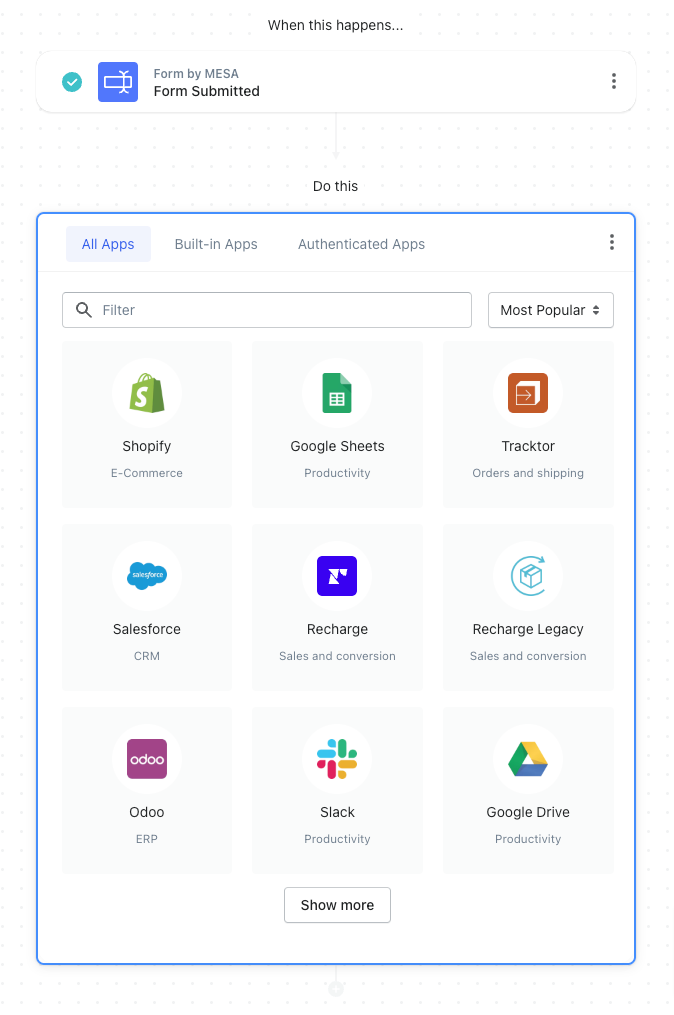
Next, choose Forms by MESA to start the workflow.
Afterward, click the Forms by MESA icon under When this happens, which is the first step in your workflow.
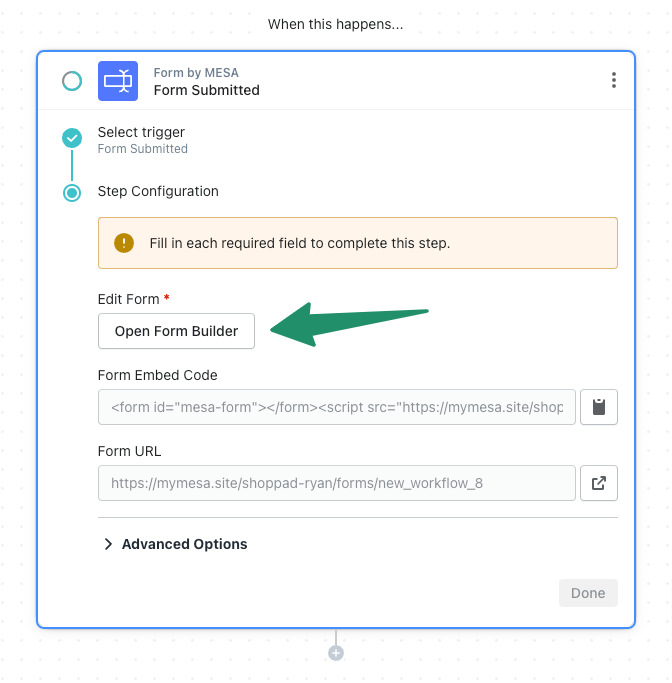
Next, open the Form Builder.
You can build a form from scratch using the Form Builder. Click the Open Form Builder button to start editing your form.
Additionally, more details can be found on Knowledge Base.
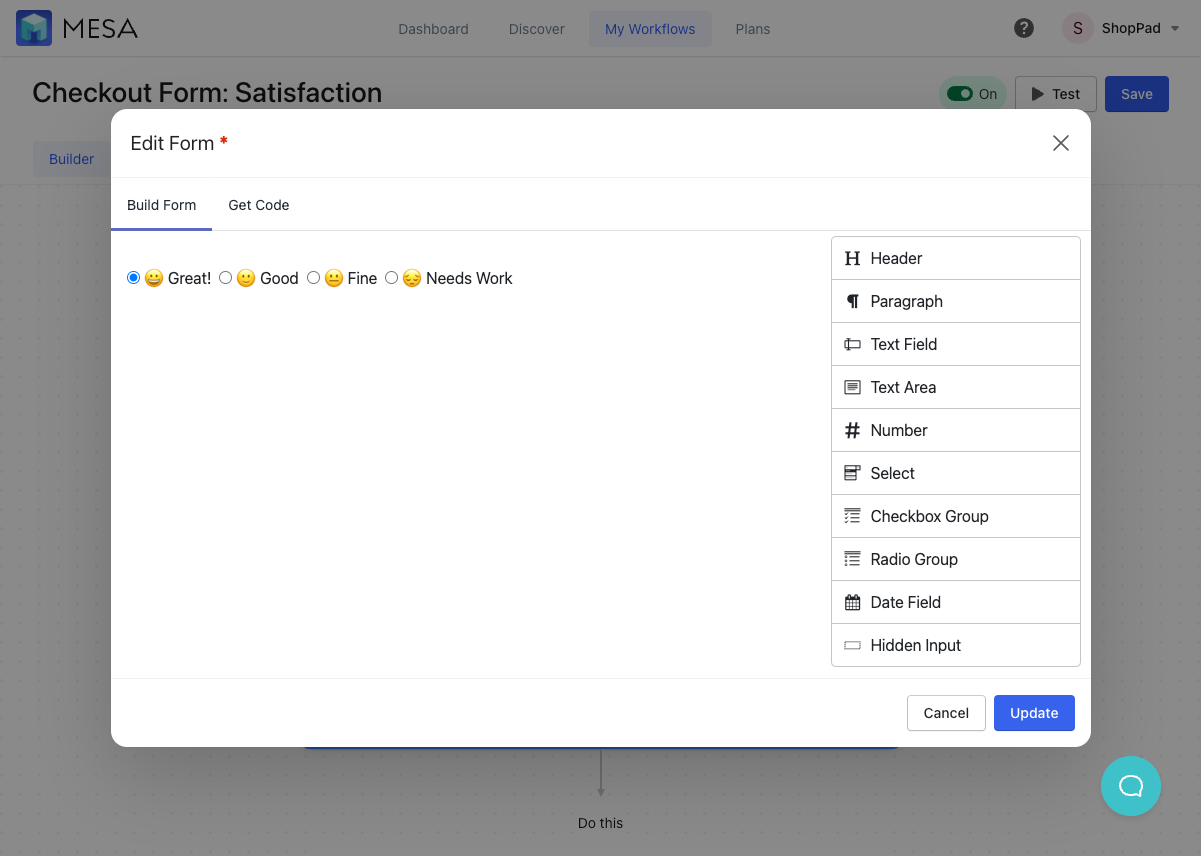
Next, create your form fields.
Use the right-hand column to choose different field types. You can drag and drop different fields on your form and tailor it as you wish.
Specifically, a common one to use is the Radio Group option, which will allow you to ask a question and provide various options to choose from.
Next, click the Update button when complete.
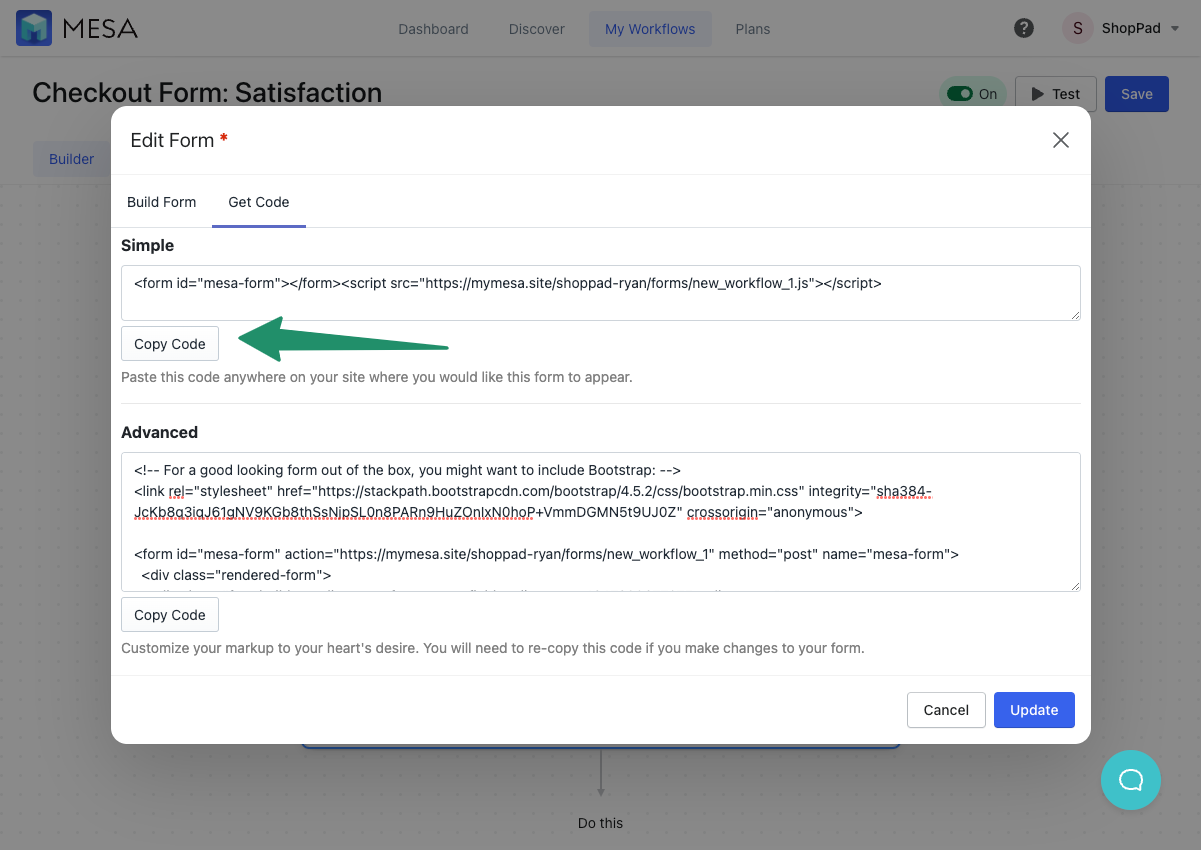
Next, copy the Form Code
Before proceeding, you need to copy the embed code which you’ll need to reference in the next step(s).
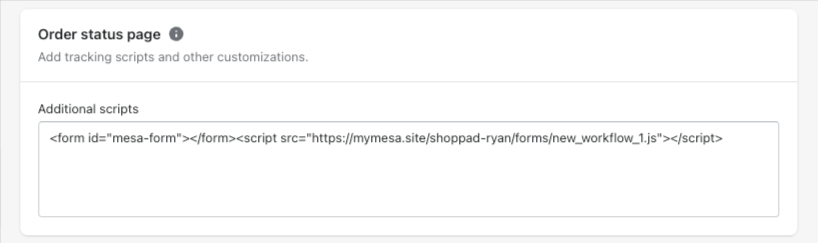
Option 1: Basic setup of Order Status page
Surely, the easiest way to add your post-purchase survey to your Shopify store is to place the Form Code directly onto your checkout settings.
First, click Settings in the lower left-hand corner of your Shopify admin, and then click the Checkout icon.
Then, under the Order Status page section, you’ll want to update the Additional Scripts with your Form Code.
It’s that simple!
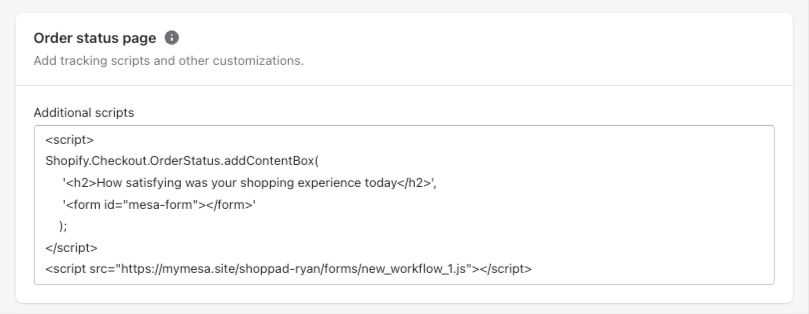
Option 2: Advance setup of Order Status page
Alternatively, if you’d like your form to look seamless with the Order Status page, this next step is for you. It’s similar to the previous step, but with a few more additional details.
First, under the Additional Scripts section, you’ll want to update the Order Status page with the code below.
Important, be sure to change the H2 text and the full path of the JS file to match what you set up for your form.
<script>
Shopify.Checkout.OrderStatus.addContentBox(
     '<h2>How satisfying was your shopping experience today</h2>',
     '<form id="mesa-form"></form>'
    );
</script>
<script src="https://mymesa.site/your-uuid/forms/new_workflow_1.js"></script>
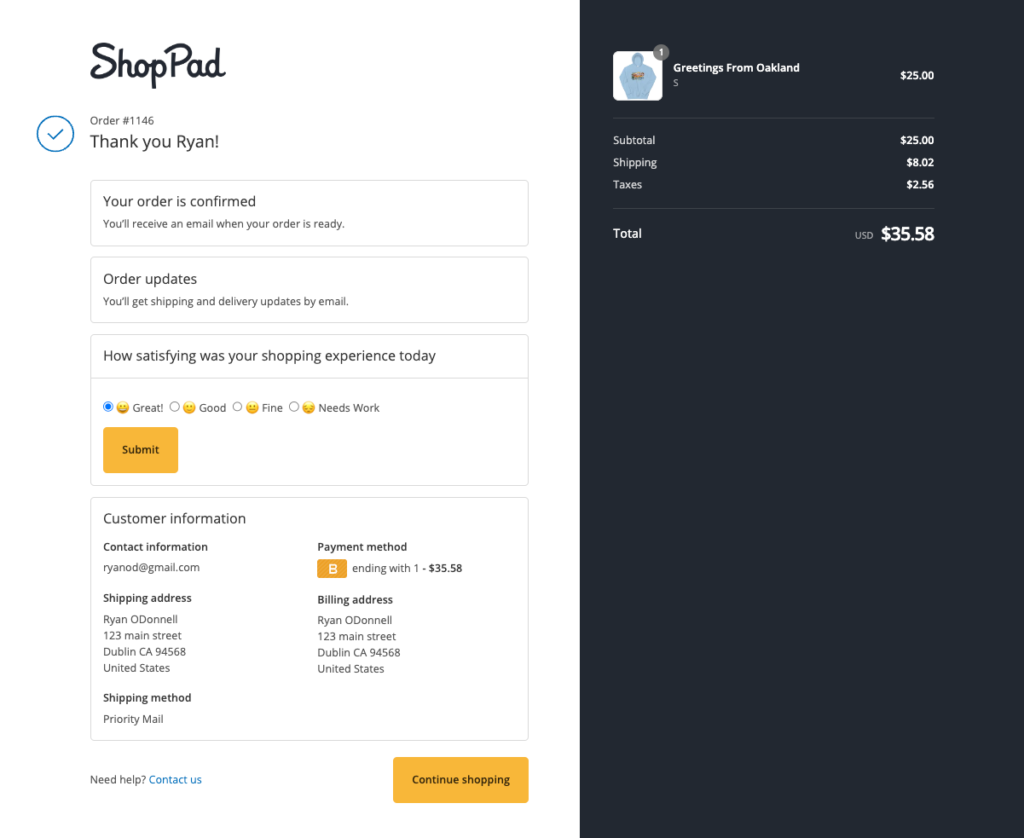
As a result, this is what the survey would look like on the order status page after checkout using the Advanced Option.
Shopify Order Status Post Purchase Survey
How to save post-purchase form responses
Now, what to do with form submissions?
Luckily, you have plenty of options.
Add another step in the workflow that captures the form data and stores it somewhere.
Shopify Post purchase survey workflow action
Maybe you’d like to have everything go to a Google Sheet. Or perhaps, you’d like to send a team Slack every time a submission happens.
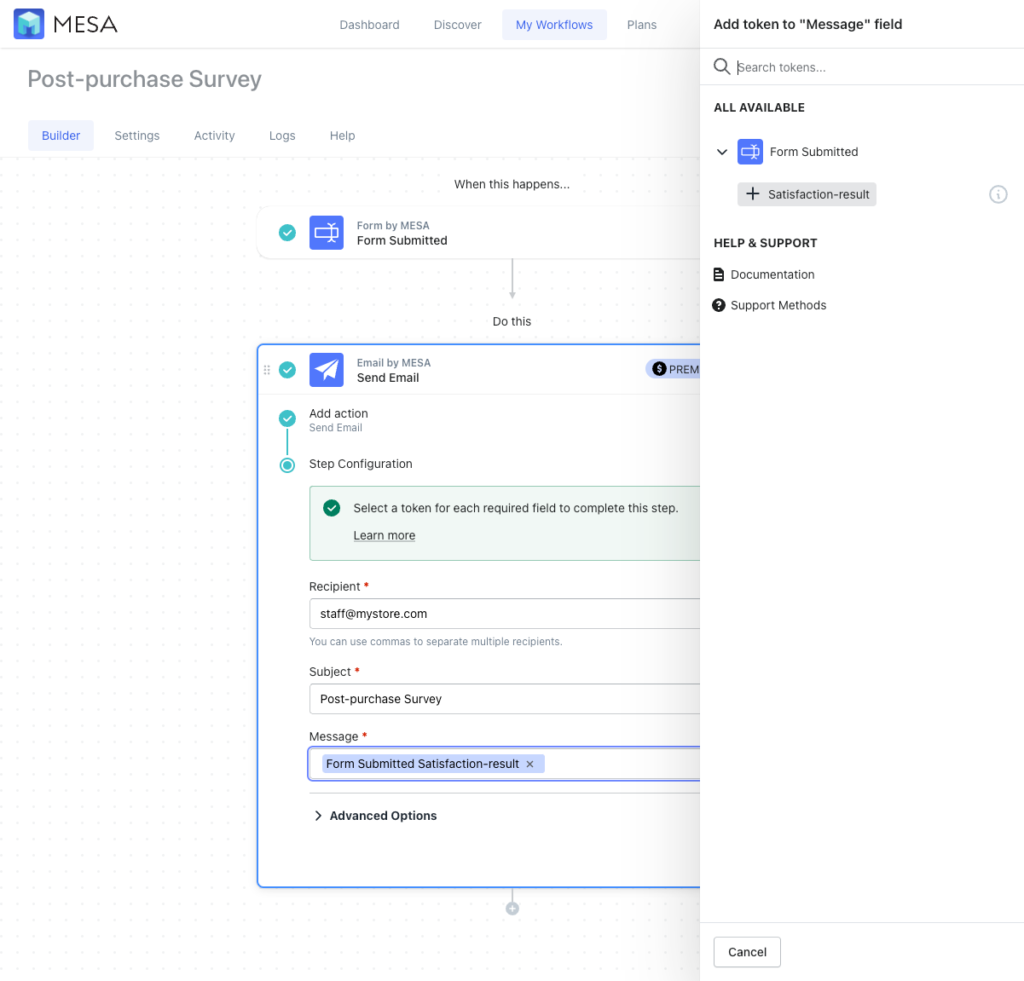
However, the simplest option would be simply to email the results.
Next, click the { + } icon for each field to bring over the data from each respective form field.
Email by MESA
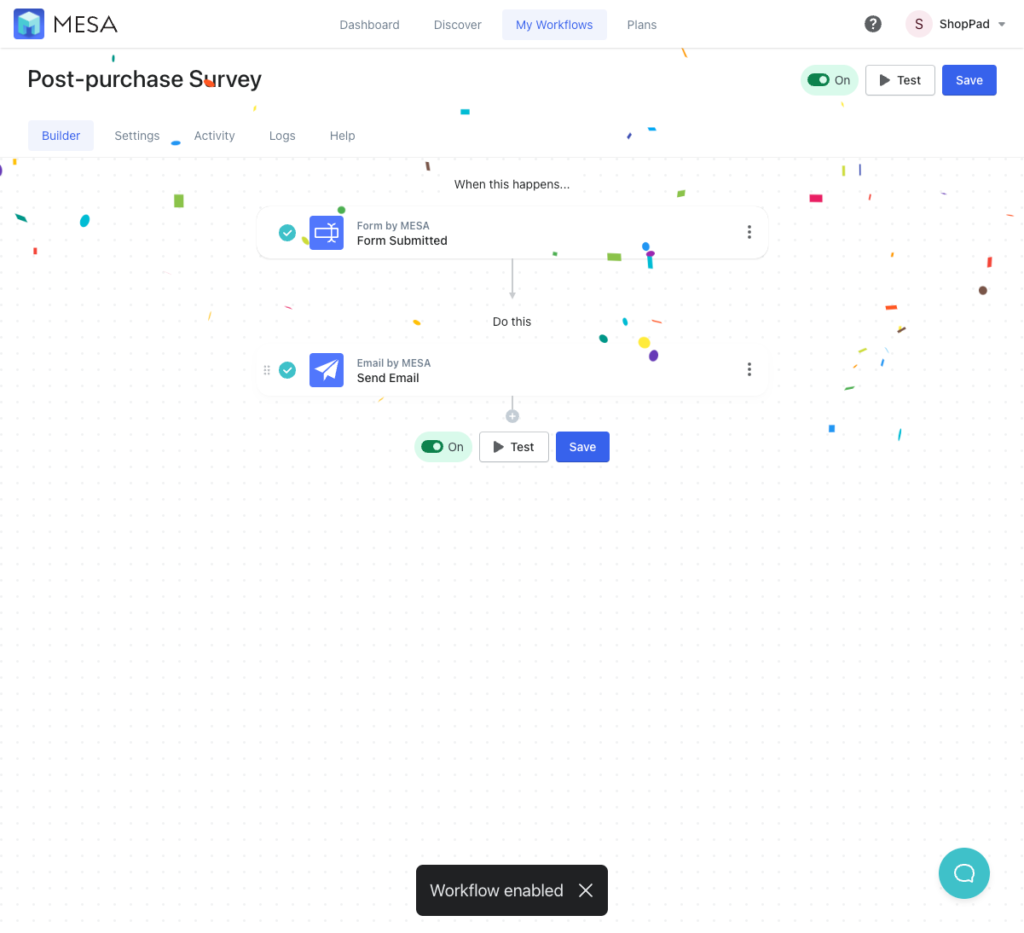
Lastly, Save and Enable your automation.
Be sure to click the “Save” button and turn your automation to “On”. Then, your automation will run every time your Shopify post purchase survey is submitted. Consequently, MESA will proudly celebrate your achievement by popping confetti in your honor. Congratulations!
Shopify post purchase survey to email automation
Tips to increase survey participation
To glean the most meaningful insights from your post-purchase surveys, it’s critical to garner a substantial participation rate. However, given that your customers are often busy and have little extra time, it might prove challenging to engage them in surveys. Fortunately, a few strategic measures can considerably enhance your survey participation. Let’s explore these tactics:
Keep Your Survey Short and Straightforward:
Lengthy surveys are a major deterrent for customers. Aim to keep your survey concise, focusing on the most critical aspects of the customer experience. Ensure that the survey questions are clear and easy to understand, minimizing the effort needed to complete them.
Provide Incentives for Completing the Survey:
Offering a small incentive can greatly increase the response rate. This could be a discount on the next purchase, a small freebie, or even entry into a draw for a larger prize. Make sure to clearly communicate this incentive at the beginning of the survey to pique their interest.
Time Your Survey Correctly:
The timing of the survey can greatly impact participation. It’s usually best to send it immediately after purchase when the experience is fresh in the customer’s mind. However, for products that require some usage before customers can accurately assess them, it may be beneficial to delay the survey until they’ve had time to use the product.
Personalize the Survey Request:
A personalized request can make the customer feel valued and more inclined to help. Use their name, reference their purchase, and explain why their feedback is essential to improving their future experiences with your business.
Make the Survey Mobile-Friendly:
With an ever-increasing number of customers using mobile devices for online shopping, ensuring your survey is mobile-friendly is crucial. This makes it easy for customers to provide feedback whenever and wherever it’s most convenient for them.
By implementing these strategies, you’ll be well on your way to increasing your survey response rate and gaining invaluable insights from your customers. Remember, every piece of feedback brings you one step closer to providing a better shopping experience that keeps customers coming back for more.
Workflow wrap up
Now, every time you receive a form submission, you can receive an email with the results.
Every step in this workflow is 100% customizable. As you can see from this tutorial if you want to adjust the formatting later, you can easily do so. Or, if you want to extend the functionality of this workflow to do more, simply add another workflow step.
What you should do now
Whenever you’re ready…here are 4 ways MESA can help you get more done:
Sign up for MESA. The best way to get started is sign up for MESA today. Every plan includes the first 7-days free so you can be assured your workflow is running properly.
Browse pre-made templates. Our customizable workflow templates are a great way to get started more quickly.
Talk to our automation experts. If you need help personalizing any workflow template, guidance how to make any automation or, simply want us to make your workflow, we can help.
If you know another merchant who’d enjoy reading this page, share it with them via LinkedIn, YouTube, Twitter, or Facebook.