How To Update Customers’ Address In Recharge When Updated In Shopify
by
Ryan ODonnell
Last updated:
November 18, 2022
Your customers have profiles across many systems used throughout your ecommerce business. As a result, keeping all of those systems in sync can be a real pain to handle manually. If they’re not updated promptly, it can lead to costly mistakes that result in lost revenue.
For subscription businesses, having accurate address details is crucial.
You need customers to get their latest subscription in a timely manner. Inaccurate address details mean increased shipping delays and or lost products. Or worse, losing the customer.
So, we’ll show you how to update customer information in Recharge any time a customer updates their address (or any other) details in Shopify.
Try MESA free for 7-days and enjoy support from automation experts!
Topics:
Watch How To Update Recharge When Customers Update Their Address In Shopify
This video tutorial shows you how to send customer address updates in Shopify to Recharge
Step-by-Step Workflow Tutorial
Time needed: 10 minutes
To get started, follow these basic steps to automatically update a customer’s address in Recharge anytime the customer is updated in Shopify.
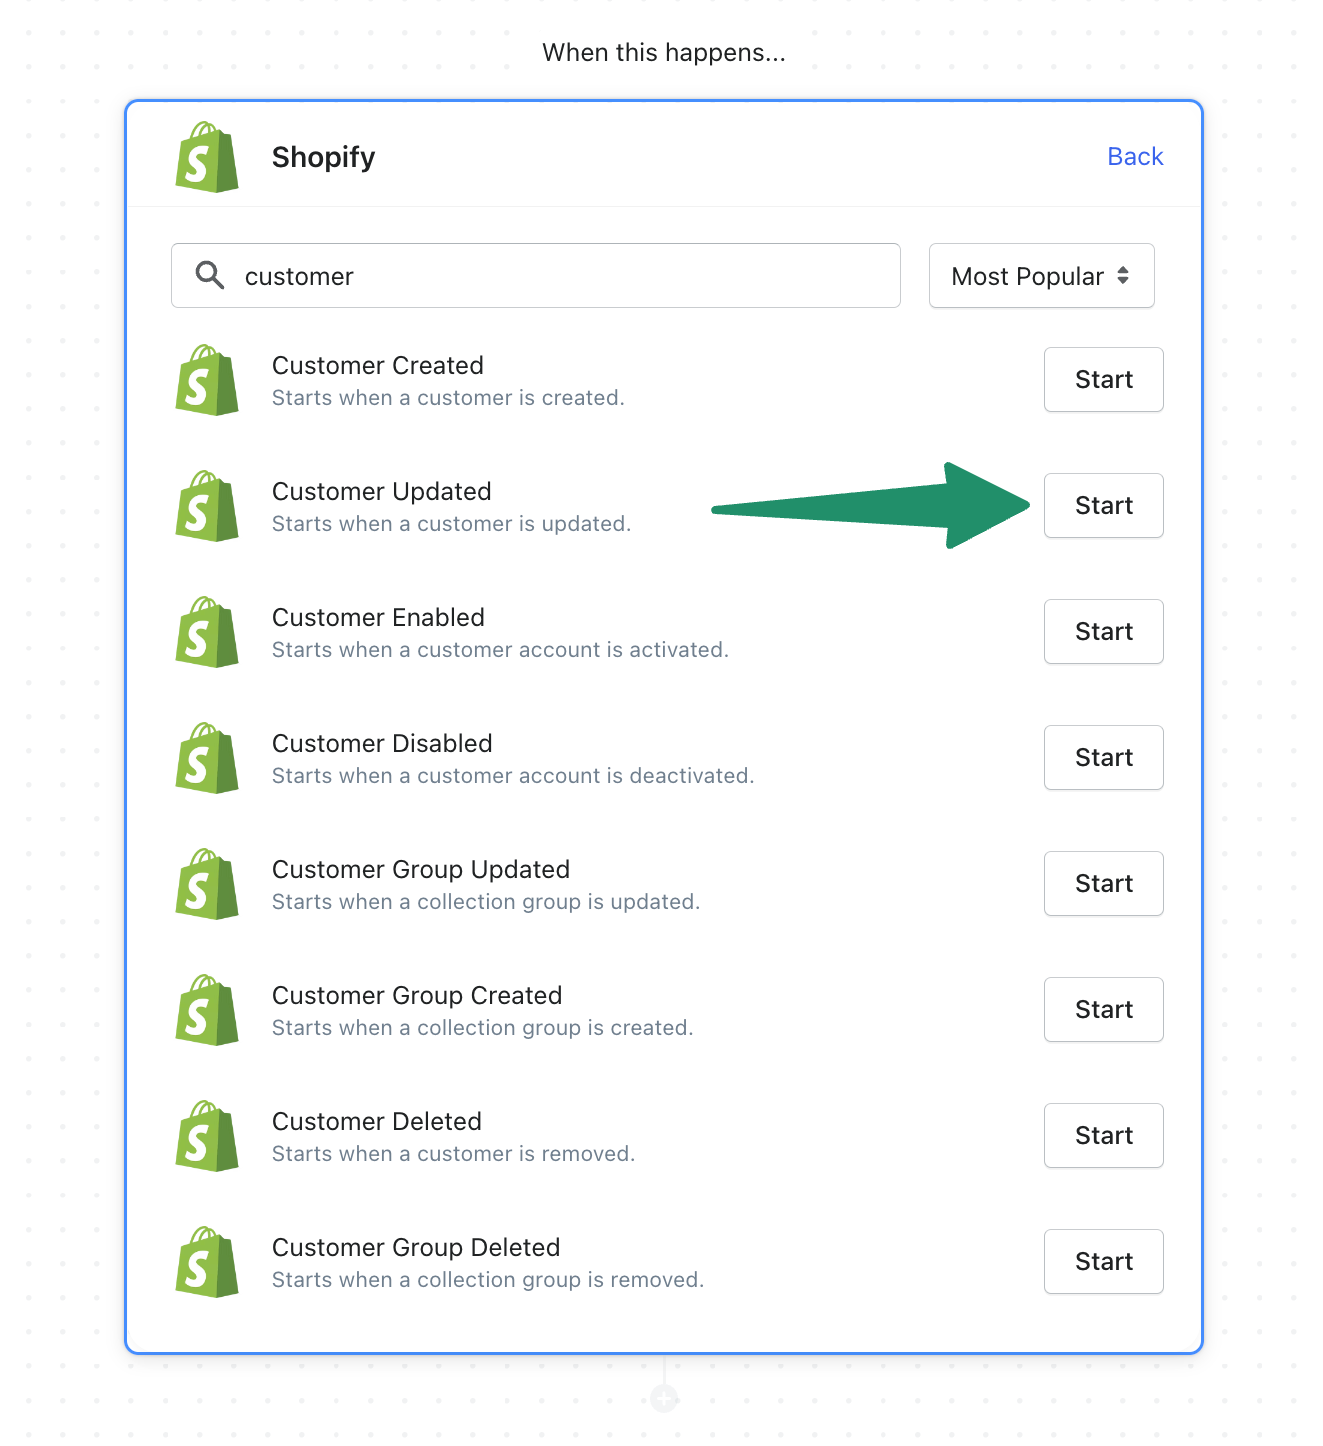
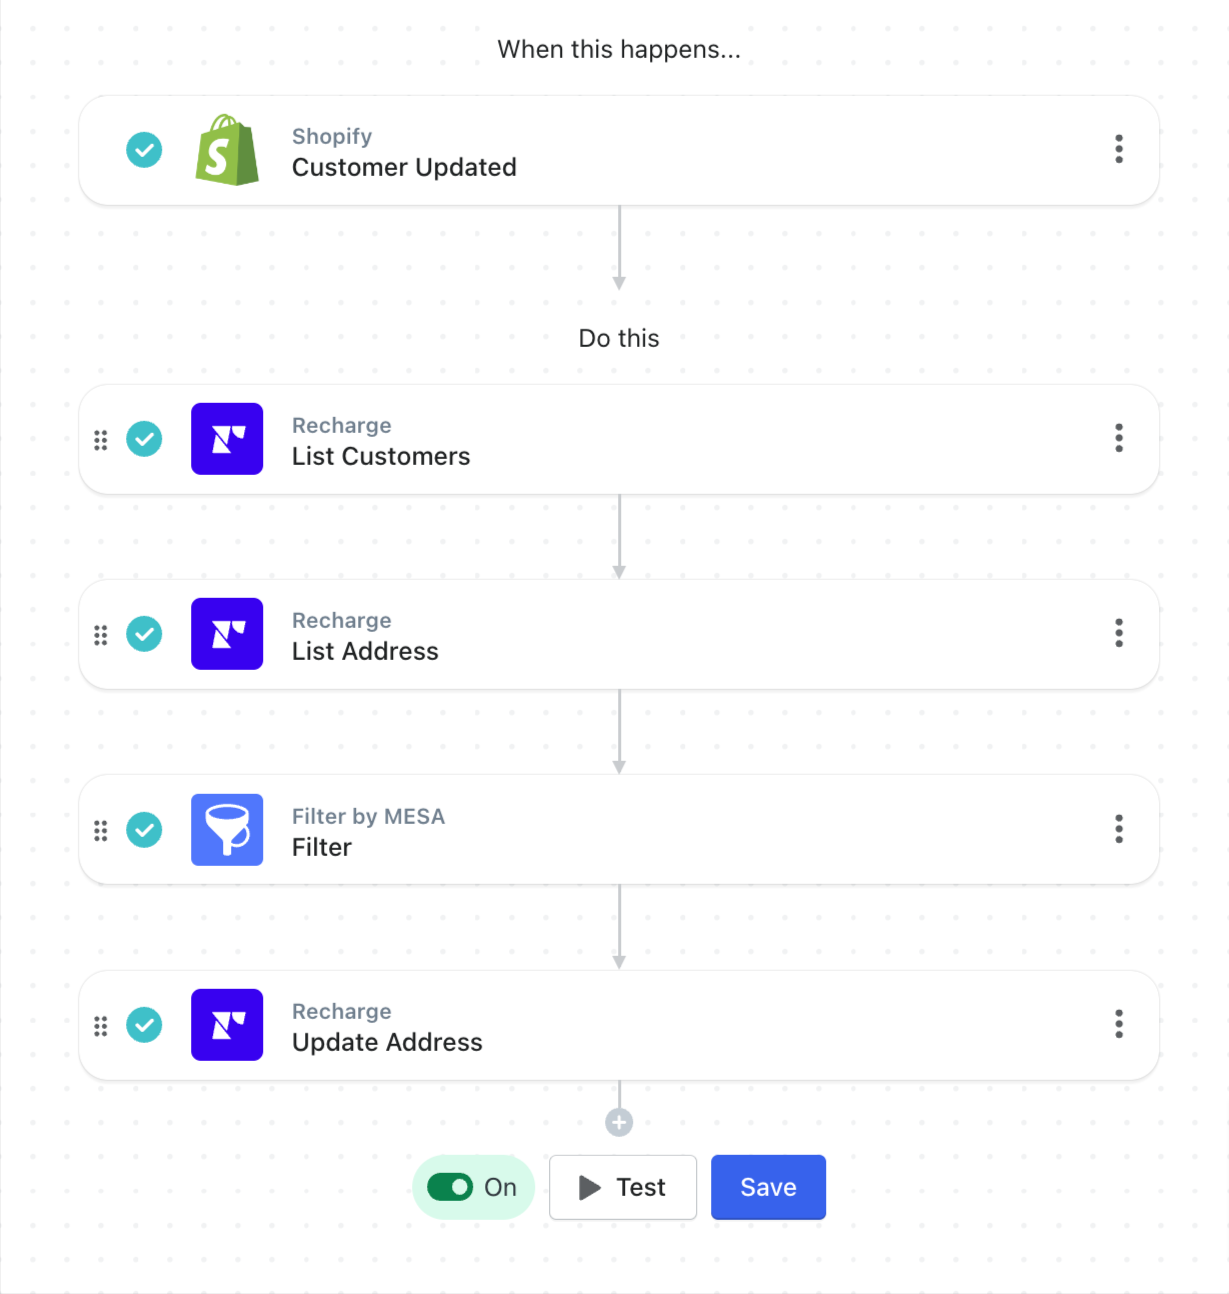
Start your workflow with the Shopify “Customer Updated” trigger event
First, select the Shopify app. Then choose the Customer Update trigger from the list.
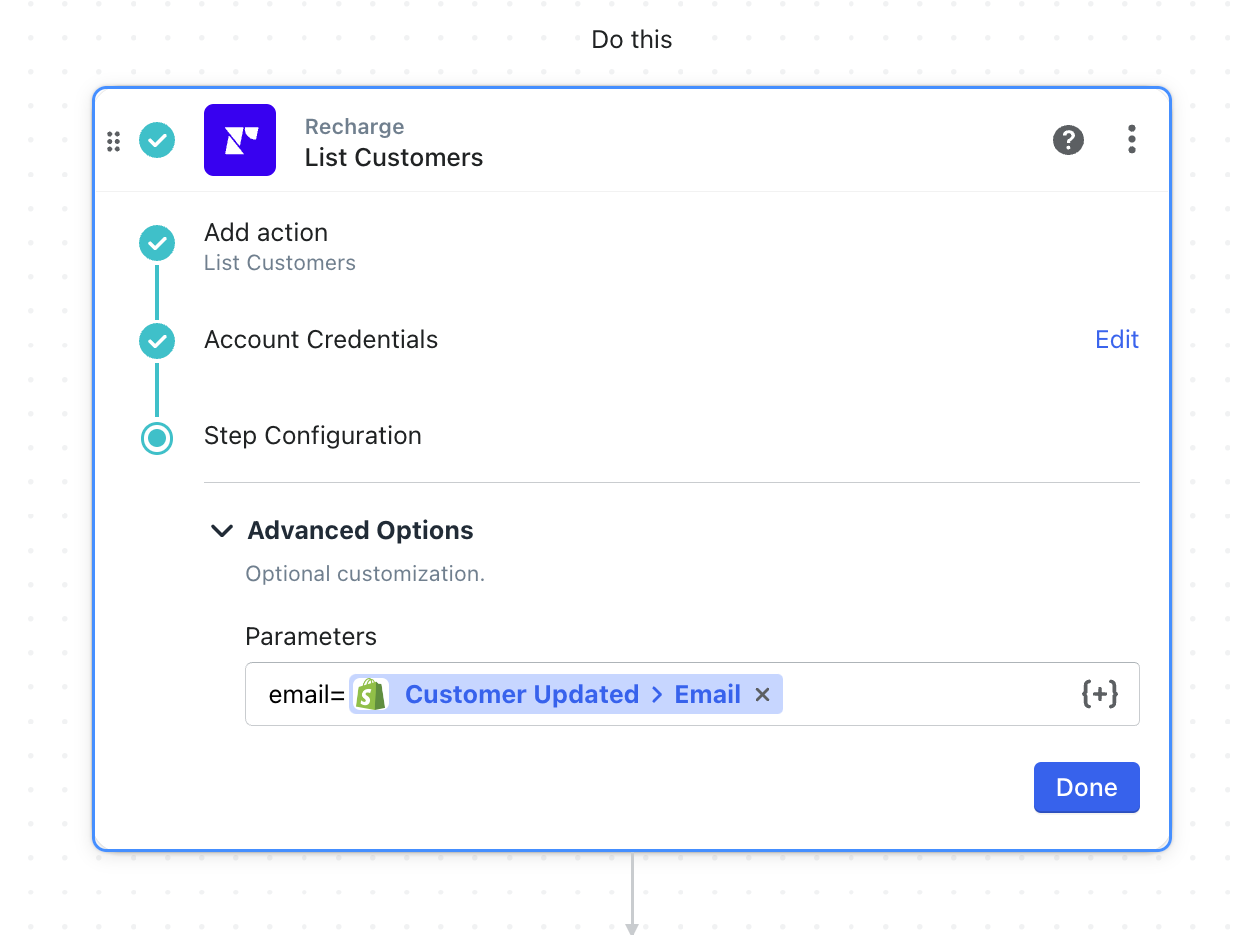
Next, choose the Recharge “List Customers” action
Recharge has customers and addresses stored separately so you have to get all the Recharge Customers and match the one you’re after based on the Shopify email address.
Use the Advanced Options to match the customer email address values.
In the Parameters field, add this code snippet: email={{shopify.email}}
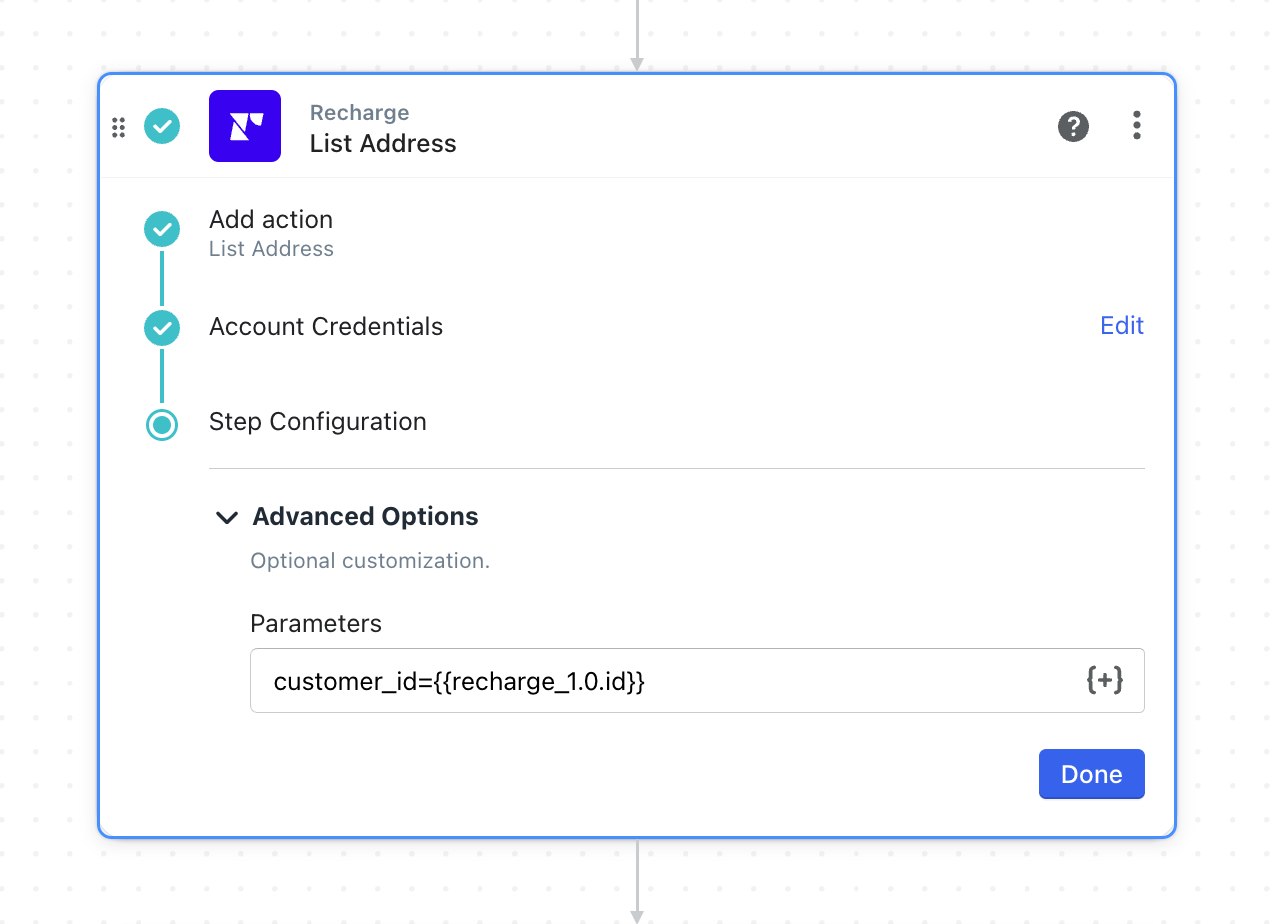
Next, choose the Recharge “List Address” action
Now that you’ve matched customer records between Shopify and Recharge, you need to get the address values from Recharge for that customer.
Again, use the Advanced Options to get the address based on the Recharge Customer ID value.
In the Parameters field, add this code snippet: customer_id={{recharge_1.0.id}}
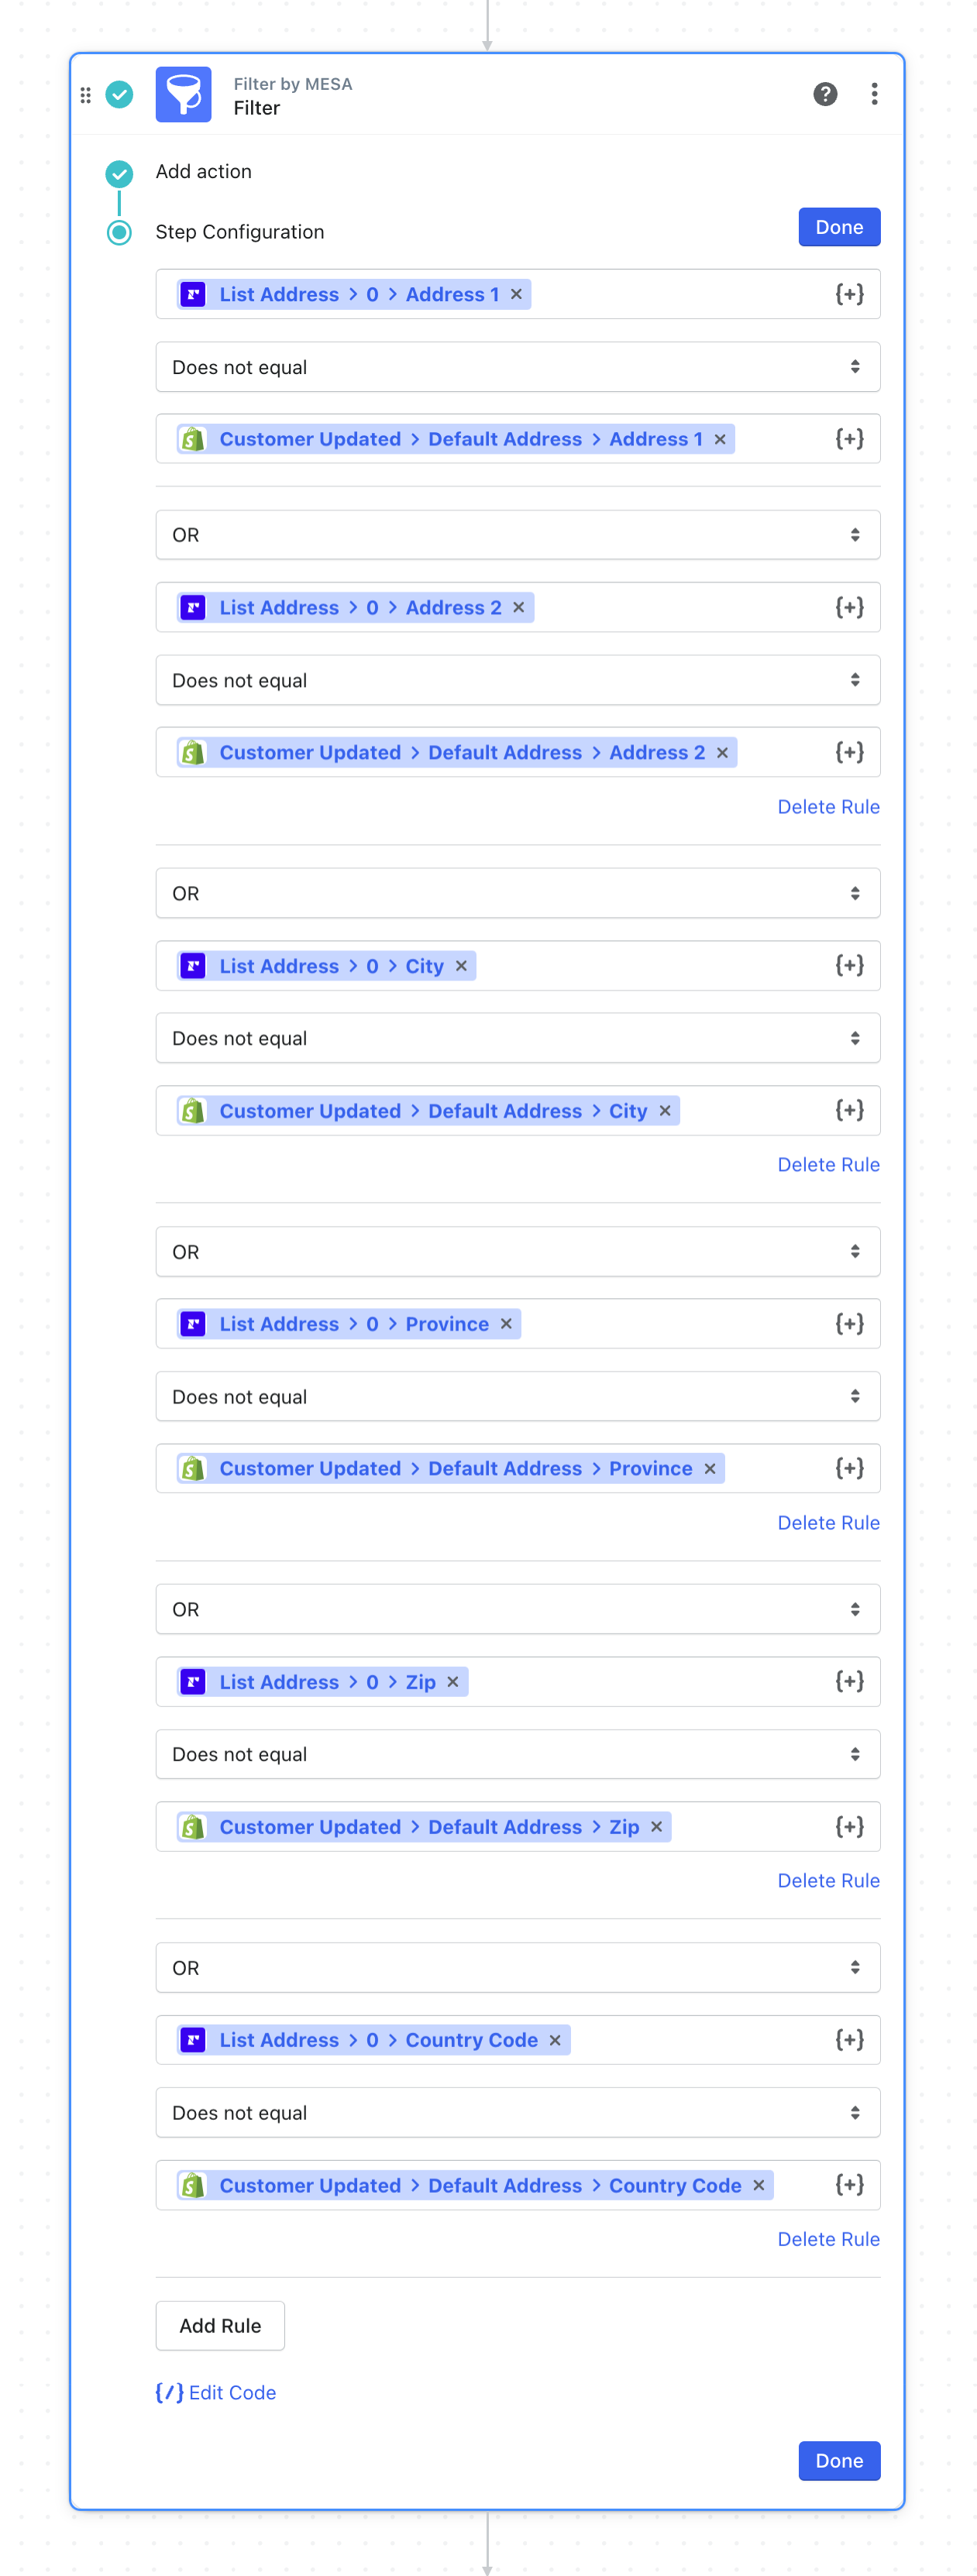
Next, add a Filter by MESA step.
This step compares the values from Shopify against the values in Recharge to see if there are any differences. If there are none, the workflow will stop. If there are differences, the workflow will proceed to the next step.
Now, use the variable selector for each field { + } to compare the data values.
Build out each rule to filter whether the Recharge address data does not equal the Shopify data.
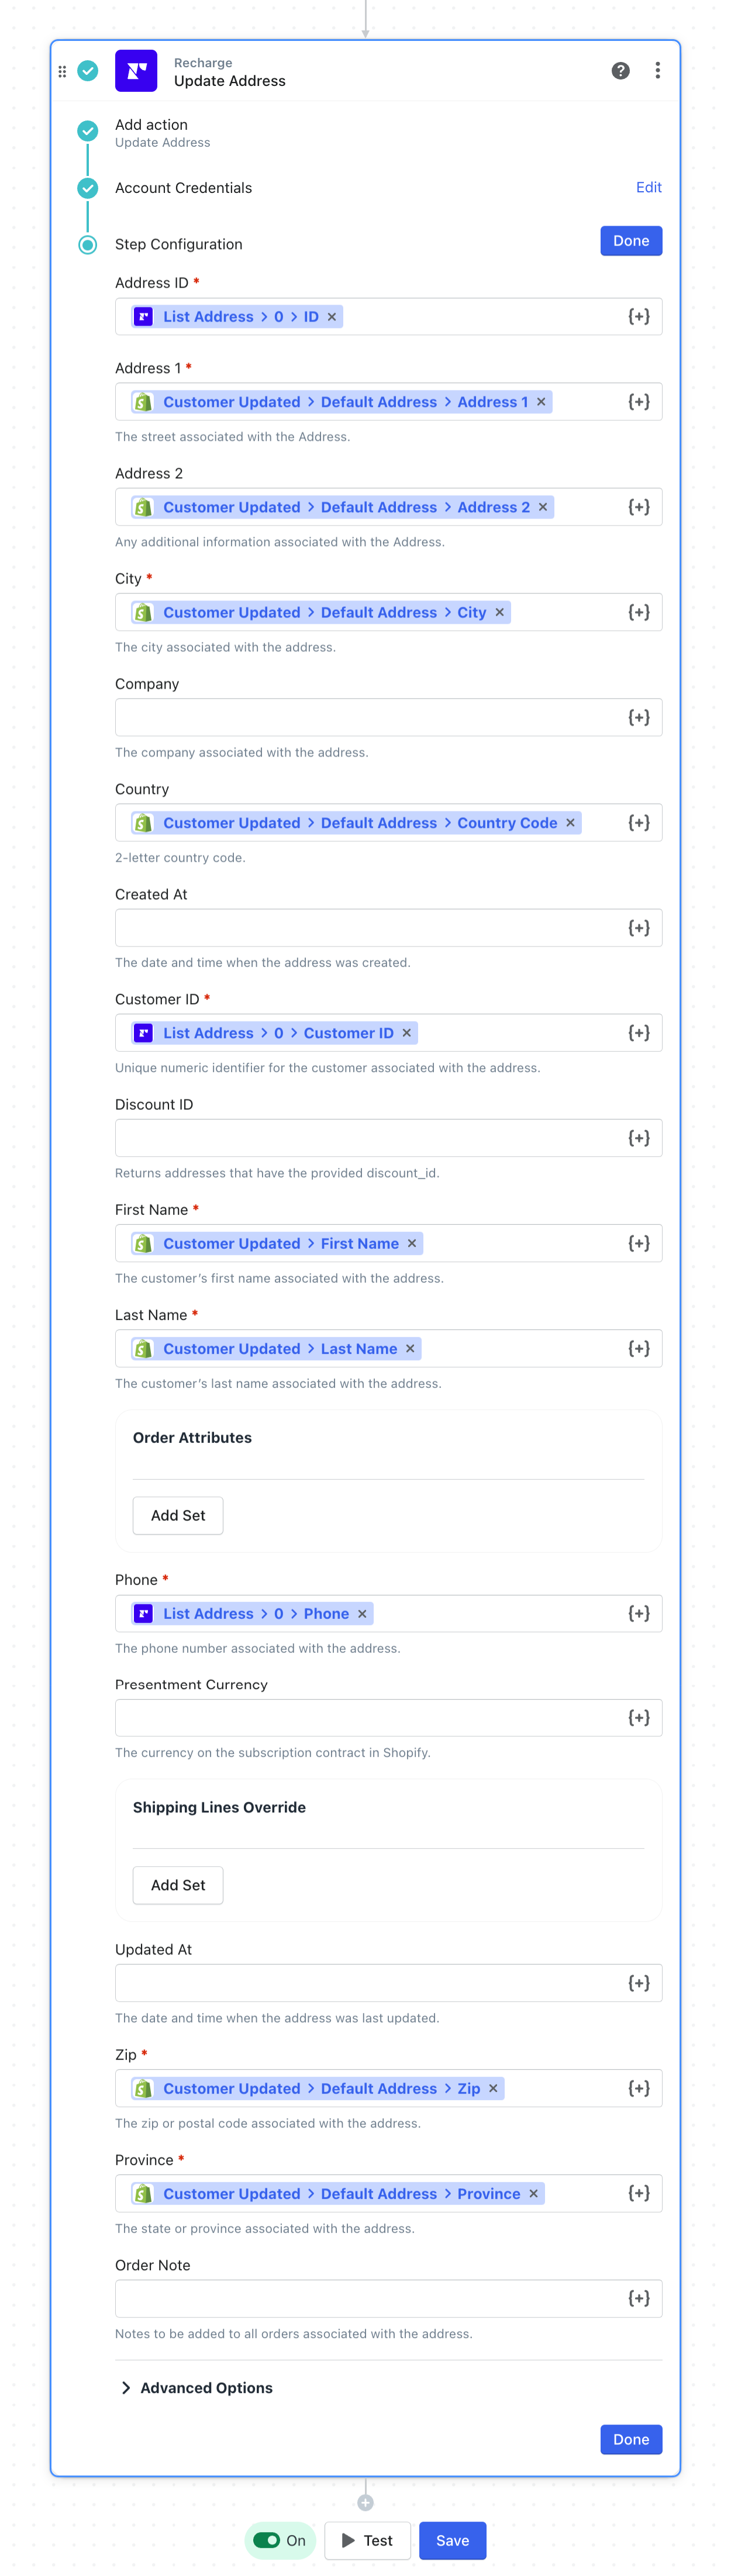
Lastly, choose the Recharge “Update Address” action
If the values from the filter step are different, then update the address in Recharge.
Again, use the variable selector { + } to select the values from the Shopify Customer Updated step and add them to the appropriate Recharge Update Address fields.
For the Address ID and Customer ID fields, map the related variables from the Recharge List Address step.
Save & Enable your workflow
Finally, after testing the workflow is setup correctly, be sure to Save and Enable your workflow.
Need Help? MESA Comes With Free Onboarding
We get it. Learning new software isn’t high on your priority list.
After installing MESA on your Shopify store, contact our Customer Success team with the task you want to automate. They will make the workflow steps for you so all that’s left to do is turn it on when you’re ready.
Related Templates
MESA even comes with pre-made templates to get you started faster.
For example, the templates below use a Schedule step so it only runs once per day against all customers updated or created. This helps keep your workflow runs to a minimum.
What you should do now
Whenever you’re ready…here are 4 ways MESA can help you get more done:
Sign up for MESA. The best way to get started is sign up for MESA today. Every plan includes the first 7-days free so you can be assured your workflow is running properly.
Browse pre-made templates. Our customizable workflow templates are a great way to get started more quickly.
Talk to our automation experts. If you need help personalizing any workflow template, guidance how to make any automation or, simply want us to make your workflow, we can help.
If you know another merchant who’d enjoy reading this page, share it with them via LinkedIn, YouTube, Twitter, or Facebook.