How to export Shopify orders to Google Sheets when they’re delivered
Using MESA, this tutorial will show how to export Shopify orders and fulfillment details from the order tracking app, Tracktor, into Google Sheets in a few quick steps. Since Shopify isn’t aware of fulfillment status, we need to use the Tracktor app to start this workflow, not Shopify. However, another great tutorial is learning how to simply export orders from Shopify to Google Sheets if that’s all you’re after.
Try MESA free for 7-days and enjoy support from automation experts!
Start with the pre-made workflow template:
Step-by-step instructions: Export Shopify orders to Google Sheets
Time needed: 15 minutes
These step-by-step instructions will connect Shopify fulfillments to Google Sheets. Install MESA on your Shopify store before proceeding.
- First, add the workflow template
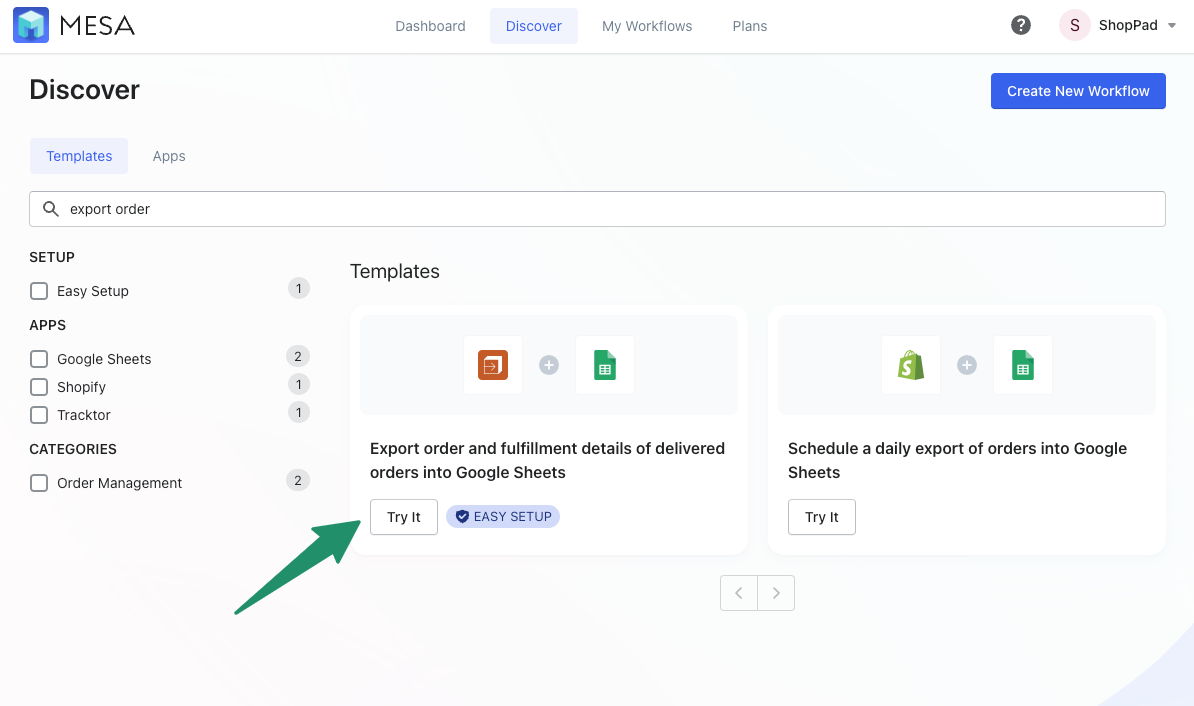
From the MESA Discovery tab, type in “export order” in the search field and select the template from the drop-down menu.
- Next, add your Google Sheets credentials
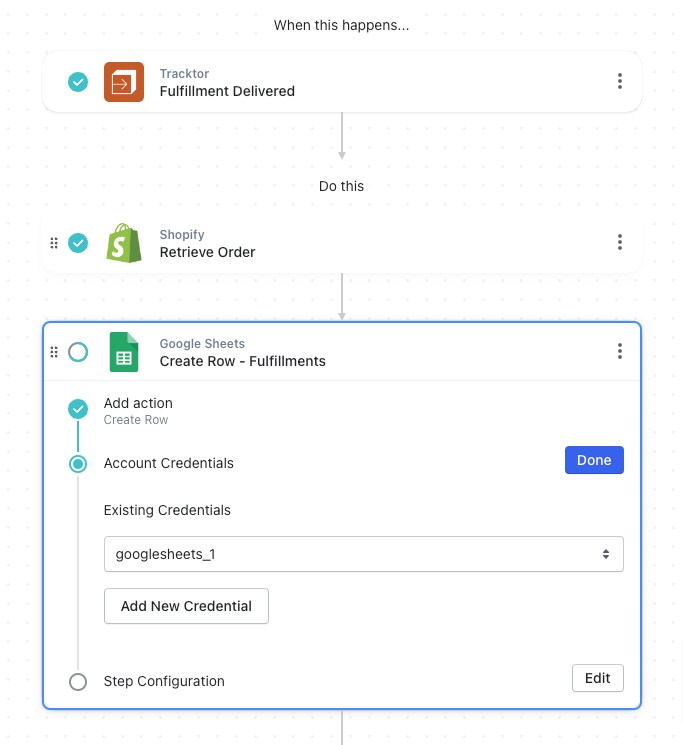
Select from the dropdown list or click the Add New Credential button to save your login details.
- View and Copy this Google Sheet sample file
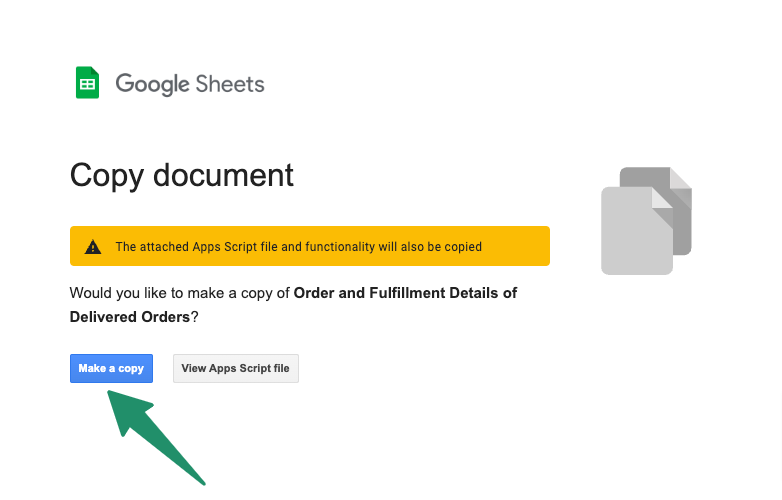
View this Google Sheet and make a copy to your Google Sheets account.
- Optionally, change the title of your sample Google Sheets file.
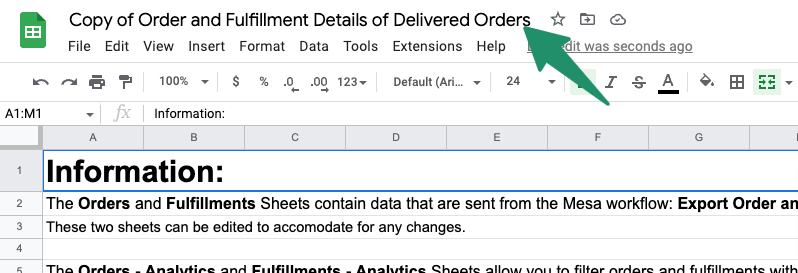
Now might also be a good time to change the title of your Google Sheet from “Copy of Order and Fulfillment Details of Delivered Orders,” to something more specific to your brand. You’ll need to reference it later.
- Return to your workflow, choose the newly copied Google Sheets file for Fulfillments.
Under the Google Sheets – Create Row – Fulfillments step, select the existing file that was just copied to your account and choose Fulfillments on the Sheet Name field. Click Done when completed.
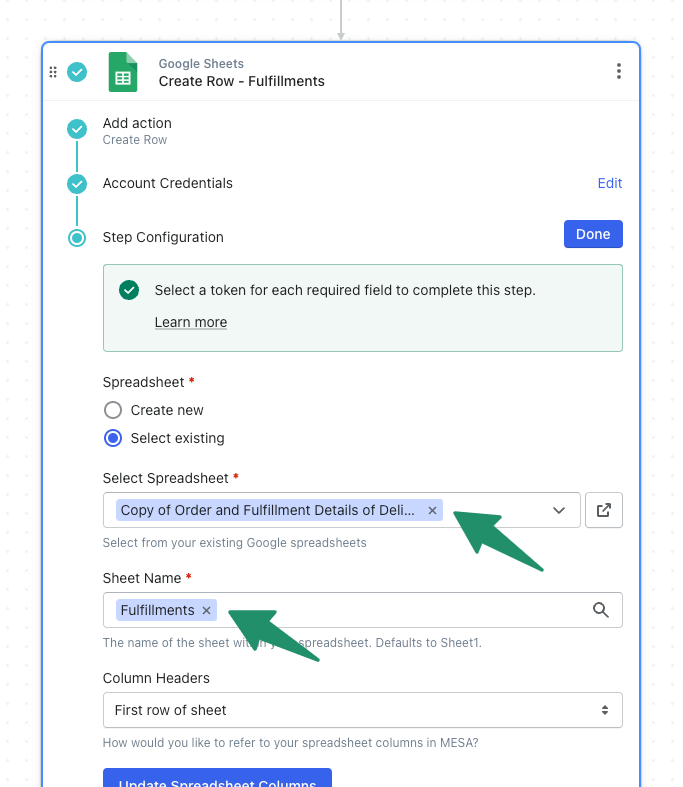
- Next, choose the newly copied Google Sheets file for Orders
For the Google Sheets Create Row – Orders step, you’ll need to do similar to what you did for Google Sheets Create Row – Fullfilments, except this time you’ll input “Orders” for the Sheet Name*.
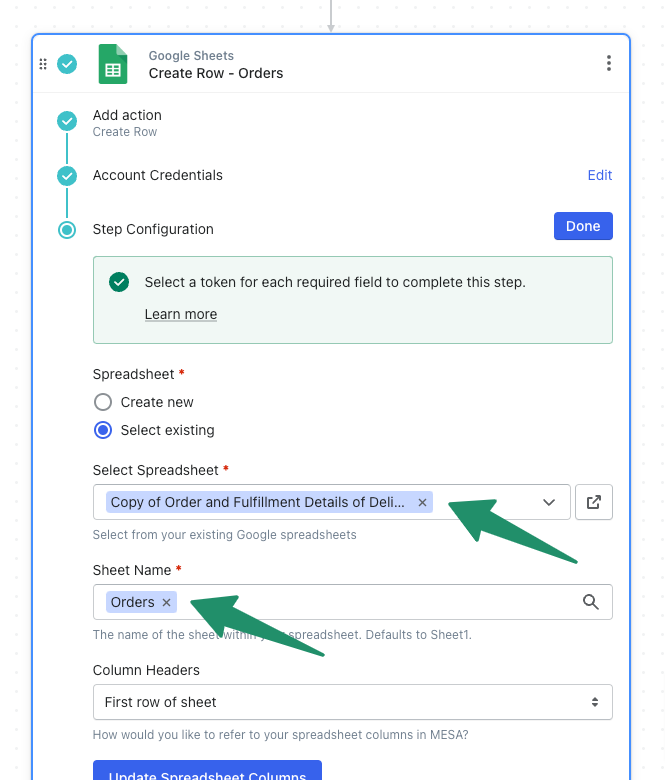
- Lastly, Save and Enable your automation.
Click the “Save” button to keep the existing or any optional configuration changes to this workflow.
Finally, be sure to enable this automation by turning it “On” so this automation runs every time a new fulfillment status is updated. MESA will proudly celebrate your achievement by popping confetti in your honor. Congratulations!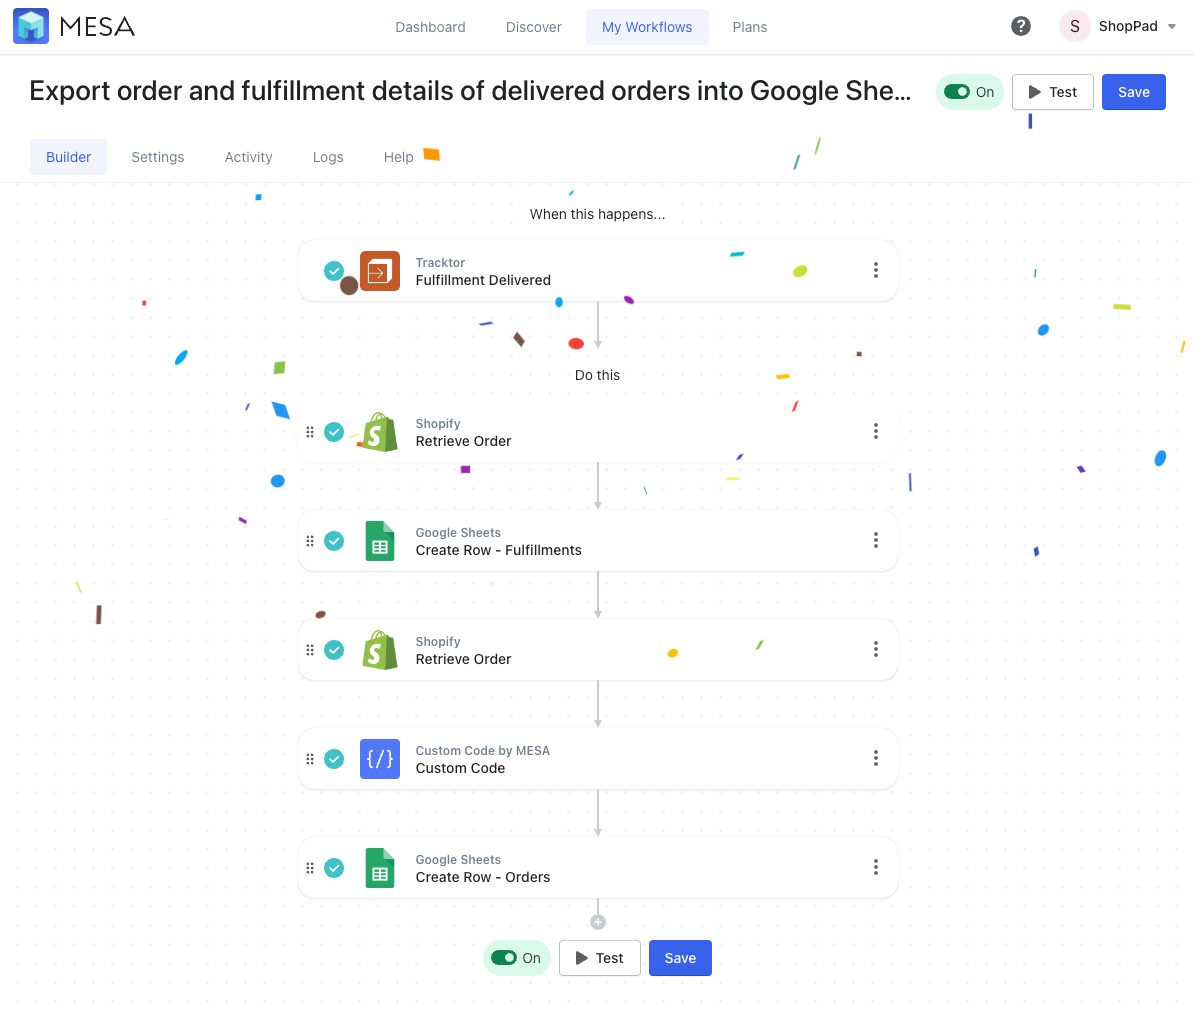
More Built-in Analytics
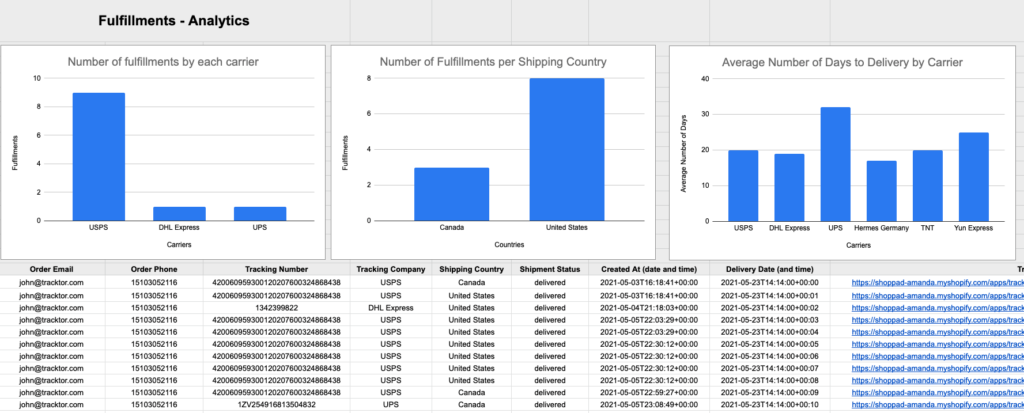
This workflow comes with some major added benefits. You’ll now be able to dig into order and fulfillment analytics previously unavailable. Filter orders by the number of days and view graphs of shipping by country, state, or province:
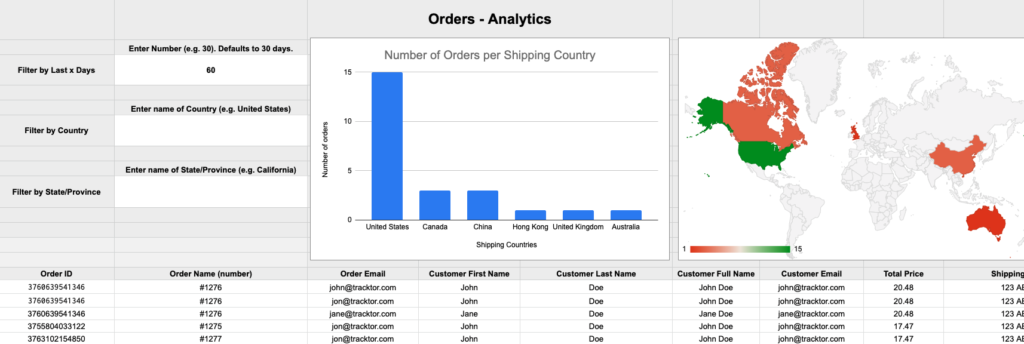
The workflow can even break down the number of fulfillments by each carrier and the average number of days to delivery by carrier:
Workflow Wrap Up
Now each delivered product from Tracktor will have a new row added in Google Sheets with order details. Every step in this workflow is 100% customizable. Change an event, add a step before/after or adjust the default settings.


