How to use OpenAI to write blog outlines for Asana tasks
by
Ryan ODonnell
Last updated:
January 19, 2023
As an ecommerce manager, you’re always looking for ways to optimize your content creation process. You want strategies that help you generate content quickly and efficiently so you can focus more on marketing your products. Specifically, blog outlines can one of the most time-consuming tasks in your day.
Fortunately, OpenAI has emerged as a powerful tool to support this goal—it allows you to generate outlines for blog posts effortlessly when new topics are added in Asana!
In this post, we’ll explore how AI-powered outline generators can shave hours off of the writing process while still producing quality results. Read on to learn the basics of using OpenAI for creating useful blog outlines.
Note: OpenAI is slowly deprecating aspects of it’s API in favor of ChatGPT. We recommend using ChatGPT step in your workflows instead just to be safe.
Topics:
Watch our walkthrough video
Watch this tutorial on how to use OpenAI to write blog outlines directly in Asana
Step-by-Step tutorial instructions
Time needed: 5 minutes
To get started, be sure to add MESA to your Shopify store before starting. Then, follow these steps to connect Asana Tasks to OpenAI Prompts.
Start the workflow with the Asana Task Added action
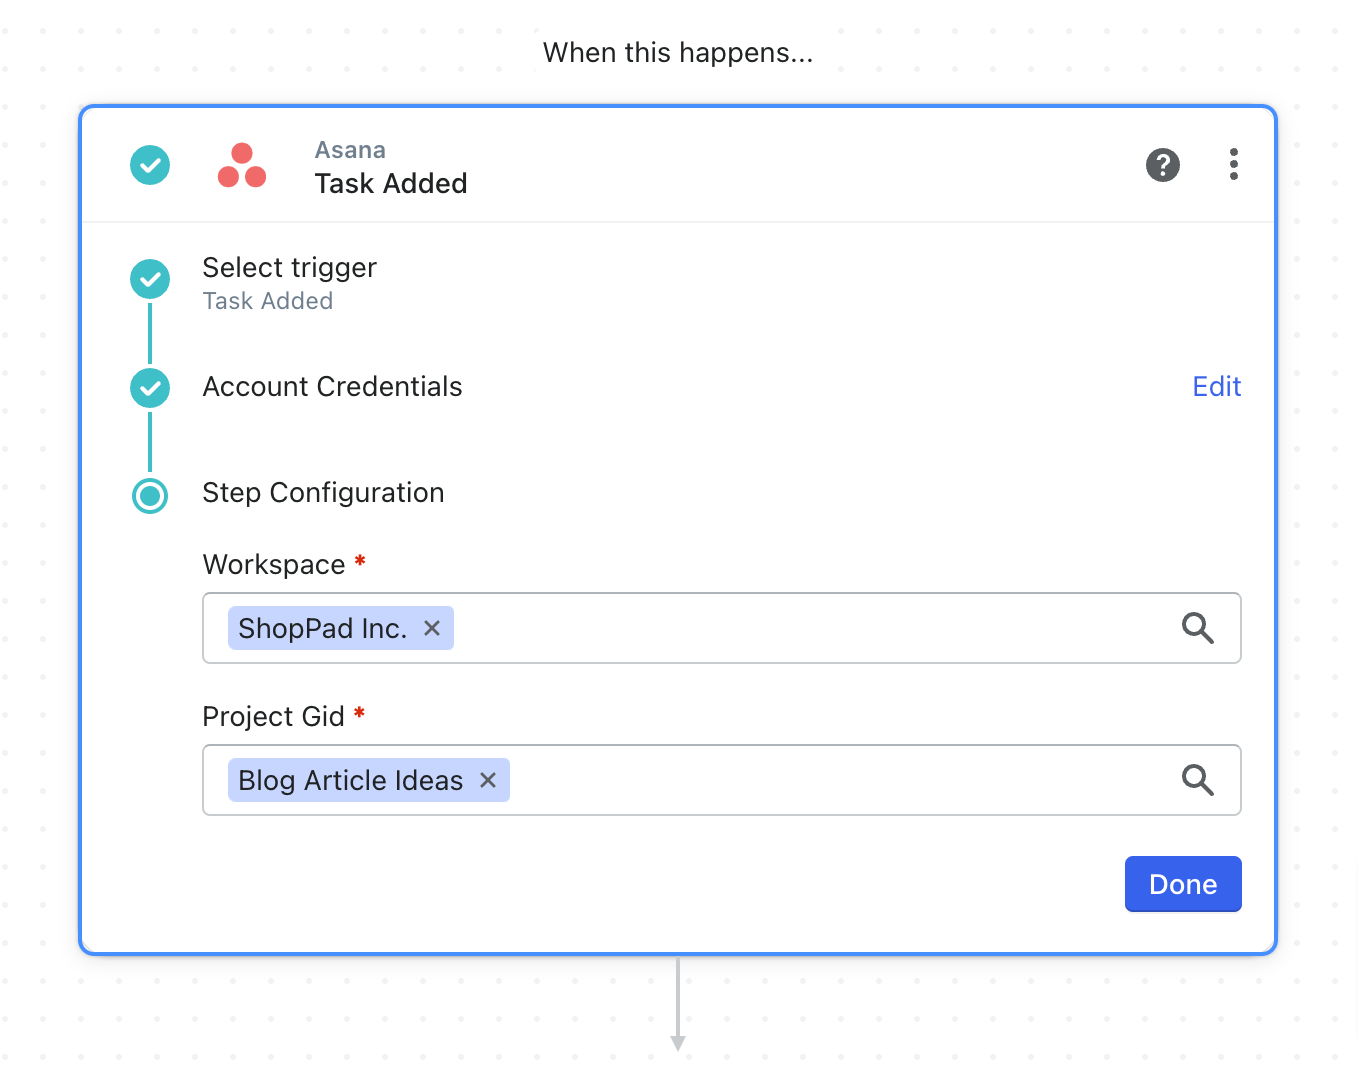
Make a new workflow and choose the Asana app. Then select the Tasks Added action. This will be the trigger event that starts this automation.
Follow the instructions to add your Asana Credentials then edit the Step Configuration. From the pre-populated fields, select the Workspace and Project GIDs values where you organize the tasks for your blog articles.
Add OpenAI and instruct the AI to write a blog outline
Now, let’s add the artificial intelligence step.
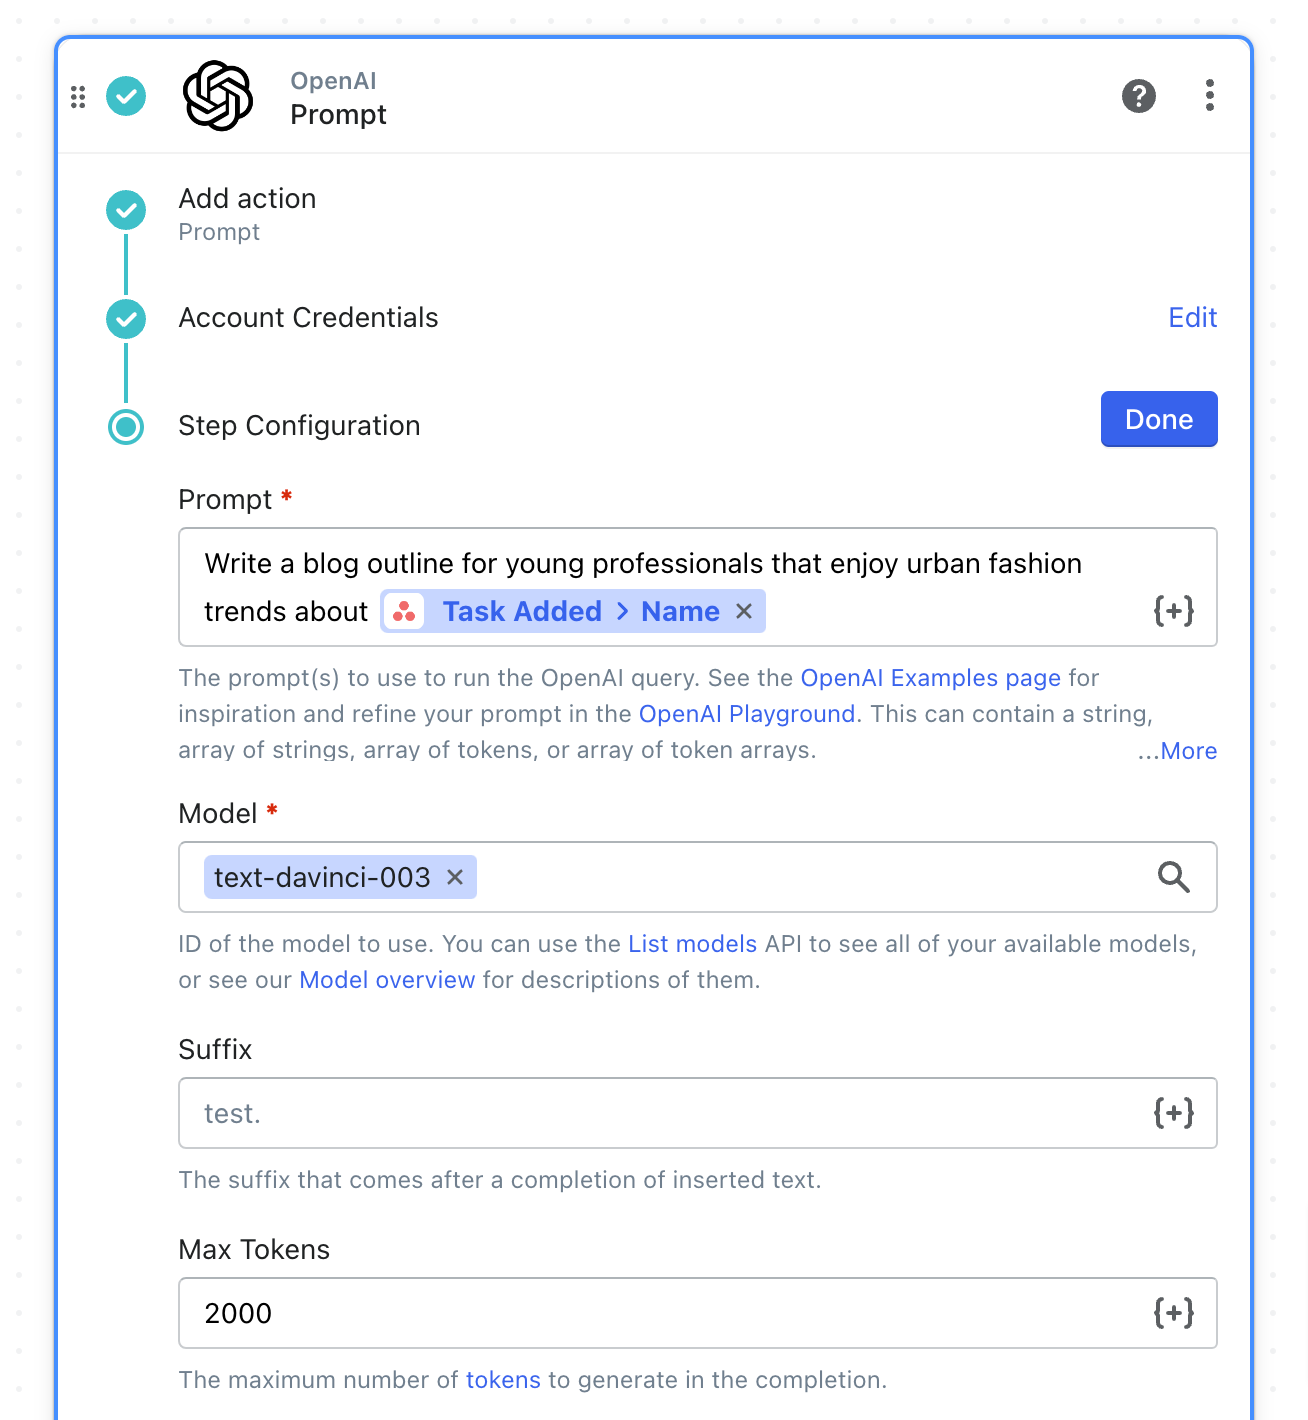
Search and choose the OpenAI app then select the Prompt action.
Again, follow the instructions to add your credentials.
Next, edit the Step Configuration and scroll to the Prompt field. This is where we’ll instruct the AI to write a blog outline based on the name of the Asana task from the previous step.
Click the Variable Selector then, click the Task Added variables to choose the Name variable.
Next, scroll to the Max Tokens field and update this value to 2,000. This is the limit of characters allowed to be returned by the AI.
Leave the rest of these field to their defaults then, click Done.
Update the Asana Task notes field with the response from OpenAI
Select the Asana app, then choose the Update Ticket action.
Under Step Configuration, select your Workspace from the dropdown menu.
Then, for the Task GID, choose Custom Value from the dropdown menu. Then click the Variable Selector to add the Task Added, GID variable to the field.
Scroll down to the Notes field. Then we’ll add the response from the AI by selecting the Prompt, Choices, Text variable.
When prompted, choose Return First Item. The AI can return multiple responses but for simplicity, we only want the first one.
Next, scroll down and click Done.
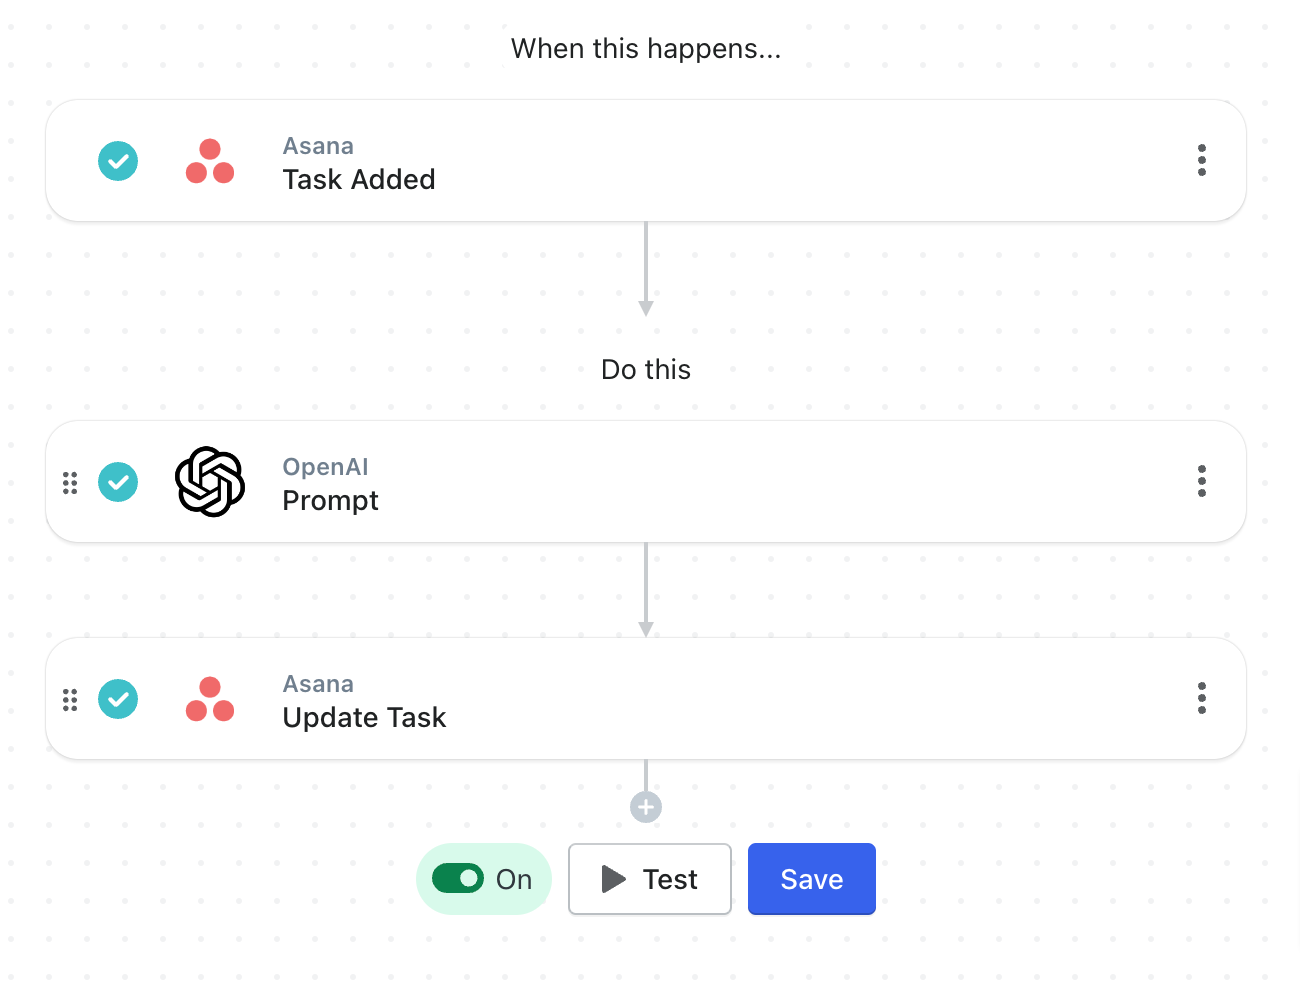
Save and turn “On” your workflow
Save your workflow by naming it, then add your email address to “Save Details”.
Lastly, turn your workflow “On”. Congrats! That’s it.
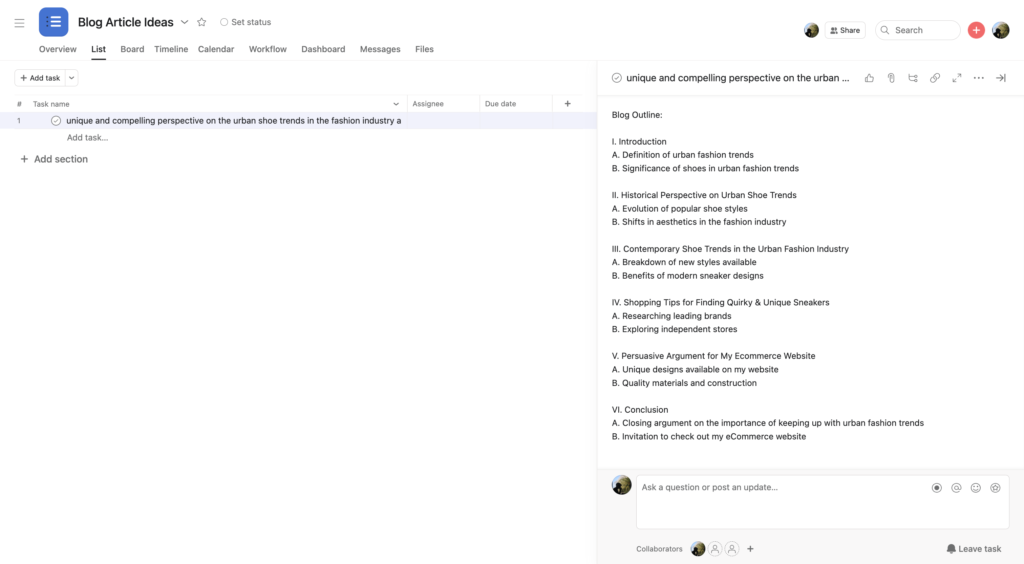
In our sample Asana project called Blog Article Ideas, we created a task titled:
Unique and compelling perspective on the urban shoe trends in the fashion industry and persuade them to view the new sneakers available on my eCommerce website.
New Asana Task
Then, after about 5 seconds, that Asana Task notes field was populated by the AI’s outline.
Asana Task updated automatically with a blog outline from OpenAI
Pretty cool, right?
Tips & Tricks for helping AI write the best blog outlines
It’s important to provide clear instructions and use the right formatting and markup language when working with AI writing assistants. Additionally, here are some other tips for improving the quality of your blog outlines:
Natural Language
Using natural language to instruct AI when writing blog outlines provides the AI with the ability to understand the context better, resulting in more accurate and relevant content. Additionally, it also gives AI the capability to produce ideas that may not have been generated without human involvement.
❌ Write an outline on why New York is awesome
✅ Write a blog article outline about the benefits of being a young fashionista in New York City.
Helpful Context
Using helpful context when instructing AI to write blog outlines ensures that the AI is able to properly interpret and understand the instructions. Include your target audience, the key benefit of your product, or the emotional tone of the article you’re after.
❌ Write a blog article outline about the benefits of being a young fashionista in New York City.
✅ Write a blog article outline for young professionals that enjoy staying ahead of fashion trends about the benefits of living in New York City. Include topics that cover the urban lifestyle, emerging fashion designers, and popular fashion events.
Format
Defining the blog article format when instructing AI to write blog outlines allows the AI to consider how content should be structured, such as the inclusion of images or videos, as well as other features like headings and formatting. This can result in more engaging content that better captures the user’s attention.
❌ Write a blog outline about the new sneakers on my website.
✅ Write an outline for a long-form blog article that will provide that will engage young professionals living in New York City with a unique and compelling perspective on the urban shoe trends in the fashion industry and persuade them to view the new sneakers available on my eCommerce website.
MESA Template ID
send-help-scout-summaries-to-asana
Benefits of using OpenAI to create and update blog outlines
Writing blog posts doesn’t have to be as daunting and overwhelming as it may feel now. With the help of AI assistance tools, like OpenAI, you can get your blog outlines written quickly and efficiently and focus on other parts of your business.
Taking advantage of these apps is essential–especially with all the competition out there nowadays. And lucky for you that adding MESA into your Shopify store is super easy and efficient.
So why wait? Become a tech-savvy pro with MESA riding shotgun in no time. Your business will thank you for it later. Get started today–add MESA to your Shopify store right away and use AI technology to work smarter instead of harder.
What you should do now
Whenever you’re ready…here are 4 ways MESA can help you get more done:
Sign up for MESA. The best way to get started is sign up for MESA today. Every plan includes the first 7-days free so you can be assured your workflow is running properly.
Browse pre-made templates. Our customizable workflow templates are a great way to get started more quickly.
Talk to our automation experts. If you need help personalizing any workflow template, guidance how to make any automation or, simply want us to make your workflow, we can help.
If you know another merchant who’d enjoy reading this page, share it with them via LinkedIn, YouTube, Twitter, or Facebook.