How to Send an Email for a Shopify Order Containing Customizable Products
by
Cara Wood
Last updated:
September 17, 2020
Offering customizable products is a great way to improve your margins, stay competitive against e-commerce giants, and generate a positive customer experience. However, communicating custom orders to a production team can be a challenge and introduce errors. A better approach is to turn your repeatable process into a workflow that can run automatically.
In this tutorial, we’ll use MESA to email each order that contains a product customized with Infinite Options over to your manufacturing team as they come in.
Try MESA free for 7-days and enjoy support from automation experts!
Step 1: Set Up Your Workflow
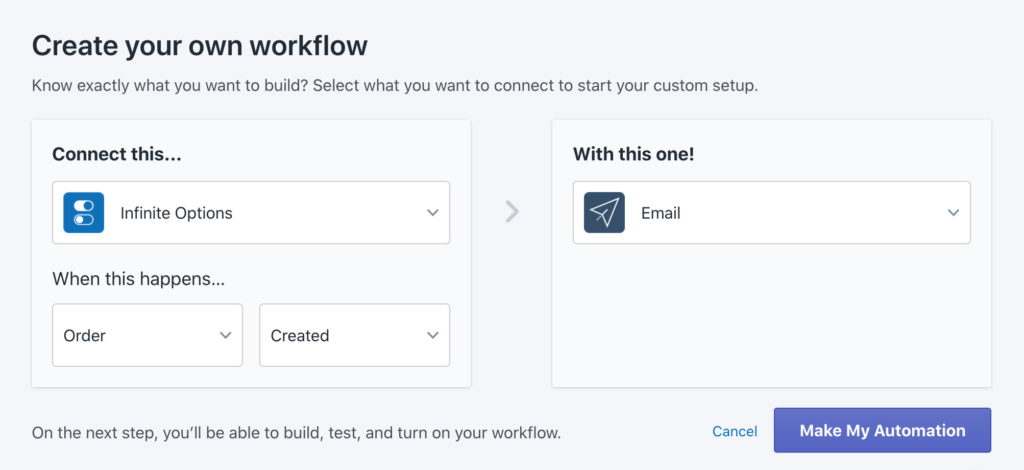
We start this automation with selecting “Infinite Options” from the Connect This… menu, followed by “Order Created” in the When this happens… dropdowns. In the With this one… menu, we’ll select “Email” as our output.
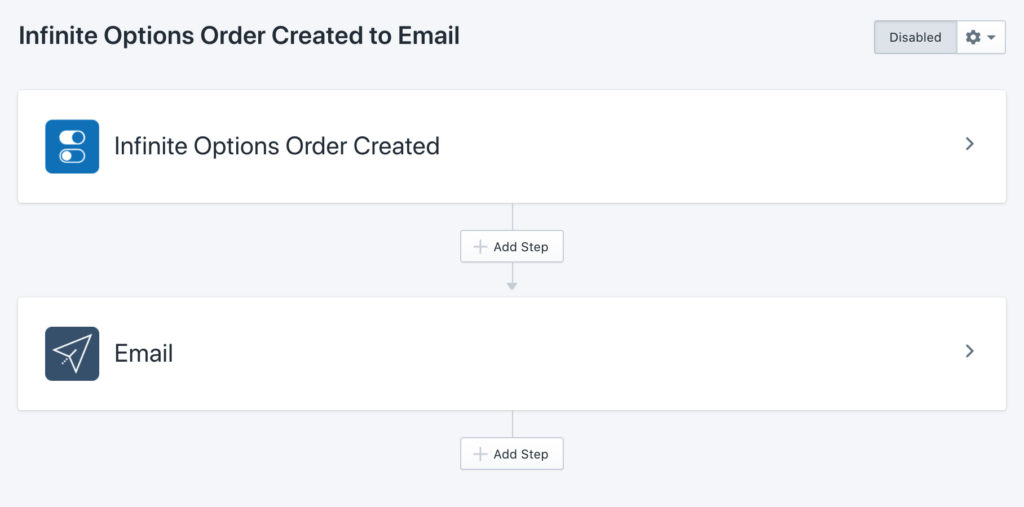
Click Make My Automation. You’ll now see this:
The following details will vary based on how your product options are set up and which ones require custom work.
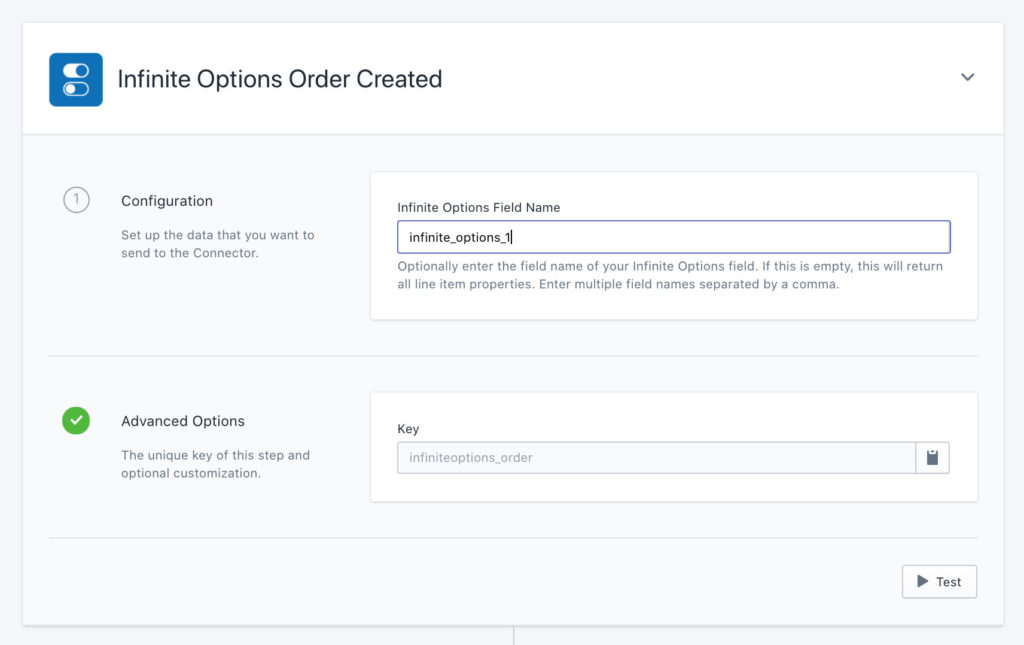
For this example, lets use a wine glass that can have unique sayings printed on it. My saying’s field name in Infinite Options’ backend is infinite_options_1. I will not be using multiple fields to pull my items into this workflow, but you certainly could.
Step 2: Target New Orders
Within the order trigger, we must specify that we only want orders with a particular field to trigger the workflow. So in the Infinite Options Field Name section, we will write the backend name of that field. In my case, that is infinite_options_1. If you have more than one field name, you can delineate them with commas.
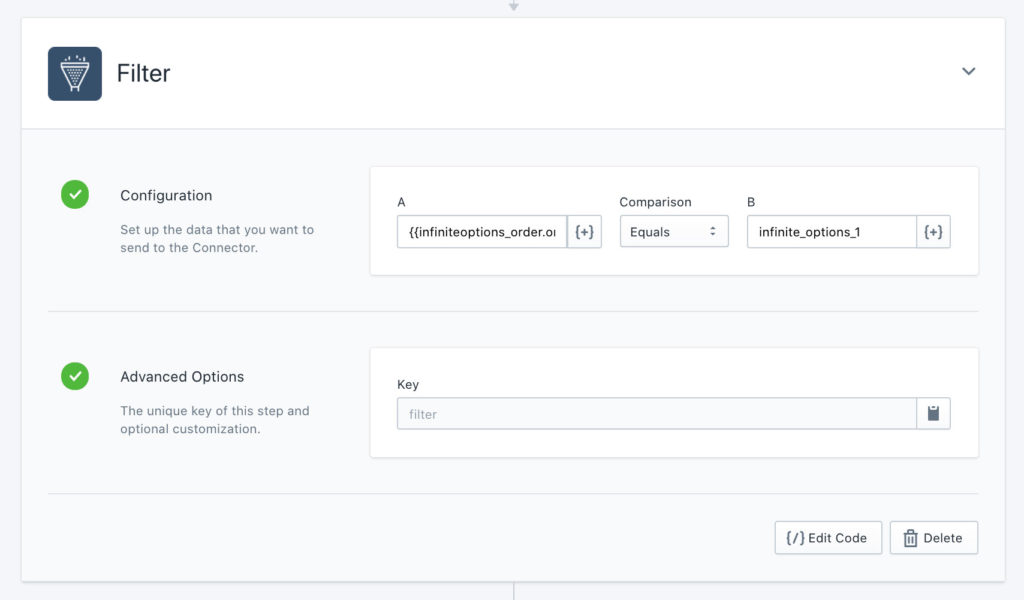
Step 3: Find Orders With Custom Line Items
To ensure that we will only be sending the manufacturing team these custom products, we’re going to add a filter beneath the trigger. So click the Add Step button and select MESA Filter. We will place {{infiniteoptions_order.order.line_items[0].properties[0].name}} in the first box. Then we will select Equals from the dropdown list. Finally, we will place that field name, infinite_options_1, in the final box.
Now MESA will be sure to weed out any orders not fitting that description.
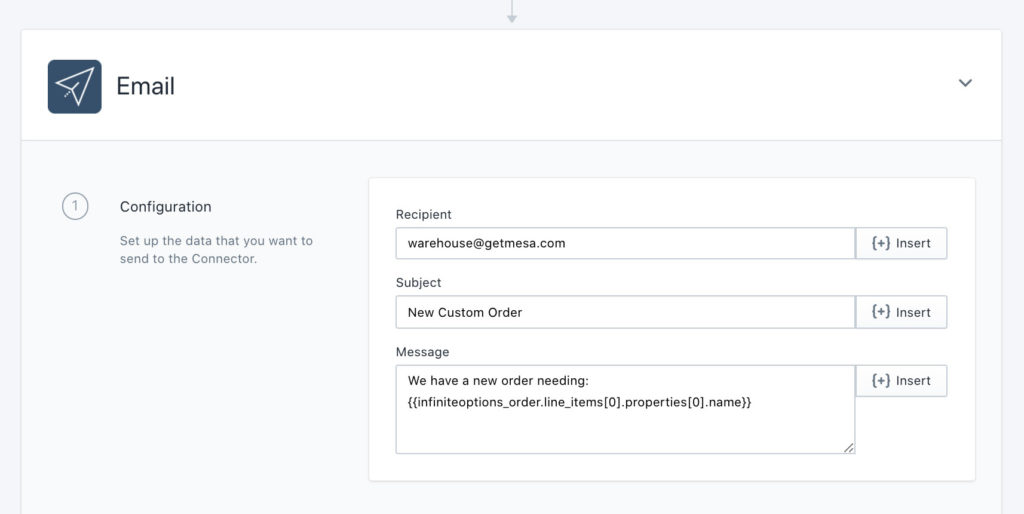
Step 4: Send Email
Finally, all we need to do is write the email. You can add dynamic tokens into the recipient, subject line, and/or message using the Insert dropdown menus. You can also use static text.
Workflow Wrap-up
You can alter this or any other workflow to connect to any app you’re using to provide order customizations.
If you enjoyed this workflow tutorial, you can get up and running quickly using this pre-made template:
Whenever you’re ready…here are 4 ways MESA can help you get more done:
Sign up for MESA. The best way to get started is sign up for MESA today. Every plan includes the first 7-days free so you can be assured your workflow is running properly.
Browse pre-made templates. Our customizable workflow templates are a great way to get started more quickly.
Talk to our automation experts. If you need help personalizing any workflow template, guidance how to make any automation or, simply want us to make your workflow, we can help.
If you know another merchant who’d enjoy reading this page, share it with them via LinkedIn, YouTube, Twitter, or Facebook.