How to Connect Shopify to Odoo (Inventory, Orders, and More)
-
- •
- Last updated: Jun. 15, 2026
- •
- 9 min read

Running a Shopify store alongside Odoo ERP means two systems that each hold a piece of your business. Inventory lives in Odoo. Sales happen in Shopify. Without a connection between them, your team ends up manually copying stock levels, re-entering orders, and chasing discrepancies between what the warehouse sees and what customers see on your storefront.
This guide covers how to set up the Shopify to Odoo integration using MESA, including the initial connection, inventory sync, order sync, and product updates. No code required for any of it.
Table of Contents:
What is Odoo and why connect it to Shopify?
Odoo is an open-source ERP used by thousands of growing merchants to manage inventory, purchasing, accounting, sales, and warehouse operations in one place. It has over 30 core modules and a large ecosystem of third-party apps, which makes it a flexible choice for businesses that have outgrown spreadsheets but want to avoid the cost and complexity of larger enterprise platforms.
The problem for Shopify merchants is that Odoo and Shopify do not talk to each other out of the box. Orders placed in Shopify do not appear in Odoo automatically. Inventory updated in Odoo does not reflect on your storefront in real time. Product changes made in one system need to be duplicated in the other.
A direct integration between the two platforms removes that manual work. With MESA, you can build workflows that move data between Shopify and Odoo automatically based on triggers you define.
What you can sync between Shopify and Odoo
Before getting into the setup steps, here is a quick overview of the most common sync scenarios:
Inventory sync — When stock levels change in Odoo, MESA detects the update and pushes the new quantity to the matching Shopify product variant by SKU. This keeps your storefront accurate without anyone touching it manually.
Order sync — When a new order is placed in Shopify, MESA sends the order and customer details to Odoo. This eliminates re-entry and gives your operations team a single source of truth for fulfillment.
Product updates — Changes to product records in either system can be pushed to the other. Update a price in Odoo and have it reflected in Shopify, or manage product data from Shopify and keep Odoo current.
All three scenarios use the same connection setup described below. Once your credentials are in place, you can activate any of these workflows independently.
How to connect Shopify to Odoo using MESA
Time needed: 10 to 15 minutes
Before you begin, make sure you have the Sales and Inventory modules active in Odoo, and inventory tracking enabled.
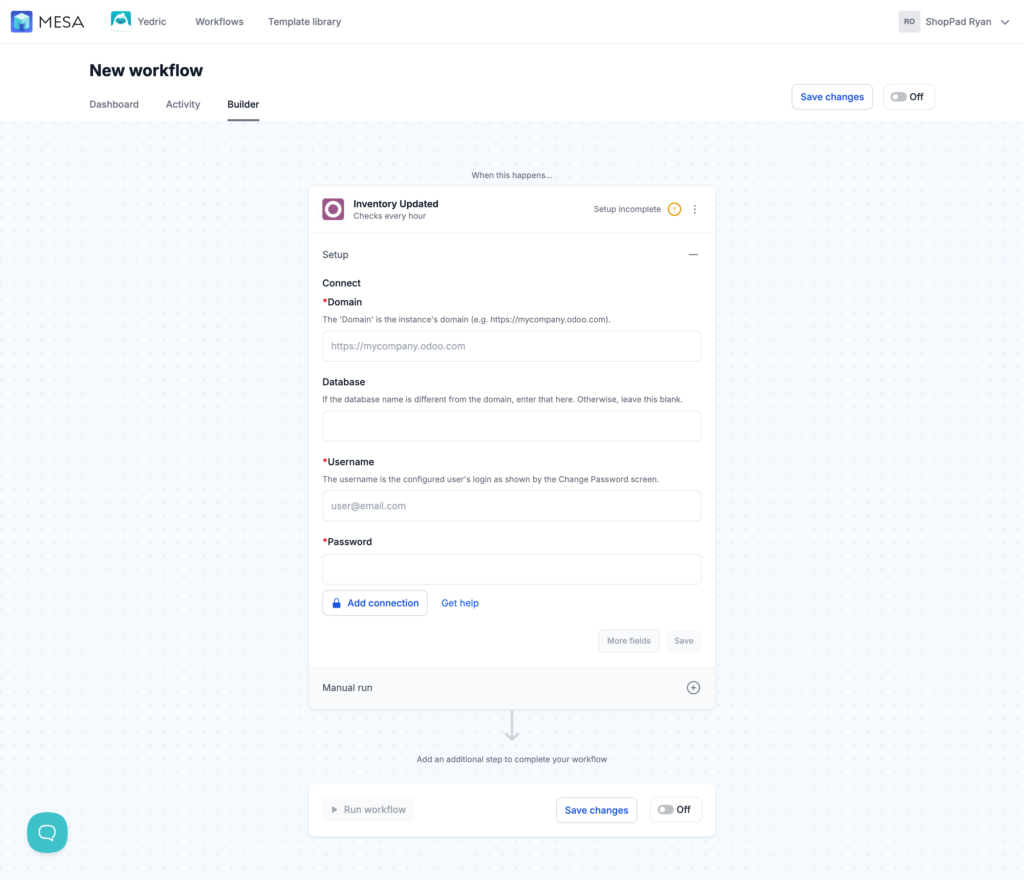
Step 1: Start a new workflow and open the Odoo step
In MESA, create a new workflow and add Odoo as a step. You will be prompted to add a connection. This is where you enter your Odoo credentials.
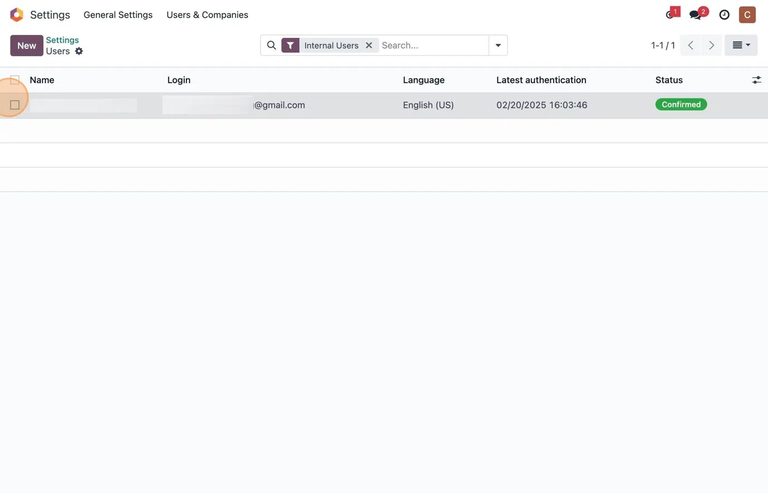
Step 2: Locate your Odoo username and password
From your Odoo account, navigate to Settings, then General Settings, then Users, and click Manage Users. Select the user you want to connect with MESA, click the Actions gear icon, and choose Change Password.
If no password exists yet, create one and copy it. If a password already exists, copy the email address listed under User Login as your username and use the existing password.
Step 3: Find your Odoo domain
Your Odoo domain is the URL of your Odoo account. It will look like https://yourcompany.odoo.com. Copy this and have it ready for the next step.
If your Odoo database name is different from the domain itself, you will also need to enter it in the Database field. If the domain and database match, you can leave the Database field blank.
Step 4: Enter your credentials in MESA
Back in MESA, paste your Username, Password, and Domain into the Odoo connection fields. Keep the domain URL without a trailing slash.
Once saved, your Odoo connection is active and available to use in any workflow.
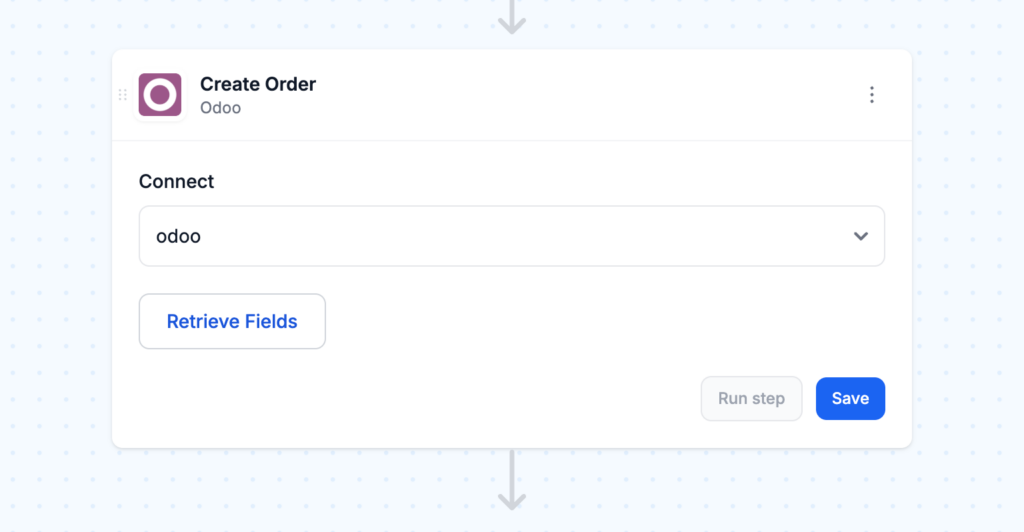
Step 5: Click Retrieve Fields and configure your workflow
With the connection in place, click the Retrieve Fields button inside your Odoo step to pull in the current fields from your Odoo account. If you update fields in Odoo later, return here and click Retrieve Fields again to refresh them.
From here, map the data fields you want to pass between the two systems and save your workflow.
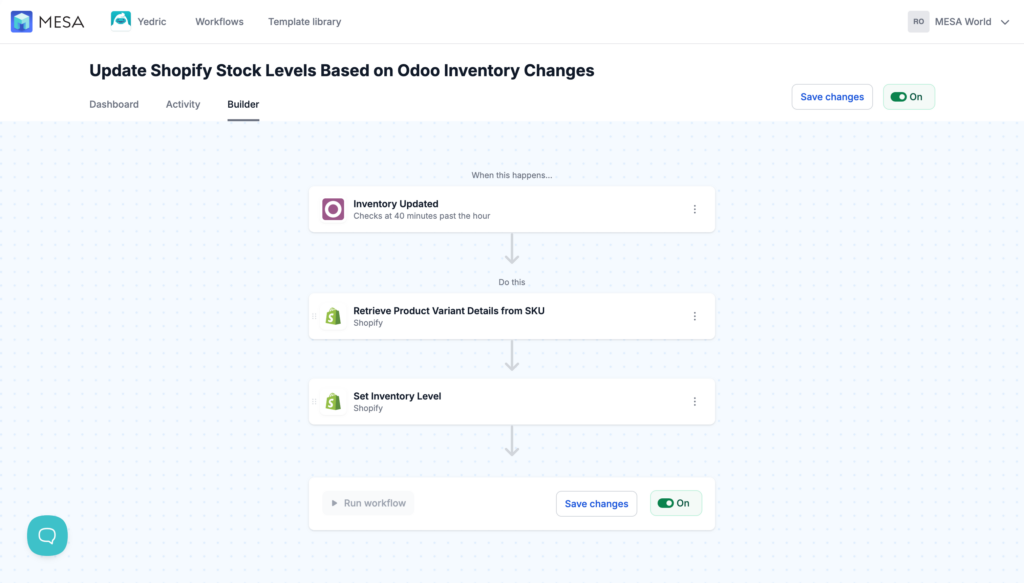
How to sync Shopify inventory from Odoo
Inventory sync is the most common use case for this integration and the one with the most direct impact on your storefront accuracy.
The workflow works by monitoring your Odoo inventory for changes and pushing updated quantities to matching Shopify product variants by SKU.
Step 1: Set up Odoo inventory monitoring
Add an Odoo trigger to your workflow and configure it to watch the stock.quant entity. By default, this checks for updates every hour. You can adjust the frequency if your inventory moves quickly.
One requirement before activating: make sure the Reference field in Odoo stores the same SKU values as your Shopify product variants. The SKU match is how MESA knows which Shopify product to update.
When updating inventory quantities in Odoo, use the Quantity on Hand field inside the Sales module. That is the field the trigger monitors.

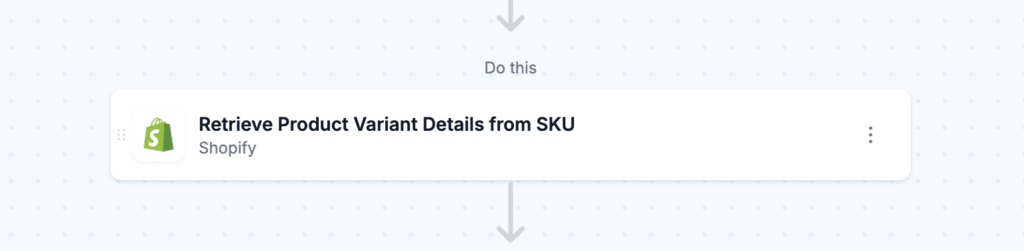
Step 2: Find the matching Shopify product by SKU
Add a Shopify step to your workflow that looks up the product variant using the SKU passed from Odoo. MESA takes the Reference value from the Odoo inventory record and searches Shopify for a variant with a matching SKU.
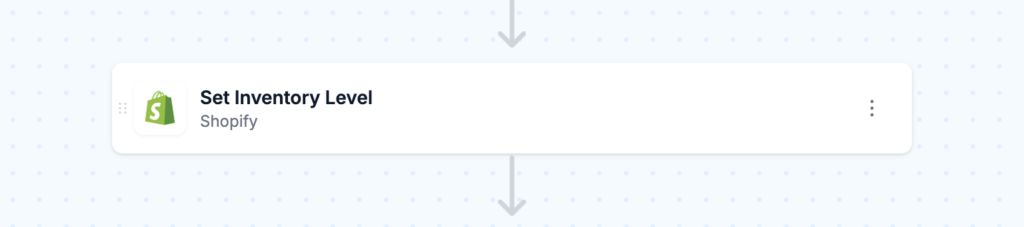
Step 3: Update the Shopify inventory level
Add a final Shopify step to set the inventory level for the matched variant. Pass in the available quantity from Odoo and set it as the new stock count in Shopify.
You will need to confirm the correct Shopify location ID for this step. Find it in your Shopify admin under Settings then Locations.
Step 4: Test and turn “On”
Save the workflow, run a test to confirm the sync works end to end, and then turn the workflow on. Once active, your Shopify inventory will update automatically whenever stock changes in Odoo.
Ready to skip the manual setup? Use the pre-built template:
MESA Template ID
sync-shopify-odoo-stock-levels
Tips for a reliable Shopify to Odoo inventory sync
Match your SKU formatting before you go live. The sync relies entirely on matching SKUs between the two systems. If Odoo uses uppercase SKUs and Shopify uses lowercase, or if there are leading zeros in one and not the other, the lookup will fail silently. Audit a sample of your SKUs in both systems before enabling the workflow.
Use Odoo’s lot tracking for better control. If you track inventory by lot or serial number in Odoo, you can use that data to add additional logic to your MESA workflow. This is useful for products with expiration dates or batch requirements.
Set buffer stock rules for popular items. If you sell high-velocity products, consider building a buffer into your workflow. Instead of syncing the raw quantity from Odoo, subtract a small reserve amount before pushing to Shopify. This protects against overselling during high-traffic periods.
How to sync Shopify orders to Odoo
When a new order is placed in Shopify, the following workflow sends the order and customer details to Odoo automatically.
In MESA, use Shopify: New Order as the trigger. Then add an Odoo step configured to create or update the corresponding record in your Odoo Sales or Contacts module. Map the Shopify order fields (customer name, email, line items, shipping address) to the corresponding Odoo fields.
For customer records specifically, Odoo requires the country and state values in its own internal code format rather than plain text. MESA’s Custom Model actions handle this: use them to retrieve the res.country and res.state values that match the customer’s address before passing them into Odoo.
Use the pre-built template as your starting point:
MESA Template ID
sync-shopify-order-and-customer-to-odoo
How to sync product data between Shopify and Odoo
Product sync runs in both directions depending on where you manage your catalog.
Shopify to Odoo: Use a Shopify: Product Updated trigger in MESA and map the changed fields to the corresponding Odoo product record. This keeps your Odoo catalog current whenever you update products in Shopify.
Odoo to Shopify: Use an Odoo trigger watching the product entity. When a product record changes in Odoo, MESA pushes the update to the matching Shopify product. This is useful if your team manages pricing or descriptions in Odoo and needs those changes reflected on the storefront.
Relevant templates:
MESA Template ID
manage-odoo-products-from-shopify-updates
MESA Template ID
manage-shopify-products-from-odoo-product-updates
Frequently asked questions
Yes. MESA supports all versions of Odoo and Odoo Online, including the Sales and Contacts apps.
Enter the database name separately in the Database field of the Odoo connection in MESA. If the two match, you can leave the Database field blank.
Yes, but set up each direction as a separate workflow with its own trigger and logic. Running bidirectional sync in a single workflow increases the chance of loops and conflicting updates.
The workflow step will fail for that record and log an error in MESA. You can add a conditional step to handle mismatches, for example routing them to a Slack message or a spreadsheet for review.
Yes. MESA supports hundreds of app integrations, so you can extend your Odoo workflows to also notify a team channel in Slack, log records to Google Sheets, or trigger follow-up actions in other tools.
Next steps
Start with the integration that matches your biggest pain point. For most merchants, that is inventory sync. Install MESA, connect your Odoo account using the steps above, and use the templates to get running in under 15 minutes.
From there, layer in order sync and product updates as your workflows mature.
Try MESA free for 7 days and get help from the automation team during setup.