Every online business faces the same frustrating bottleneck: manually copying customer information from forms into their store database. When you're running marketing campaigns, collecting leads, or processing customer inquiries through Typeform, the last thing you want is to spend hours transferring that data into Shopify one submission at a time.
Smart business owners know there's a better way to handle this repetitive task. By connecting Typeform to Shopify, you can eliminate manual data entry while ensuring every lead gets properly recorded and tagged for future marketing efforts.
This guide walks you through three proven methods to automatically create Shopify customers from Typeform submissions. You'll learn how to set up this Shopify integration, map form fields to customer data, and handle edge cases like duplicate submissions and missing information.
Ready to automate customer creation from your forms?
Every submission becomes a properly tagged Shopify customer without manual entry.
Step-by-step: Turn Typeform submissions into Shopify customer records automatically
Time needed: 10 minutes.
This is a set-it-and-forget-it automation. When someone submits your Typeform, their information automatically creates or updates a customer record in Shopify with the appropriate tag. Perfect for wholesale applications, program sign-ups, or any form that collects customer information.
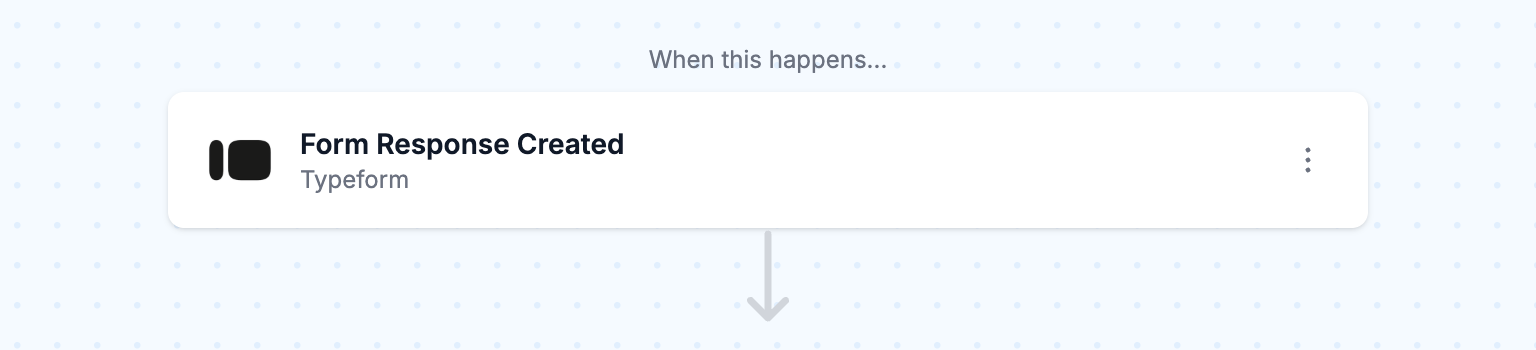
- Set up the Typeform trigger
Connect your Typeform account and select the specific form you want to monitor for new responses. The workflow will automatically start whenever someone submits this form. Make sure your form collects at least an email address, first name, and last name to create complete customer profiles in Shopify.
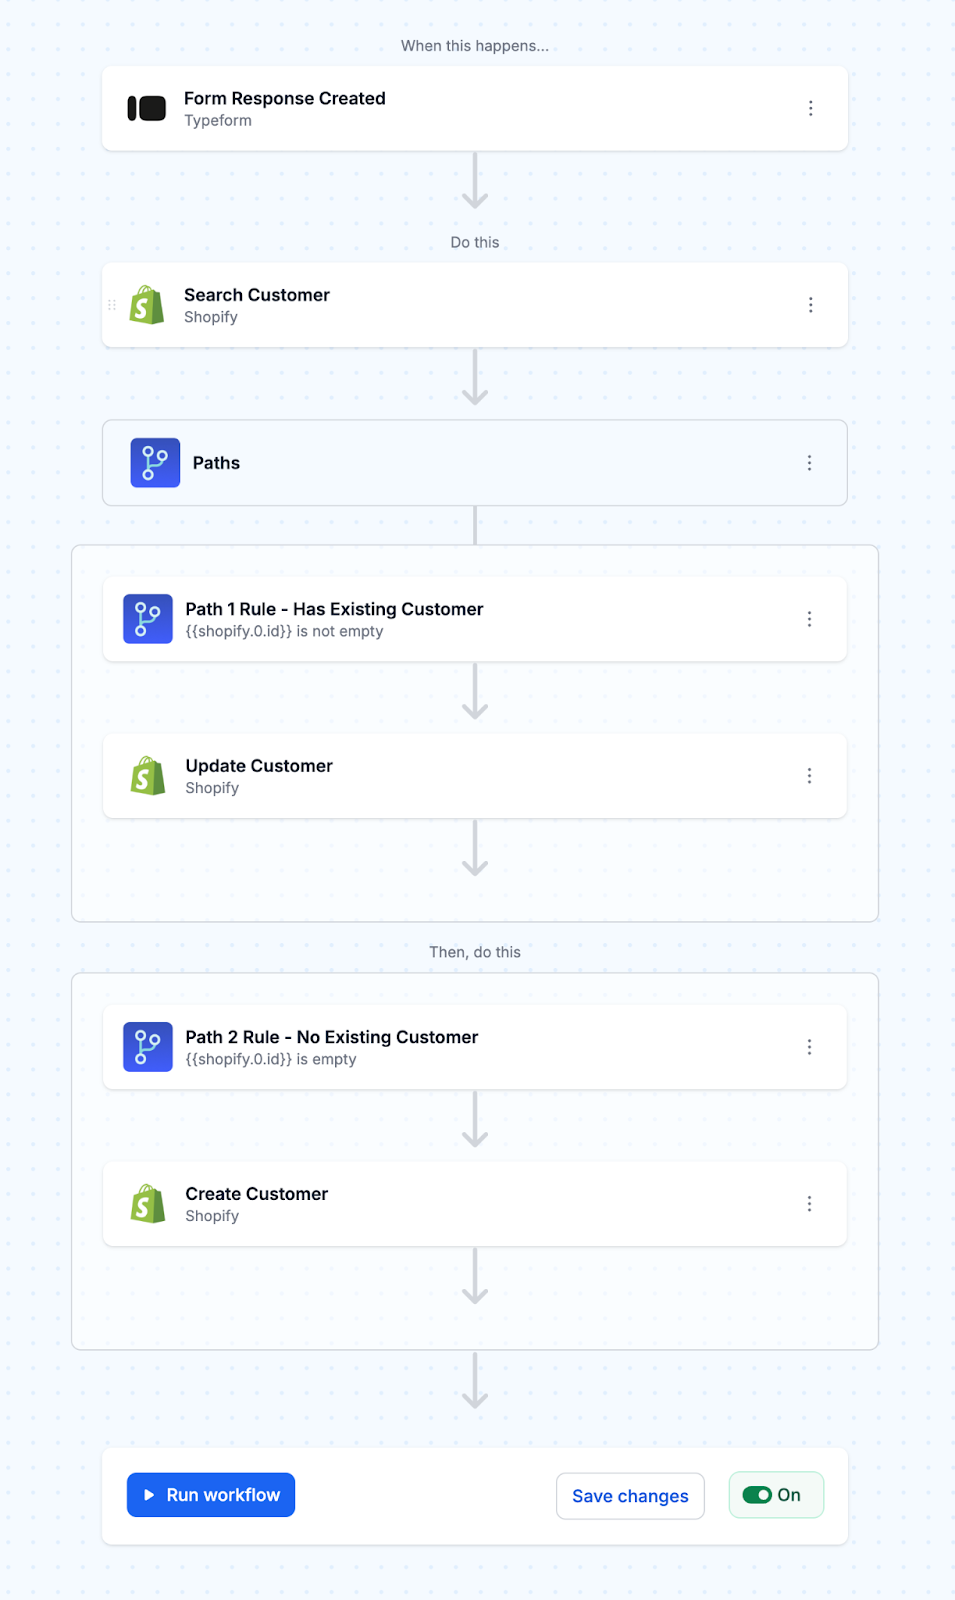
- Existing customer records are checked
The workflow searches your Shopify store for an existing customer using the submitted email address. This prevents duplicate records and determines whether to create a new customer or update an existing one.

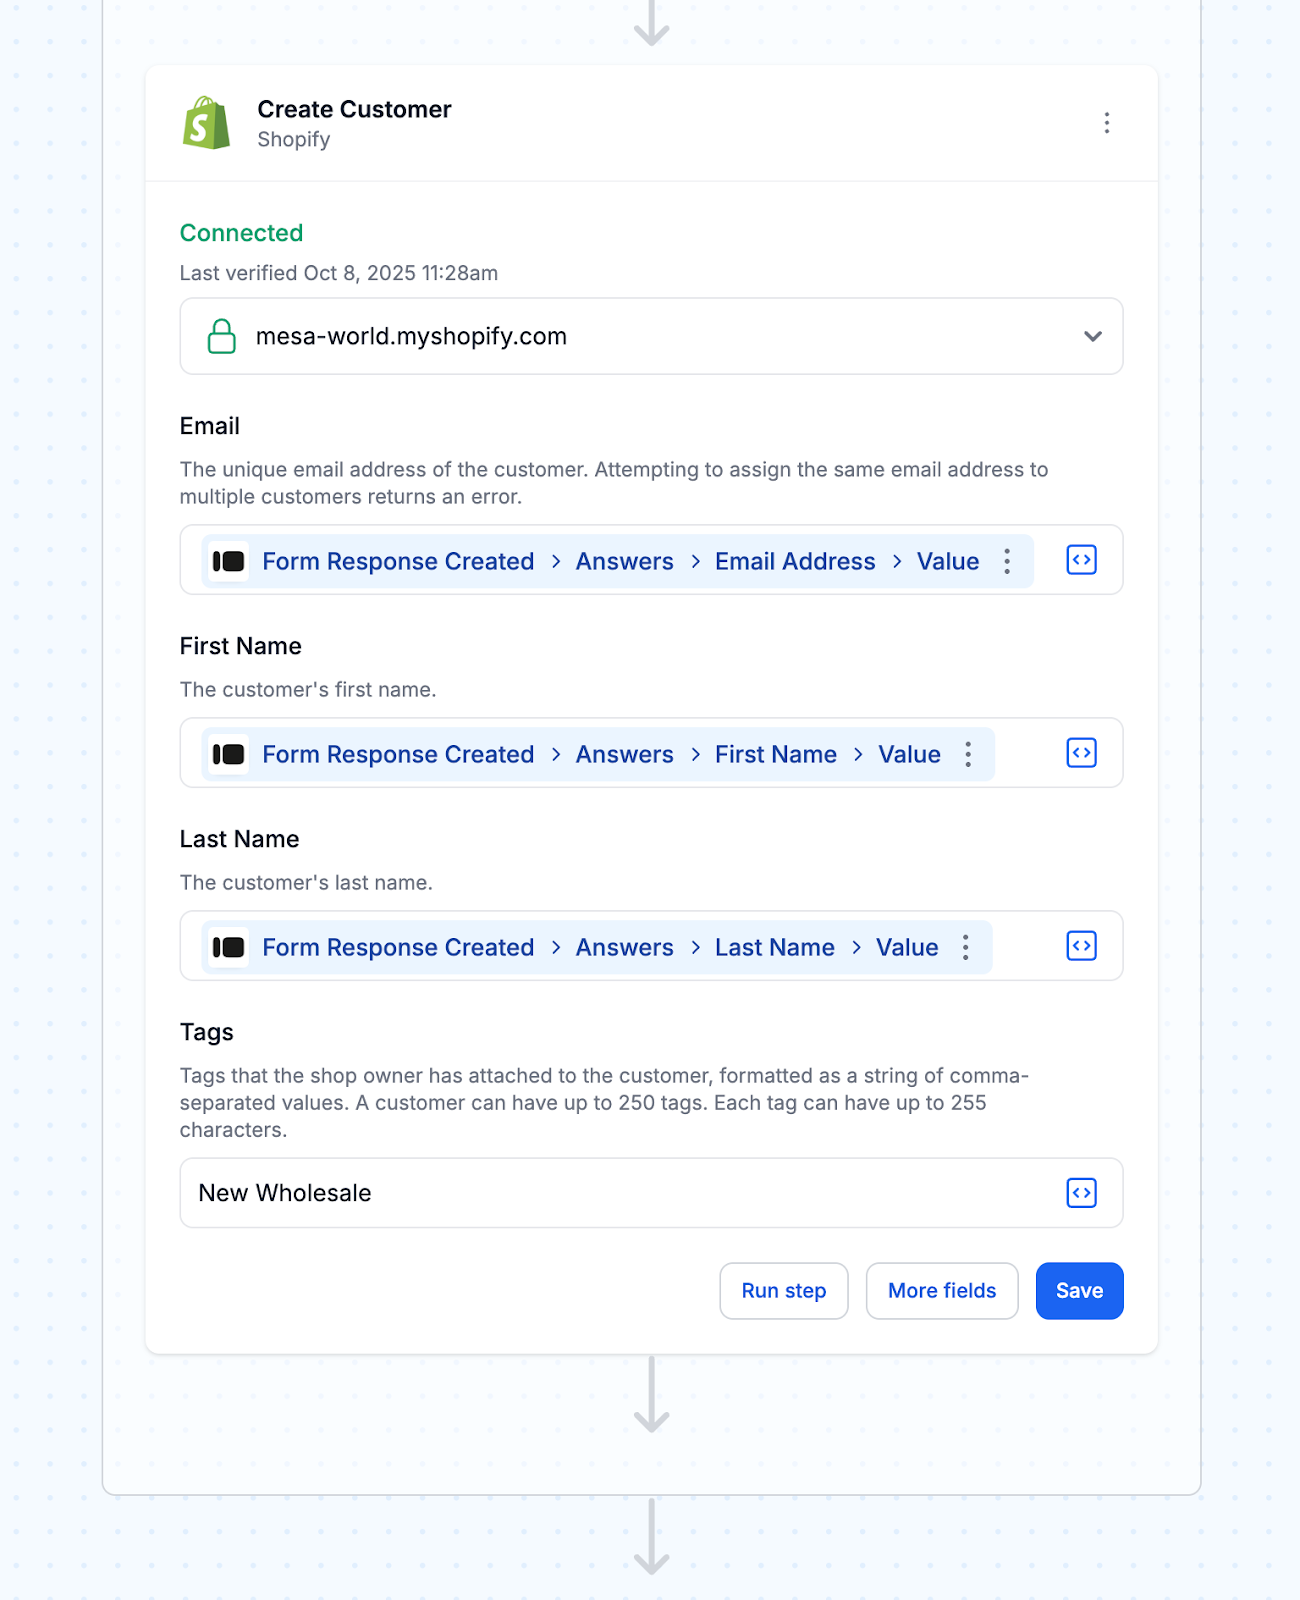
- Customer is created or updated with tags
If the customer exists, their information is updated and tagged accordingly. If they're new, a complete customer record is created with their details and tag. Either way, your customer database stays current and properly organized.
- Turn your workflow On
Turn your workflow on and submit a test form response to verify everything works correctly. Check that new customers are created properly and existing customers are updated with the right information and tags. Once you confirm the setup is working, the workflow will automatically handle all future form submissions.
Connect once, and every form submission syncs to Shopify automatically.
Takes about 5 minutes to map your form fields.
Tips on creating Shopify customers from Typeform submissions
1. Map form fields strategically to customer data
Your Typeform questions should align with the customer information you actually need in Shopify. Focus on essential fields like email (required), first name, last name, and phone number. You can always collect additional data in custom meta fields, but resist the urge to overcomplicate your form with questions that won't translate meaningfully to your customer records.
2. Handle duplicate customers gracefully
When someone fills out your form multiple times with the same email address, you'll want to update their existing Shopify customer record instead of creating duplicates. This template automatically checks for existing customers by email address and updates their information rather than creating redundant entries. This keeps your customer database clean and prevents confusion.
3. Use conditional logic to create customer segments
Not every form submission needs to become a customer immediately. You might want to create customers only when someone indicates purchase intent or requests specific services. Set up your automation to approve form responses and create customers based on specific conditions, like selecting "Yes, I'm interested in purchasing" or providing a company name for B2B inquiries.
4. Leverage Typeform's hidden fields for better context
Pass additional context through Typeform's hidden fields to enrich your Shopify customer records. You can capture UTM parameters, referral sources, or campaign information that helps you understand how customers found you. This data becomes invaluable for segmentation and personalized marketing later.
Reasons to create Shopify customers from Typeform submissions
Build customer relationships before the first purchase
Most businesses wait until someone buys something to create a customer record. That's backwards thinking. When someone fills out your lead form, survey, or waitlist signup, they're already showing interest in your brand. Creating them as a Shopify customer immediately means you can start nurturing that relationship through your existing email flows and customer segments.
Capture detailed customer data that checkout forms can't
Shopify designs its checkout for speed, not data collection. You get a name, email, and shipping details—that's it. But what if you knew their preferences, pain points, or how they found you? Typeform lets you ask those deeper questions without friction. When that data flows into Shopify customer profiles, your support team has context, your marketing becomes relevant, and your product development gets real feedback.
Prevent duplicate customers across your sales funnel
Here's a common headache: someone signs up for your newsletter through Typeform, then later makes a purchase. Without integration, you end up with two separate records—one in your form tool and one in Shopify. When they contact support or you want to segment your audience, you're missing half the picture. Connecting these systems from the start means one complete customer profile.
Enable pre-purchase customer tagging and segmentation
Once someone becomes a Shopify customer through your form, you can immediately tag them based on their responses. Maybe they indicated they're a wholesale buyer, mentioned they're price-sensitive, or said they found you through Instagram. These tags let you customize their entire experience—from the emails they receive to the products you recommend—before they ever hit your store.
Create VIP experiences for engaged prospects
Not everyone who fills out your form will buy immediately. But some will be your most valuable future customers. By creating Shopify customer records for engaged prospects, you can offer them early access to sales, exclusive content, or personalized product recommendations. You're treating interested people like the valuable customers they're about to become.
Try this related template:
Frequently asked questions
How do I automatically create Shopify customers from form submissions?
The most reliable way is to set up an automation that triggers whenever someone submits your Typeform. MESA connects directly to both platforms, so when a new submission comes in, it automatically creates a customer record in your Shopify store with all the relevant details. You can map form fields like name, email, and phone number directly to Shopify's customer fields without writing any code.
What's the best way to integrate Typeform with Shopify?
Choose a no-code automation platform like MESA that handles the technical complexity for you. While you could build a custom solution using Typeform webhooks and Shopify's API, automation platforms offer pre-built templates, error handling, and ongoing maintenance. They're faster to set up and more reliable than custom code, especially if you don't have a dedicated developer.
How do I update existing Shopify customers from Typeform data?
Most automation tools, including MESA, can check if a customer already exists in your Shopify store using their email address. If they do exist, the automation updates their information instead of creating a duplicate. You can configure which fields get updated and whether to overwrite existing data or only fill in missing information.
What fields can I map from Typeform to Shopify customer records?
You can map most standard fields including first name, last name, email address, phone number, and customer notes. For address information, you'll need separate form fields that correspond to Shopify's address structure (street address, city, state, zip code, country). Custom fields from your Typeform can also be stored in Shopify's customer notes or tags for future reference.