If you’re a Shopify app developer, you know how critical it is to keep customer data flowing cleanly between systems. When someone installs your app, that data often gets siloed—sitting in your database, disconnected from the rest of their business tools. This disconnect creates problems for you and your customers: support tickets take longer, billing can get messy, and it’s harder to deliver a seamless experience.
Take accounting, for example. If your app sends new customer data to QuickBooks manually (or worse, not at all), you’re opening the door to missed invoices, duplicate entries, and hours of cleanup. That may seem like “someone else’s problem,” but it reflects on your app’s polish and reliability.
This tutorial is for Shopify Partners who build apps, use Mantle and want to automate customer syncing from Shopify app installs into QuickBooks.
Let’s dive in and make your app’s backend just as seamless as its frontend.
TL;DR: Ready to skip the setup? Use our templates that does everything for you.
Step-by-step guide: Syncing QuickBooks customers from Shopify app signups
Time needed: 5 minutes.
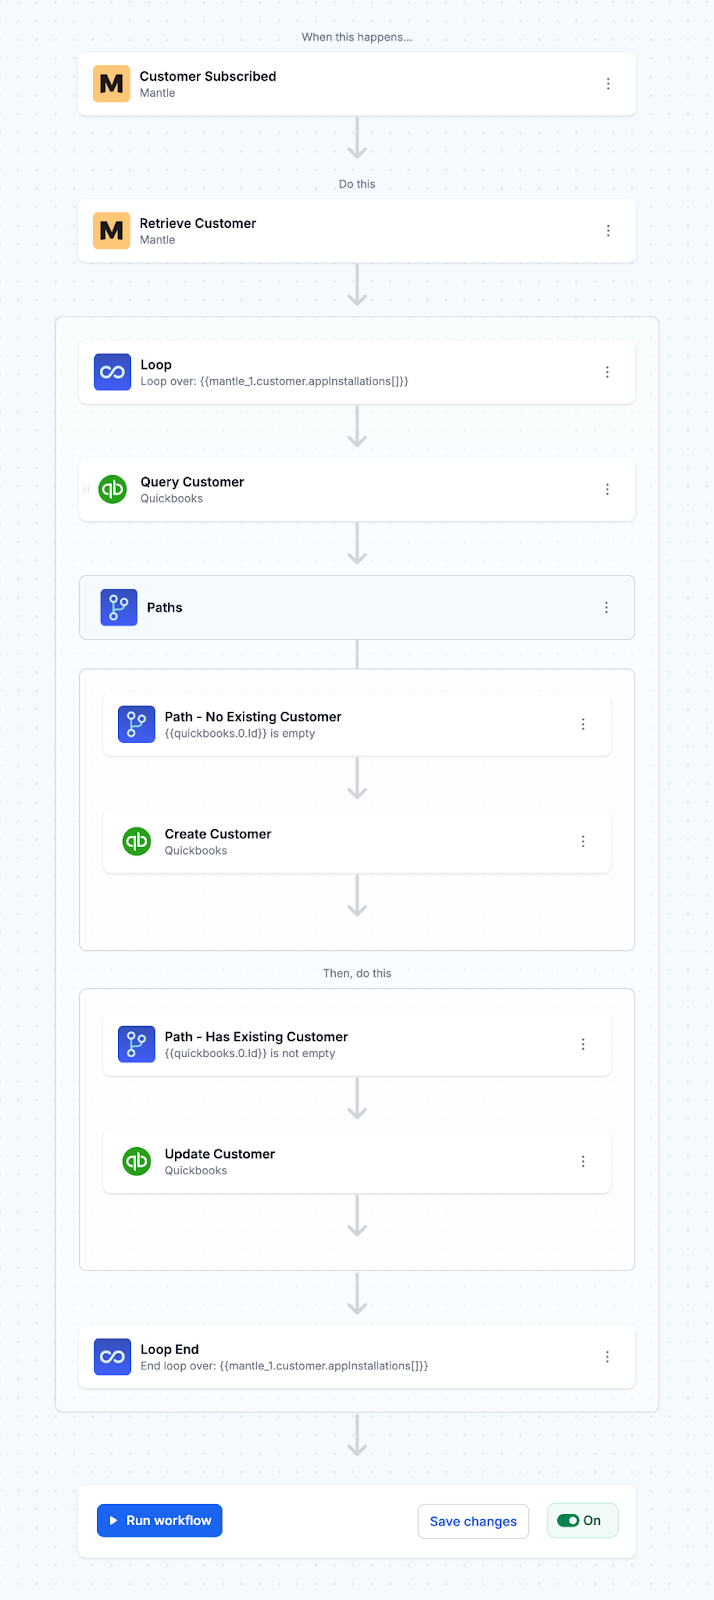
This workflow automatically creates or updates customer records in QuickBooks whenever a user subscribes to a plan in your Shopify app, ensuring accurate and synchronized customer data across both platforms. The exact steps to set up this workflow are as follows:
- Listen for customer subscription events
Configure the Mantle app trigger to monitor for new customer subscription events. This initiates the workflow when a customer subscribes to a plan.

- Retrieve customer details
Fetch comprehensive customer information from your Shopify app using the customer ID from the subscription event. This ensures we have all the necessary customer data for QuickBooks.

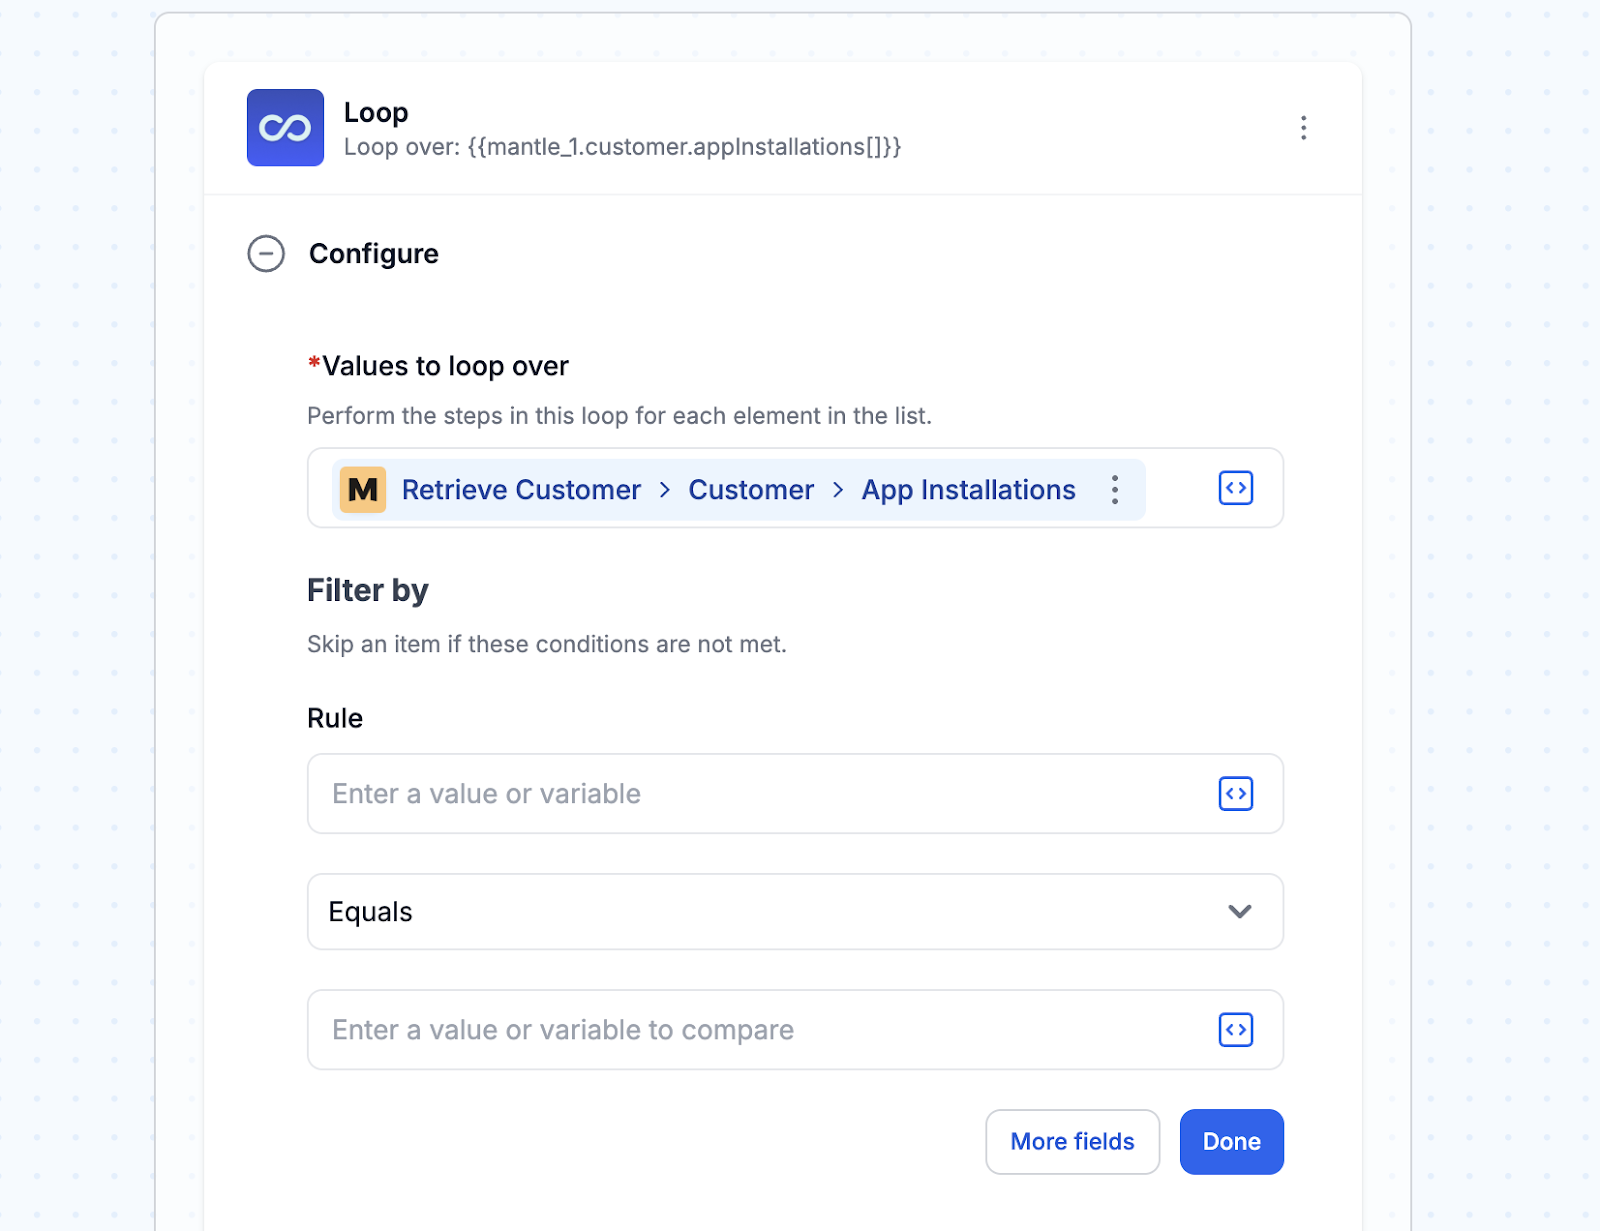
- Capture the app installation date
Use a loop to process each app installation and extract the installation date. This allows you to add a “date installed” note when creating or updating the customer record in QuickBooks, giving your team helpful context for billing or support.
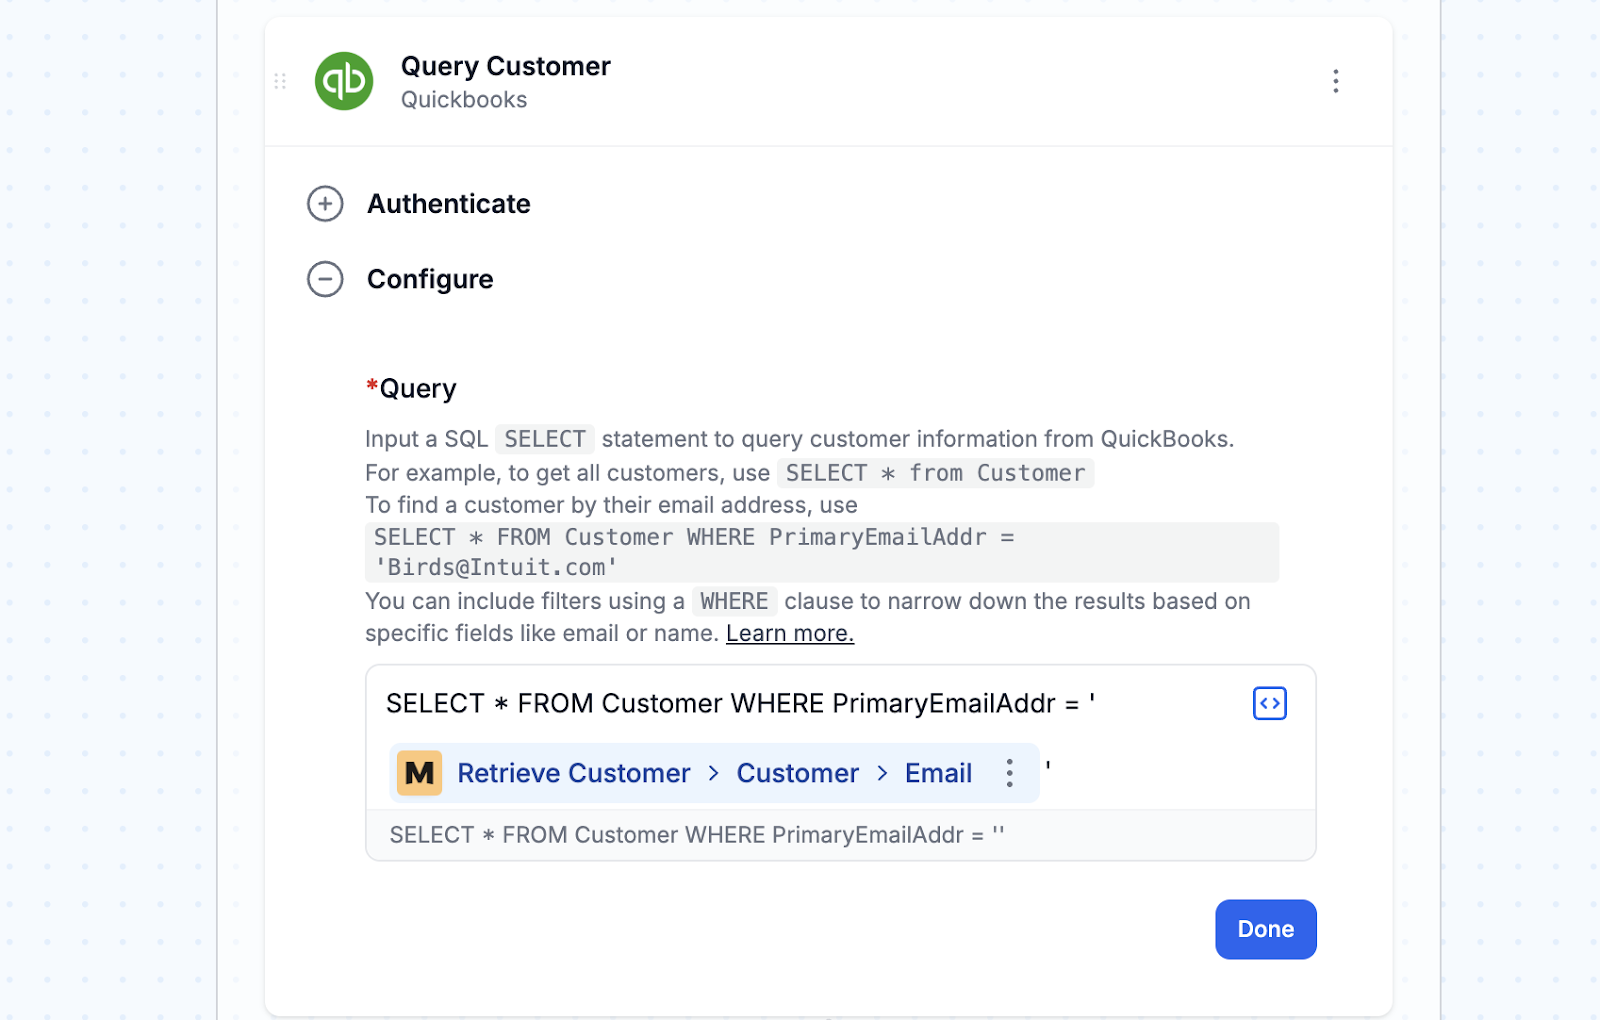
- Check if an existing customer exists in QuickBooks
Search QuickBooks for an existing customer record using the customer's email address. This prevents duplicate entries and determines whether to create or update a record.
- Path 1 - Create new customer record
If no existing customer is found, create a new QuickBooks customer record with:
- Customer name
- Billing address details
- Contact information (phone and email)
- Additional notes, including Shopify domain and installation date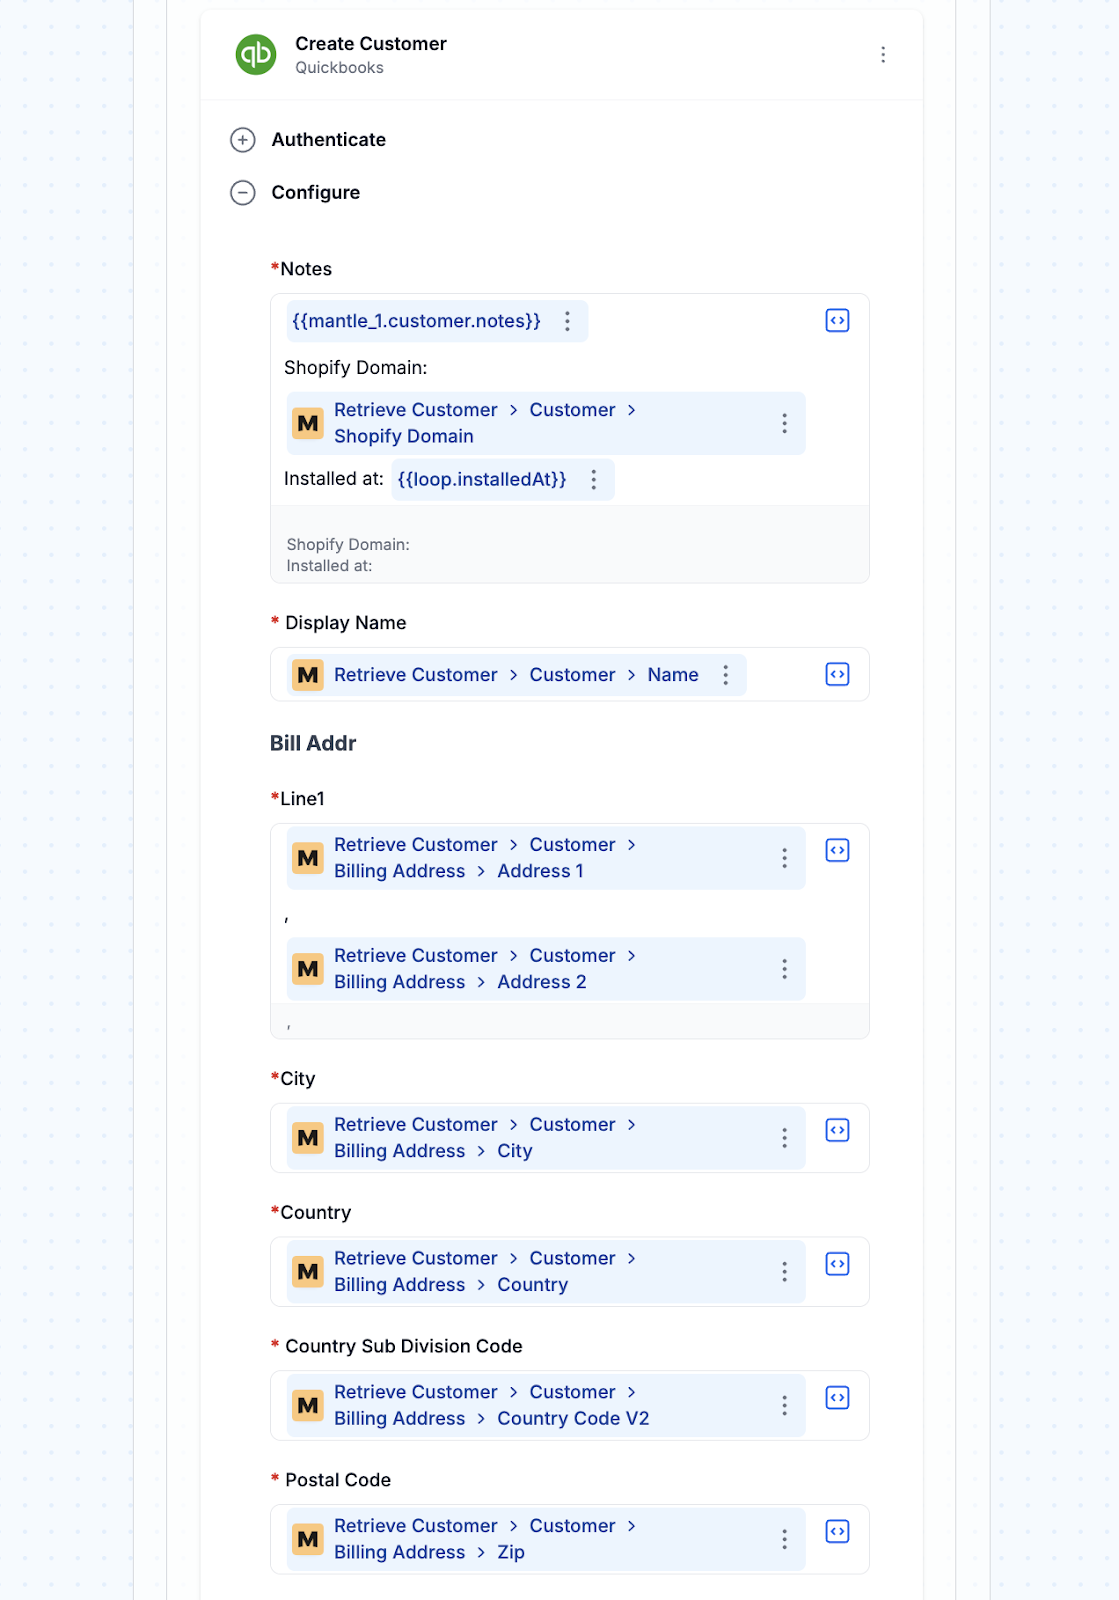
- Path 2 - Update existing customer record
Otherwise, if a matching customer is found, update their QuickBooks record with the latest information:
- Updated billing address
- Current contact details
- Refreshed notes with Shopify domain and installation timestamp
- Maintain the existing QuickBooks customer ID and sync token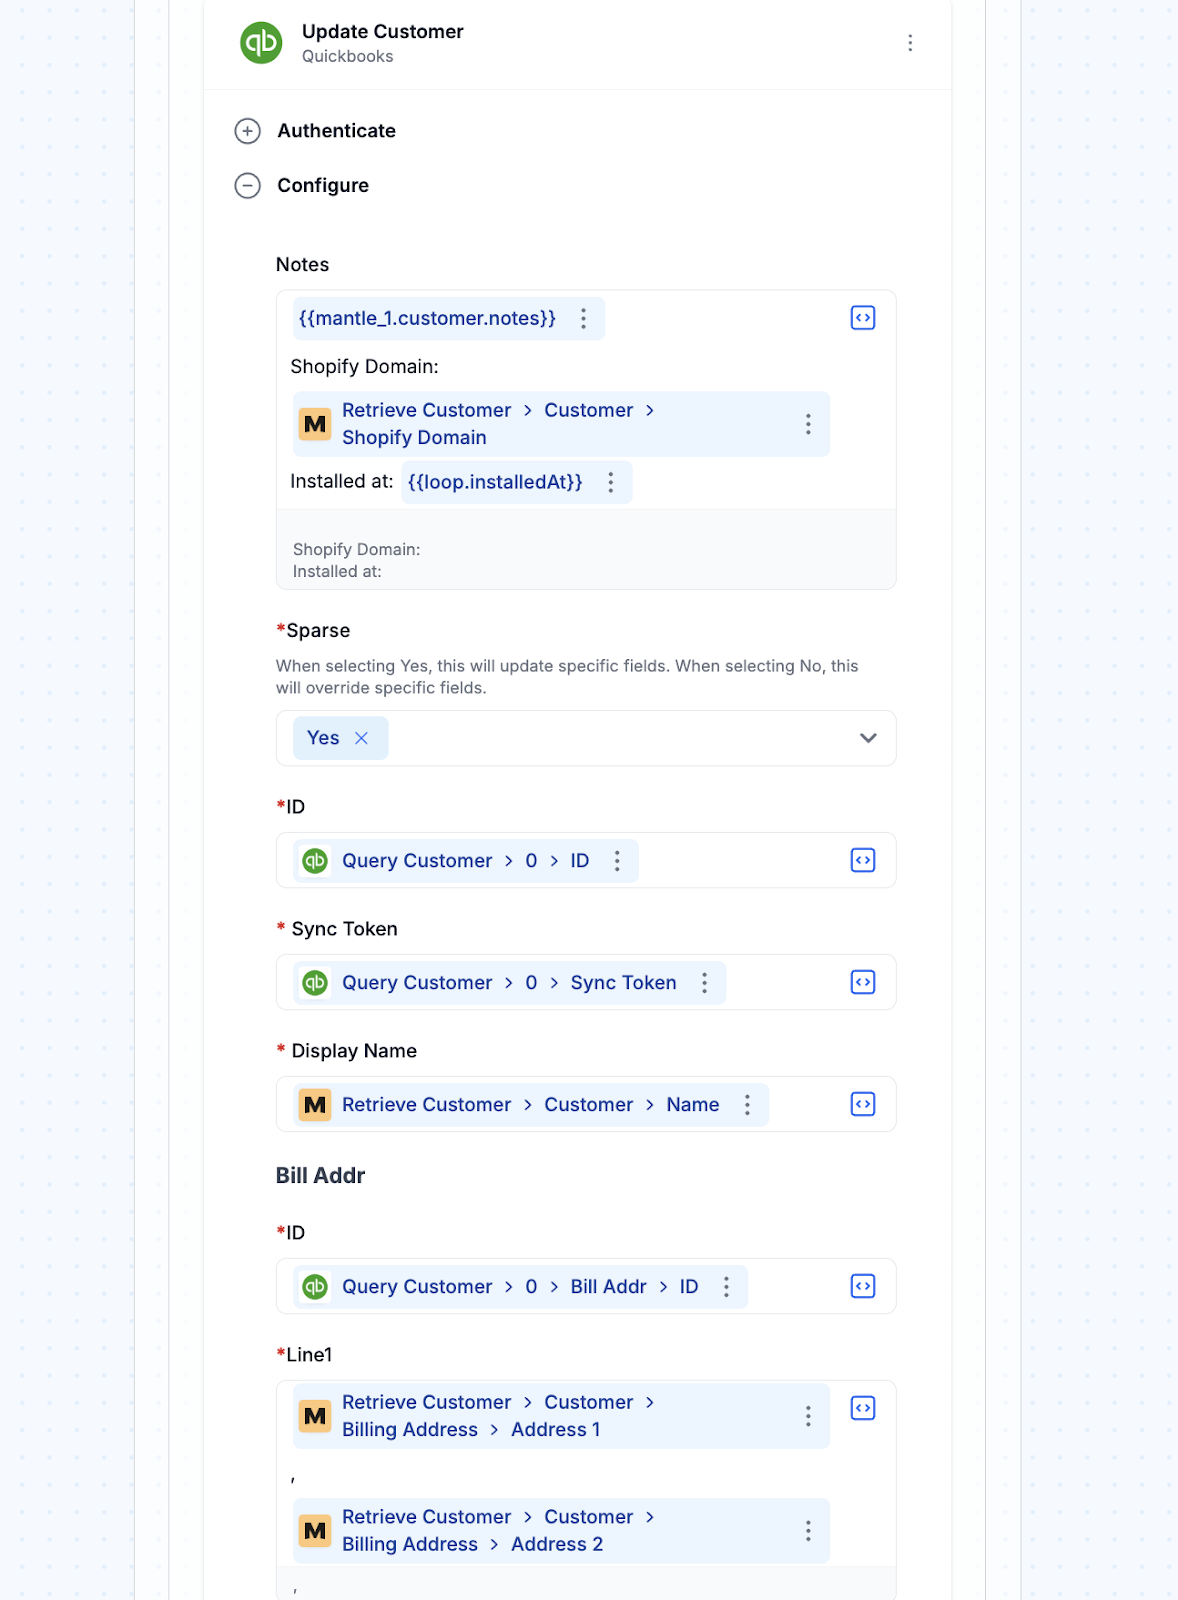
- Turn workflow “On”
Enable the workflow and run it once to ensure proper functionality before allowing it to run automatically for all new subscriptions.
Save yourself the setup. Use this template instead:
Reasons to sync QuickBooks customers from Shopify app signups
- Boost customer insights: You see the bigger picture when you link Shopify app usage with QuickBooks financials. This helps determine which customers bring the most value and which campaigns work.
- Better planning: Syncing revenue from your Shopify app straight into QuickBooks gives you more accurate numbers for forecasts and budgets. There is no more guessing or manual calculations.
- Easier tax season: Every dollar from your Shopify app gets tracked in QuickBooks, so tax prep doesn’t become a scramble. You’ll thank yourself when you see how much time and stress this saves.
- Sales and accounting on the same page: A unified customer database means your teams can share info easily, avoid confusion, and deliver a better customer experience. To connect QuickBooks with your Shopify Partner account, check out QuickBooks to Shopify partner automations.
If you’re looking for more ideas on how to connect these two platforms, check out some ready-made Shopify to QuickBooks automations or explore this Shopify QuickBooks integration guide for step-by-step help.
Frequently asked questions
How often are customer records updated in QuickBooks?
Customer records are updated in real-time whenever a new subscription event occurs in your Shopify app.
Can I customize the customer fields that are synced to QuickBooks?
Yes, you can modify the workflow to include or exclude specific customer fields based on your QuickBooks setup.
What happens if a customer cancels their Shopify app subscription?
You can set up a separate workflow to update the customer's status in QuickBooks when a cancellation event occurs in your Shopify app.
Is there a limit to the number of customers I can sync from Shopify to QuickBooks?
No, there’s no limit to how many customers you can sync. However, QuickBooks may limit customer records based on your subscription plan.